📨 User Mailing
The User Mailing module enables you to create, manage, and send targeted email campaigns to your platform members. With an intuitive campaign builder, flexible recipient management, and powerful scheduling options, you can keep your community informed and engaged with personalized communications.
Key features include:
- Campaign Management: Create and manage multiple email campaigns with customizable templates
- Recipient Lists: Build and organize targeted recipient groups using advanced filters
- Visual Email Editor: Design professional emails with drag-and-drop templates and customization options
- Scheduling: Send emails immediately or schedule them for optimal delivery times
- Subscription Management: Allow users to control their email preferences

💼 Usage (Admin)
Create a Campaign
Navigate to Admin → Tools → User Mailing and click the "Campaigns" tab.
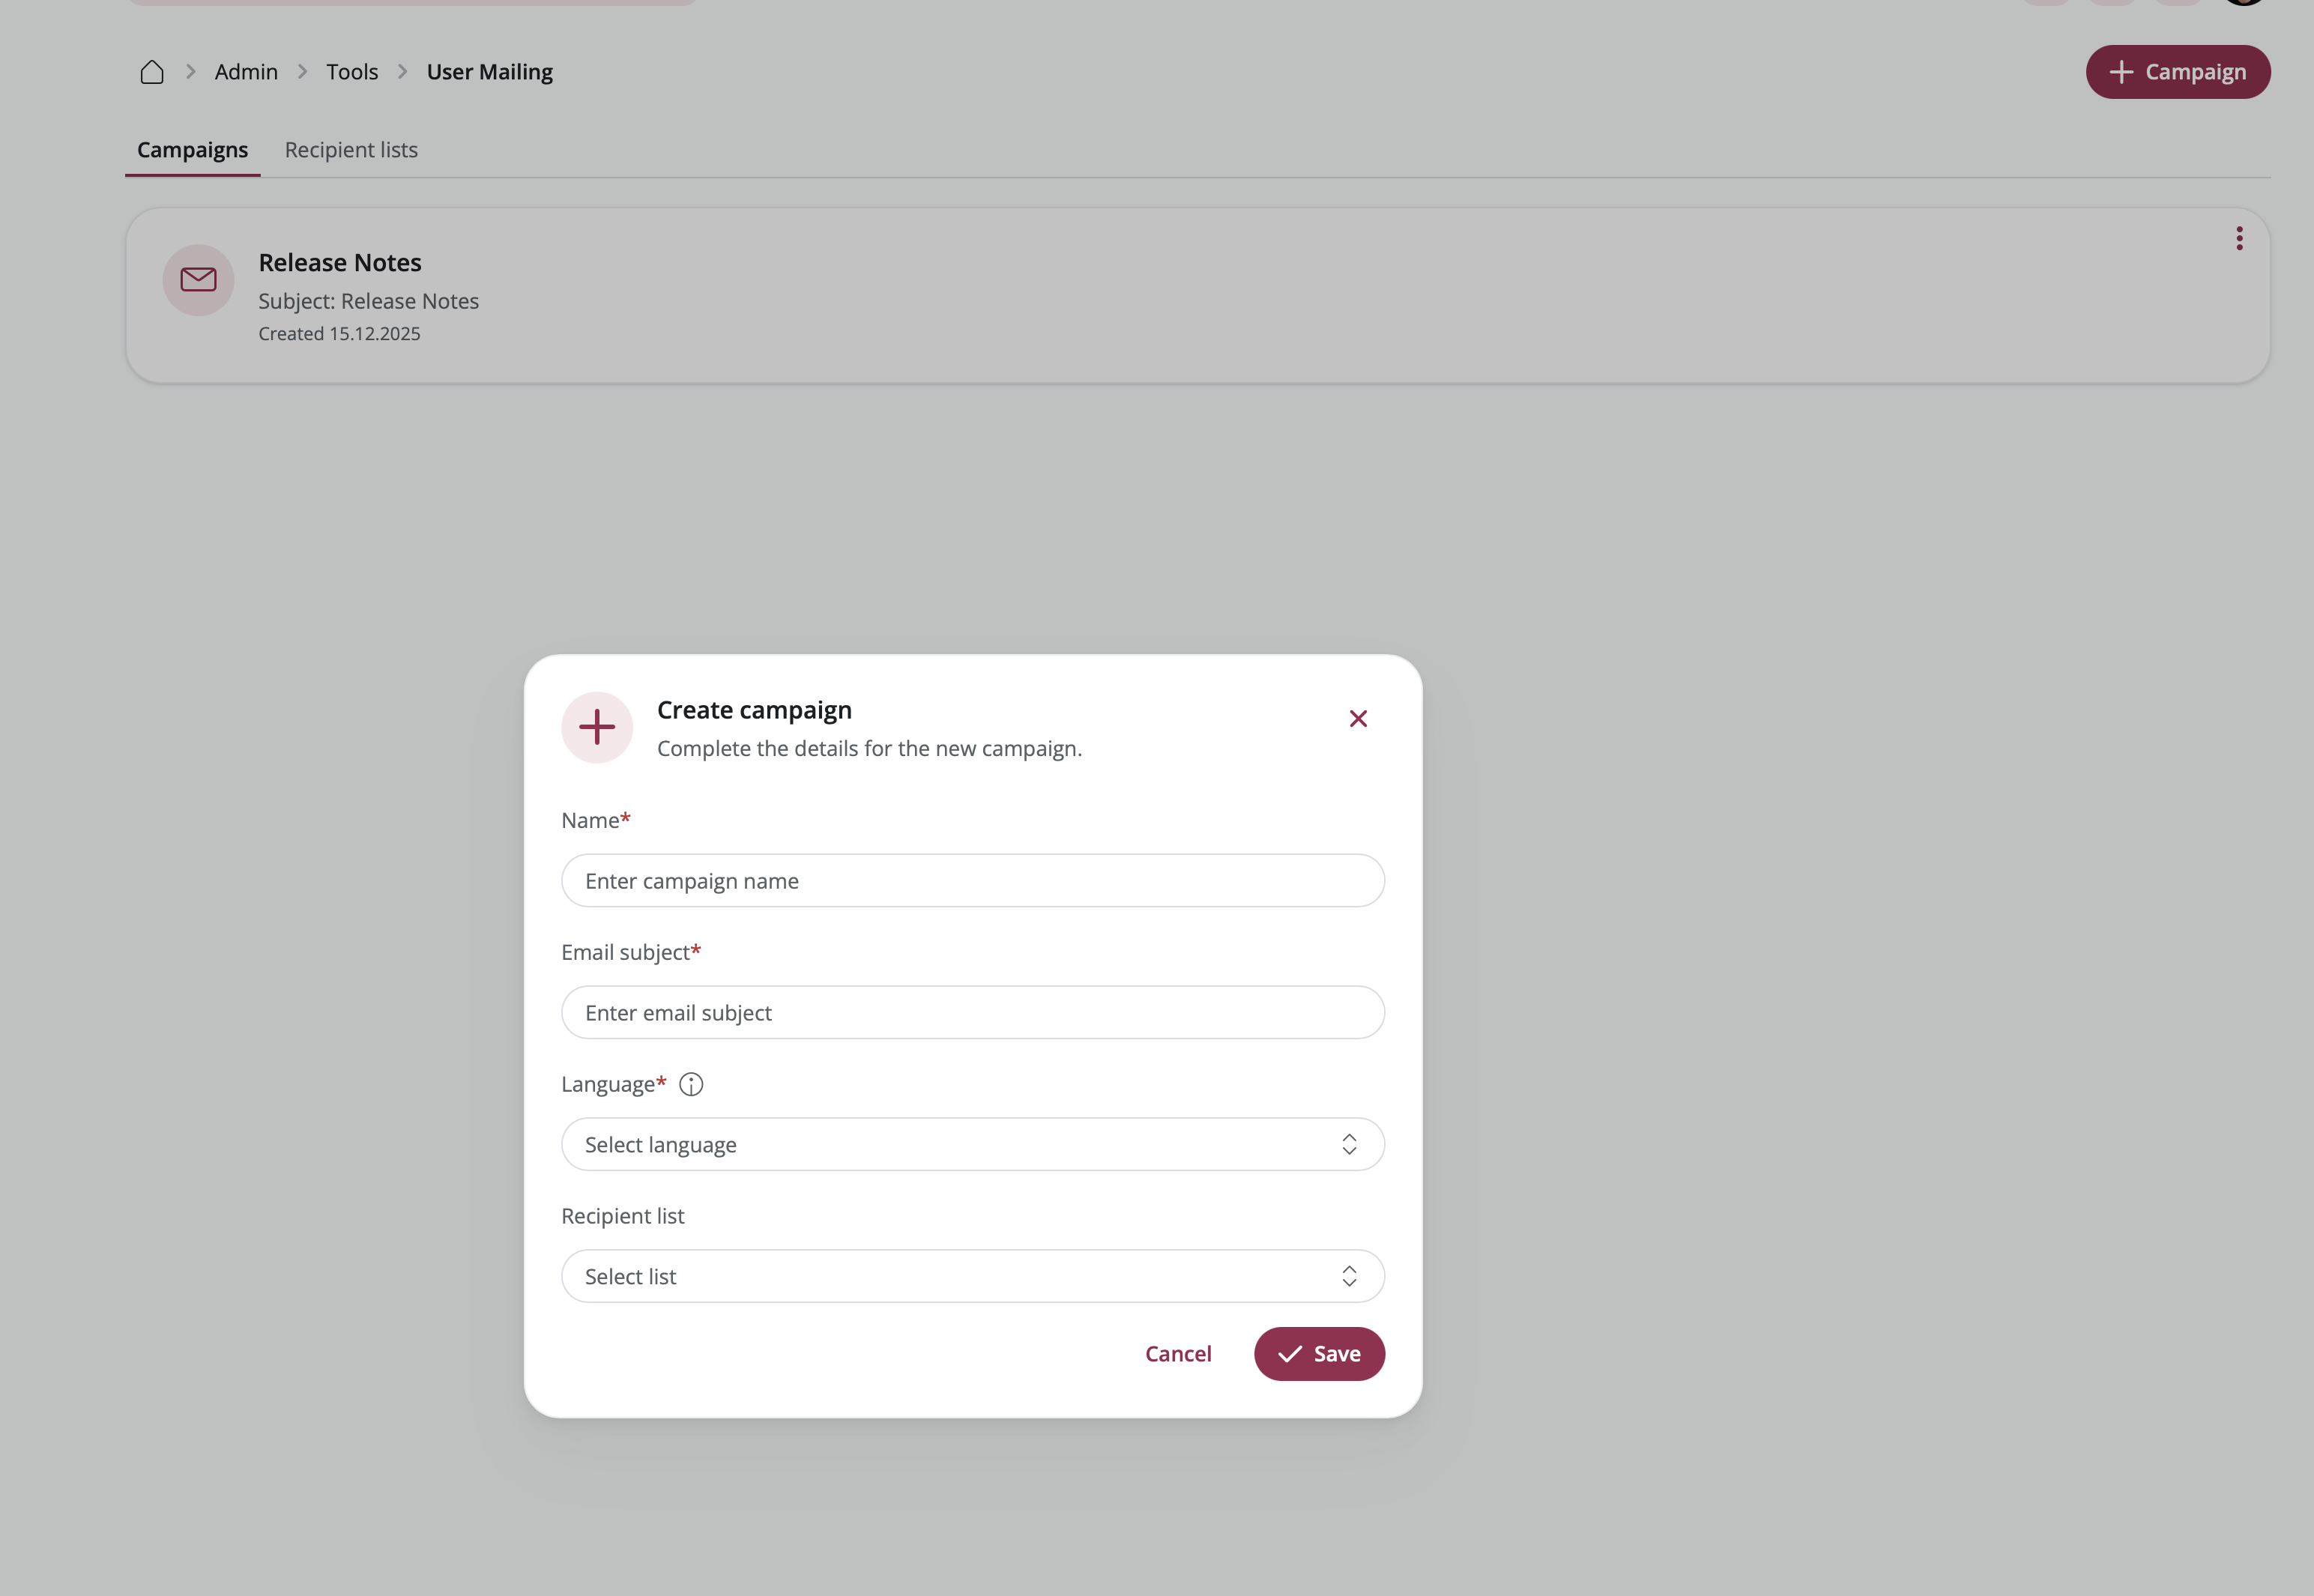
- Click "+Campaign" to create a new email campaign.
- Enter a Campaign Name to identify your campaign internally.
- Add an Email Subject that recipients will see in their inbox.
- Select the Language for your campaign content.
- Optionally, select a Recipient List to target specific users (you can also add this later).
- Click "Save" to create your campaign.
Build Your Email Content
After creating a campaign, you'll enter the email editor where you can design your message:
Add Templates
- On the left sidebar, browse available Templates organized by category.
- Click on a template to add it to your email.
- Templates include options for:
- Basic sections: Headers, text blocks, images, and buttons
- Data cards: Dynamic content from your platform (Events, Organizations, Custom Modules)
Customize Content
- Click on any element in the preview to edit it.
- Use the right sidebar to modify:
- Text content: Edit titles, paragraphs, and button labels
- Images: Upload and position images
- Buttons: Add links and customize button text
- Styling: Adjust colors, fonts, alignment, and spacing
Manage Layout
- Use the Layout tab on the left to view your email structure.
- Drag and drop sections to reorder them.
- Toggle element visibility using the eye icon.
- Delete sections you don't need.
Header and Footer
Toggle the Header and Footer options in the General settings to include or exclude them from your email. The footer automatically includes your platform's contact information and unsubscribe options.
Create and Manage Recipient Lists
Recipient Lists allow you to organize and target specific groups of users for your campaigns.
Create a Recipient List
- Navigate to Admin → Tools → User Mailing and click the "Recipient Lists" tab.
- Click "+Recipient List".
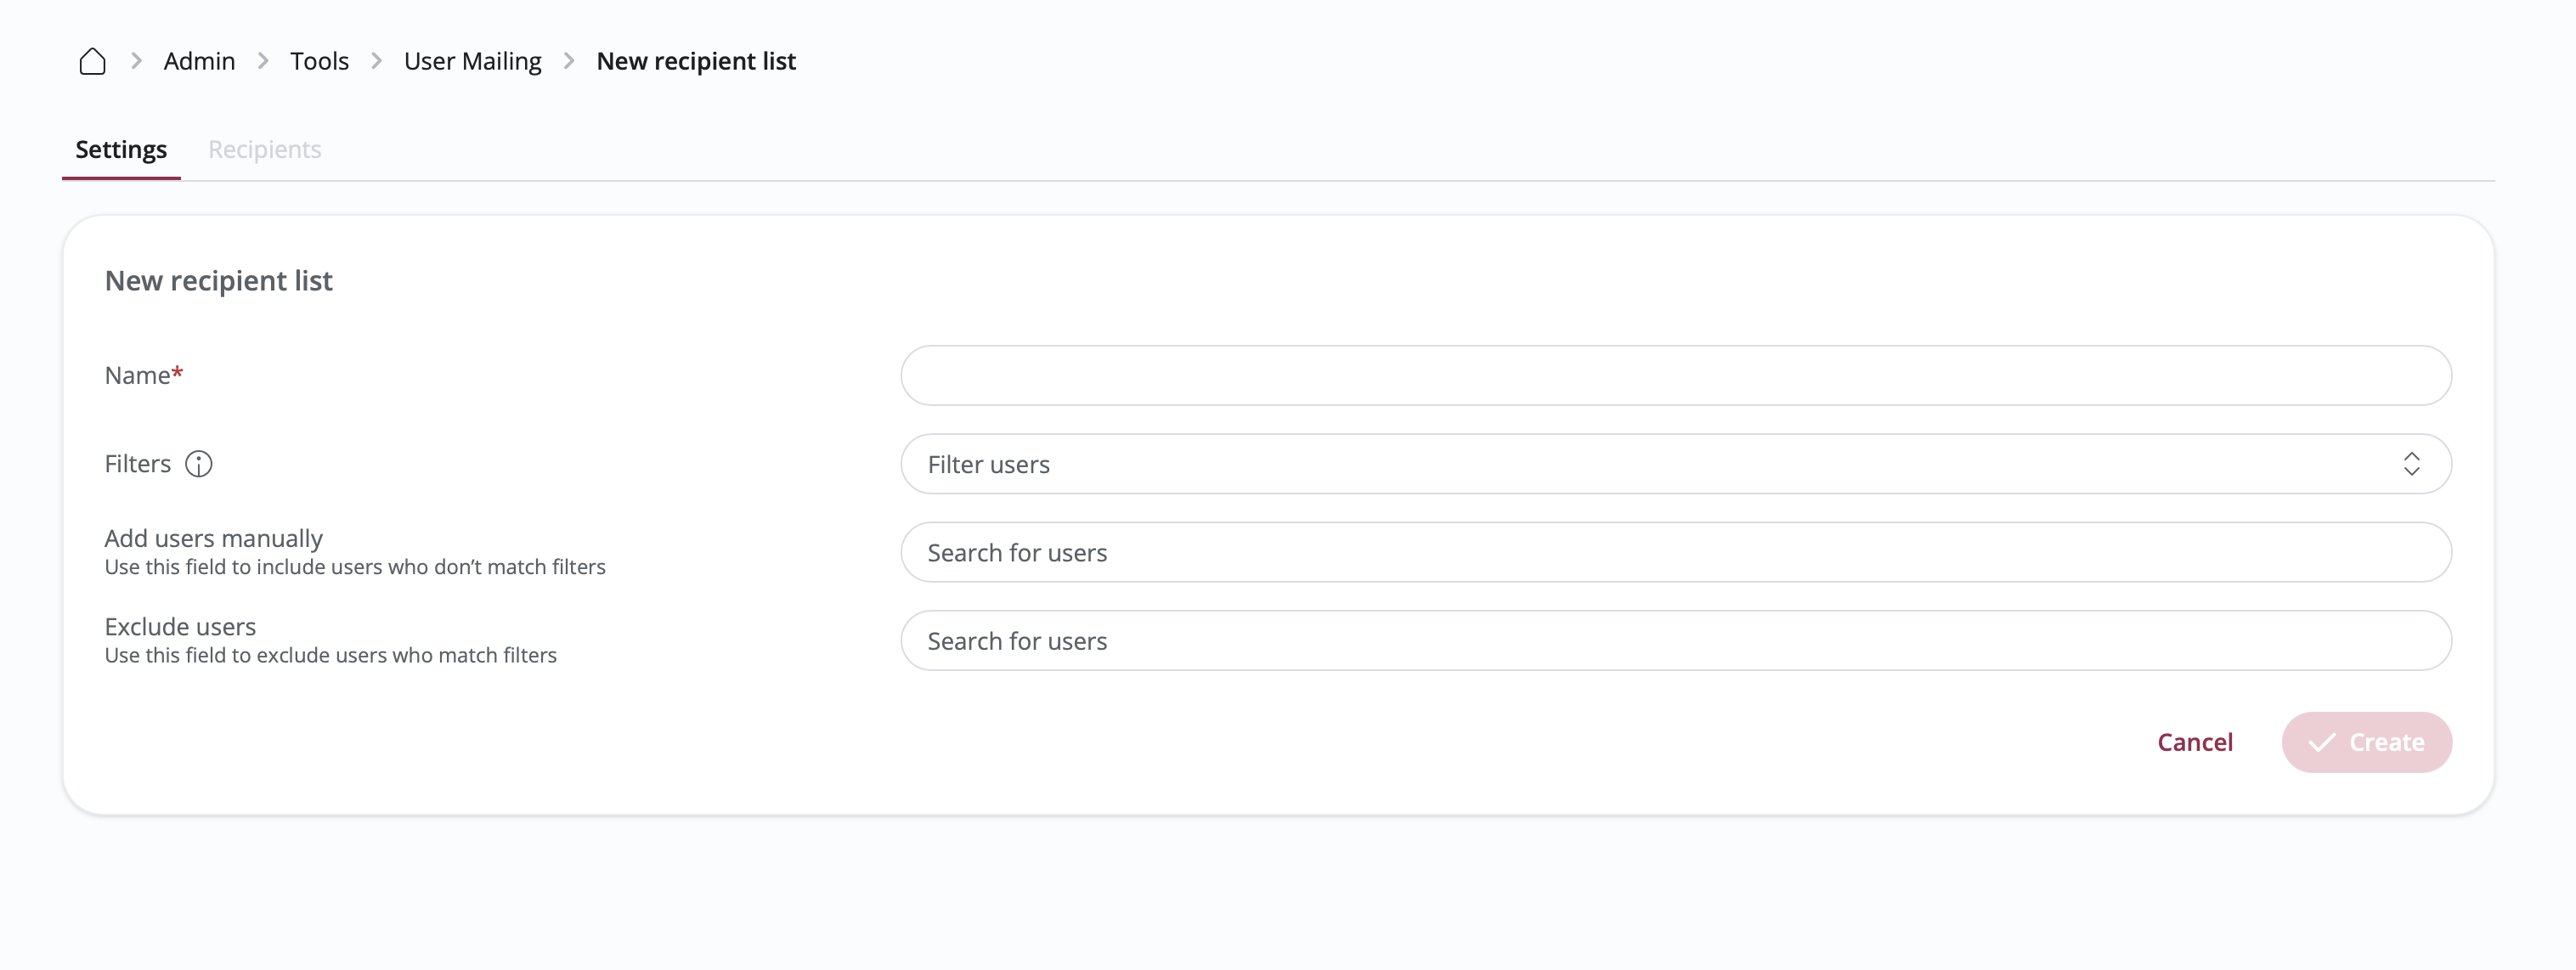
- Enter a Name for your list.
- Click "Save" to create the list.
Add Recipients Using Filters
Use advanced filters to automatically include users based on specific criteria:
- In the Settings tab of your recipient list, click "Filters".
- Select filter criteria such as:
- User Type: Target specific user roles (students, mentors, etc.)
- Organization Type: Filter by company type (startups, corporates, etc.)
- Location: Filter by country, city, or state
- Groups: Include members of specific groups
- Programs: Target program participants
- Events: Include event attendees
- Custom Attributes: Use any custom user attributes you've created
- Combine multiple filters to create precise targeting.
Add Recipients Manually
- In the Settings tab, use the "Add Users Manually" field.
- Search for users by name and select them.
- Added users will be included in the recipient list regardless of filter settings.
Exclude Specific Users
- In the Settings tab, use the "Exclude Users" field.
- Search for users you want to exclude from this list.
- Excluded users will not receive emails even if they match your filter criteria.
View Recipients
- Navigate to the Recipients tab to see all users in your list.
- View detailed information including user type, organization, and how they were added.
- Export the recipient list as CSV for external use.
- Remove individual users by clicking the delete icon.
Schedule Email Campaigns
You can send emails immediately or schedule them for future delivery:
Immediate Sending
- Open your campaign in the editor.
- Click "Send Options" in the top right.
- Select "Send to Recipients" to send immediately.
- Confirm to send the email to all recipients in your selected list.
Scheduled Sending
- In the General settings on the right sidebar, toggle "Scheduled Sending".
- Configure your schedule:
- Frequency: Choose from one-time, daily, weekly, monthly, quarterly, or yearly
- Send Time: Set the time of day for sending
- Time Zone: Select the appropriate timezone
- Start Date: Choose when the schedule begins
- End Date: For recurring campaigns, set when to stop (optional)
- Only Weekdays: Toggle to skip weekend sending
- Click "Save" to activate the schedule.
Pause a Scheduled Campaign
- Open your scheduled campaign.
- Click "Pause Campaign" in the top right.
- The campaign will stop sending until you resume it.
Preview and Test Emails
Before sending to your entire list, always test your email:
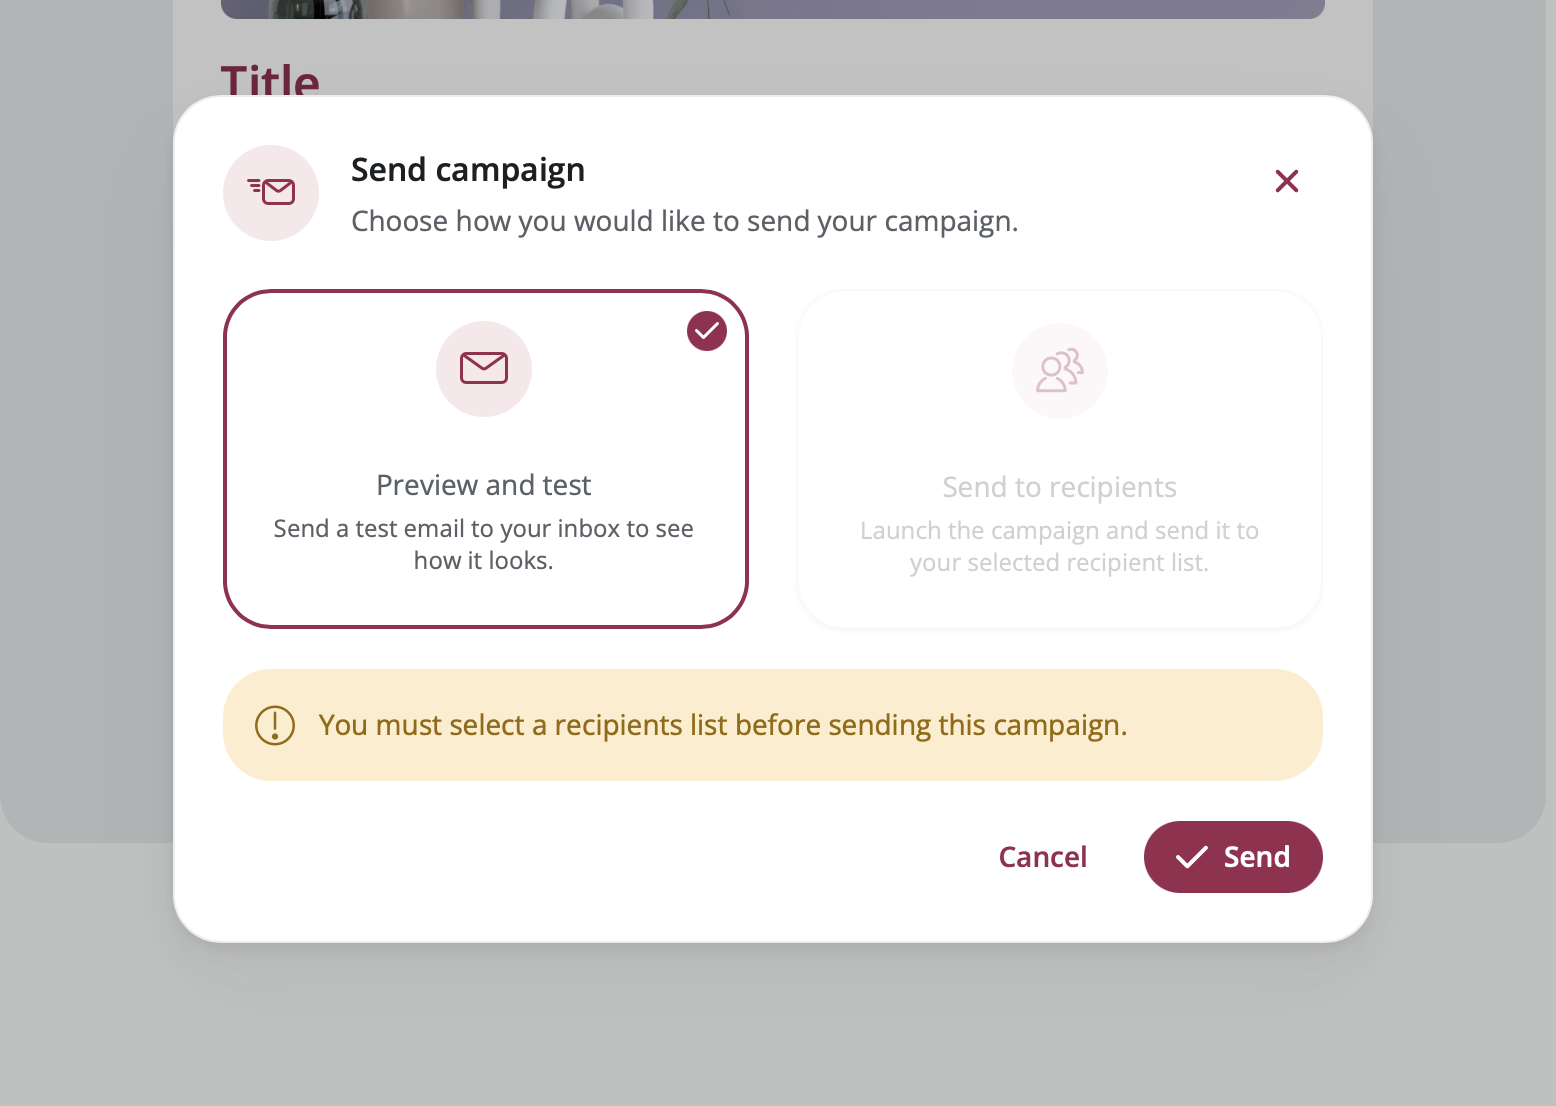
- Click "Send Options" in the top right.
- Select "Preview and Test".
- A test email will be sent to your registered email address.
- Review the email in your inbox to check formatting, links, and content.
Duplicate a Campaign
To reuse a campaign structure:
- Navigate to Admin → Tools → User Mailing → Campaigns.
- Click the menu icon (three dots) on the campaign you want to duplicate.
- Select "Duplicate".
- Enter a new name for the duplicated campaign.
- The campaign will be created with all content and settings copied.
Delete a Campaign
- Navigate to Admin → Tools → User Mailing → Campaigns.
- Click the menu icon (three dots) on the campaign you want to delete.
- Select "Delete".
- Confirm the deletion.
⚠️ Once a campaign is deleted, it cannot be recovered. Ensure you've exported any necessary data before deletion.
👋 Usage (User)
Manage Email Subscriptions
Users can control which campaign emails they receive:
- Navigate to your Profile Settings.
- Click "Notifications" in the left sidebar.
- Scroll to the "Campaigns" section.
- Toggle individual campaigns on or off based on your preferences.
- Each campaign shows:
- Campaign name
- Email subject
- Last received date
Changes take effect immediately, and you'll only receive emails from campaigns you've subscribed to.
🥇 Best Practices
Campaign Strategy
- Clear Subject Lines: Write concise, compelling subject lines that encourage opens
- Consistent Branding: Use your platform's colors and logo for brand recognition
- Mobile-Friendly: Preview your emails on mobile devices before sending
- Call-to-Action: Include clear buttons that guide recipients to take action
- Timing: Schedule emails for optimal engagement (typically mid-morning on weekdays)
Recipient List Management
- Segment Your Audience: Create multiple lists for different user groups
- Keep Lists Updated: Regularly review and update your filter criteria
- Respect Preferences: Honor user subscription choices and unsubscribe requests
- Test Filters: Preview recipient counts before sending to ensure proper targeting
Content Creation
- Start with Templates: Use pre-built templates as a foundation
- Keep It Concise: Focus on one main message per email
- Use Images Wisely: Include relevant images but don't overload the email
- Test Links: Verify all buttons and links work correctly before sending
- Personalization: Use dynamic content to make emails more relevant
Scheduling
- Test First: Always send a test email before scheduling
- Consider Time Zones: Choose appropriate times for your global audience
- Avoid Weekends: Unless your content is specifically weekend-focused
- Monitor Performance: Review engagement metrics to optimize send times
❓ FAQs
General
-
How many recipient lists can I create? There is no limit to the number of recipient lists you can create.
-
What happens if a user unsubscribes? Users who unsubscribe will not receive future emails from that campaign, even if they match your recipient list criteria.
Campaigns
-
Can I send to users without a recipient list? No, you must select a recipient list before sending a campaign. This ensures targeted, relevant communications.
-
How do I know if my scheduled campaign sent successfully? Check the campaign details to see the "Last Sent" date and time. You can also view the campaign history.
-
Can I cancel a scheduled campaign? Yes, use the "Pause Campaign" button to stop scheduled sends. You can resume it later.
-
What's the difference between pausing and deleting a campaign? Pausing temporarily stops scheduled sends but preserves the campaign. Deleting permanently removes the campaign and cannot be undone.
Recipient Lists
-
Can I combine multiple recipient lists? No, but you can create a new list with filters that include criteria from multiple lists.
-
How do I know how many recipients are in my list? The recipient count is displayed in the list overview and when selecting a list for a campaign.
-
Can users be in multiple recipient lists? Yes, users can appear in multiple lists based on different filter criteria.
-
What happens if I delete a recipient list that's used in a campaign? You cannot delete a recipient list that's currently assigned to an active campaign. Remove it from all campaigns first.
Email Editor
-
Can I use HTML in my emails? No, User Mailing does not support HTML. All formatting is done through the built-in rich text editor, which provides options for styling text, adding links, images, and other content elements.
-
What image formats are supported? JPG, PNG, and WebP formats are supported. We recommend images under 1MB for optimal loading.
-
Can I add attachments to emails? Direct attachments are not supported. Instead, upload documents to your platform and link to them in your email.
-
How do I add dynamic content from my platform? Use Data Card templates and select your target module (Events, Organizations, etc.) to automatically pull in platform content.