👤 Users
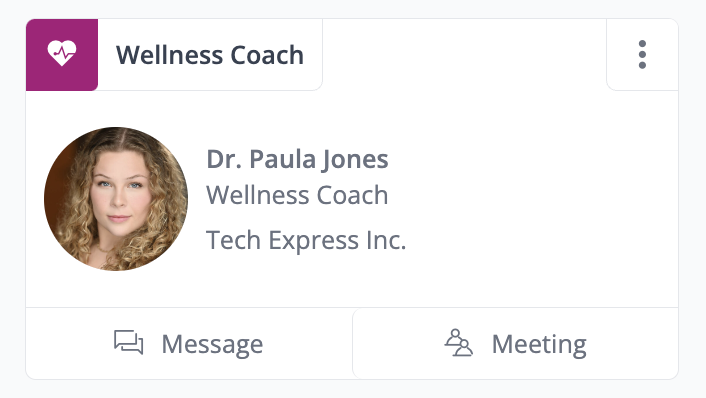
The Users module contains user profiles, showcasing their name, position, assigned organization, and a profile picture. Users have the ability to directly message or request video meetings with other users on each profile.
The module includes:
- Database view with User Types
- Ability to search for users by using filters
- Detailed personal profiles
- Direct messaging and meeting request capabilities
👩🏻💻 Usage
Using the Users Database
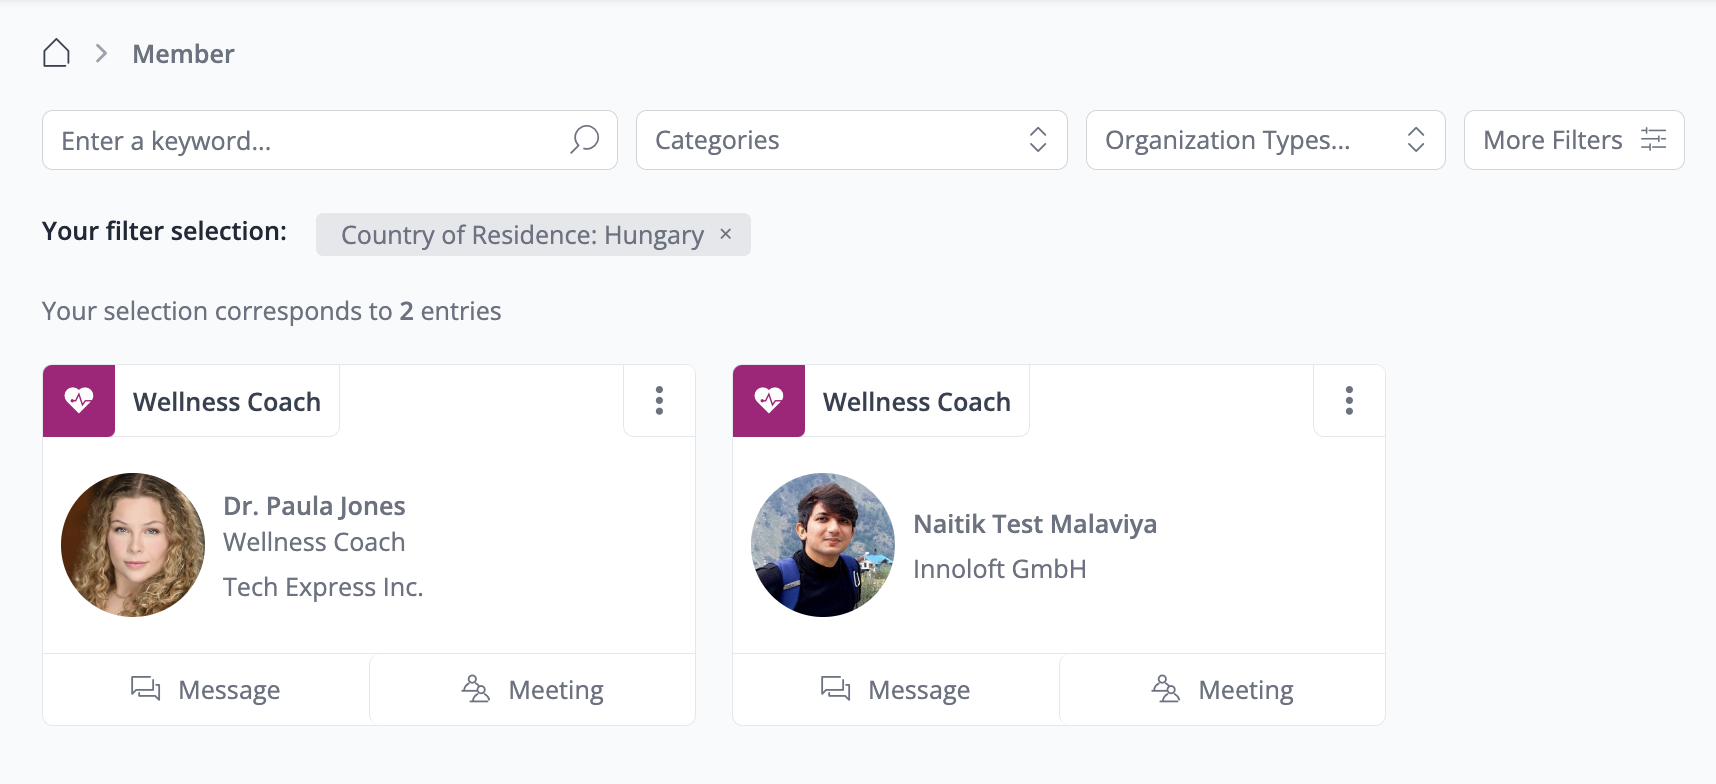
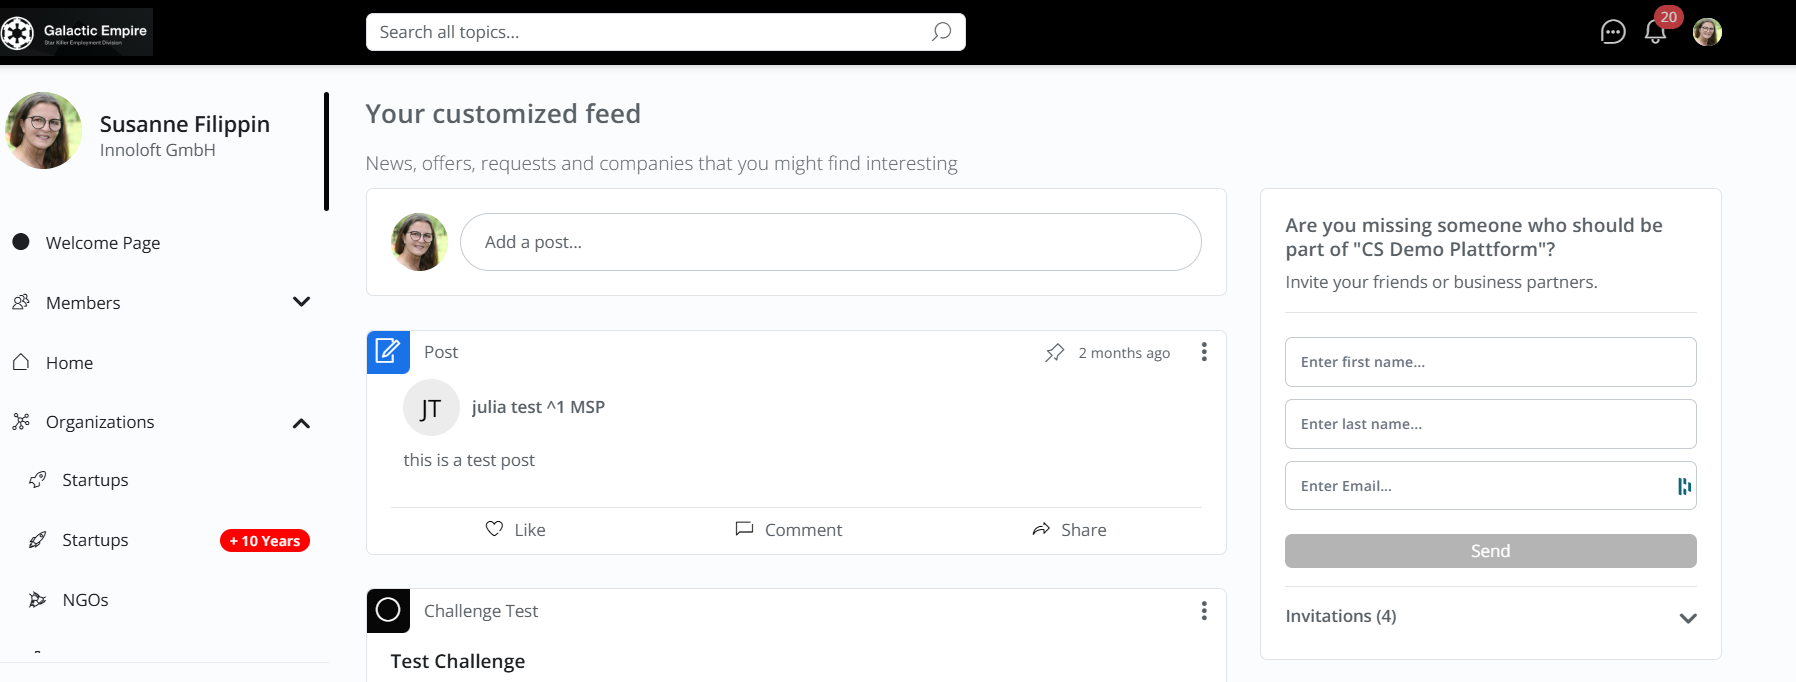
In your profile, navigate to the "Users" section in the left-hand-side panel. Here, you'll find personal profiles of individuals associated with registered organizations. You can filter the Users database by different attributes like name, position, or organization.
Additionally, you can make notes on a profile that will be visible only to you.
Each User profile showcases their chosen User type at the top, reflecting the category selected by the user during profile creation.

Contact another User
In the Users database view, you have the option to message a user or schedule a meeting directly. Click on the desired profile, then choose between sending a message or arranging a meeting.
Find a specific user
To locate a specific user, utilize the filter options or enter the name in the search bar. You can select a category, input a user's name, or specify the organization type they work for. Additionally, if available, you can apply more filters provided by the admin in the database.
Managing your Profile
Discover how to edit your Profile. Ensuring your Profile is complete is essential as it provides important information for other users when contacting you.
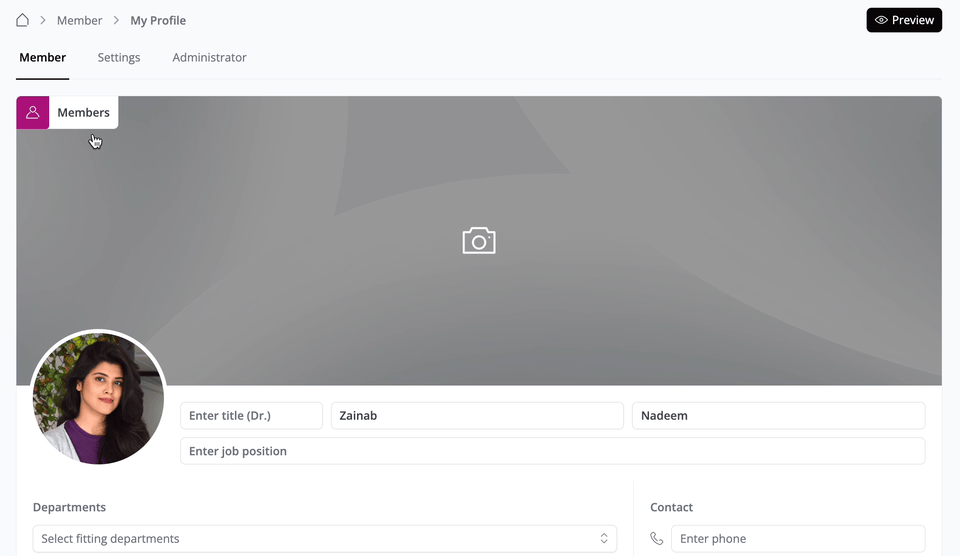
Edit the Personal Profile
There are two ways to access your Profile
- Below your profile picture open the drop-down and click “My Profile”.
- Enter your ”Name” in the top bar.
Choose your User Type
Click the “Users” icon and select the user type that best suits you. Please note that you will only see User types if they have been created by the platform admin.
ℹ️ User Types vs. User Roles: User Types are chosen and changed by users themselves to describe who they are on the platform. User Roles, on the other hand, are an admin tool used to grant permissions and are only accessible to admins. Users cannot choose their own roles — only admins can assign them.
Add a Profile Picture & Other Details
Hover over the placeholder for your profile picture, then click on the “Camera” icon to upload an image. You'll have the option to adjust the size and shape of your image before clicking “Save”. The best ratio for a profile picture is 16:5 (e.g. 1600 x 500 px).
Fill out your Name, Job Position, Department, and other essential details like your contact and social media information.
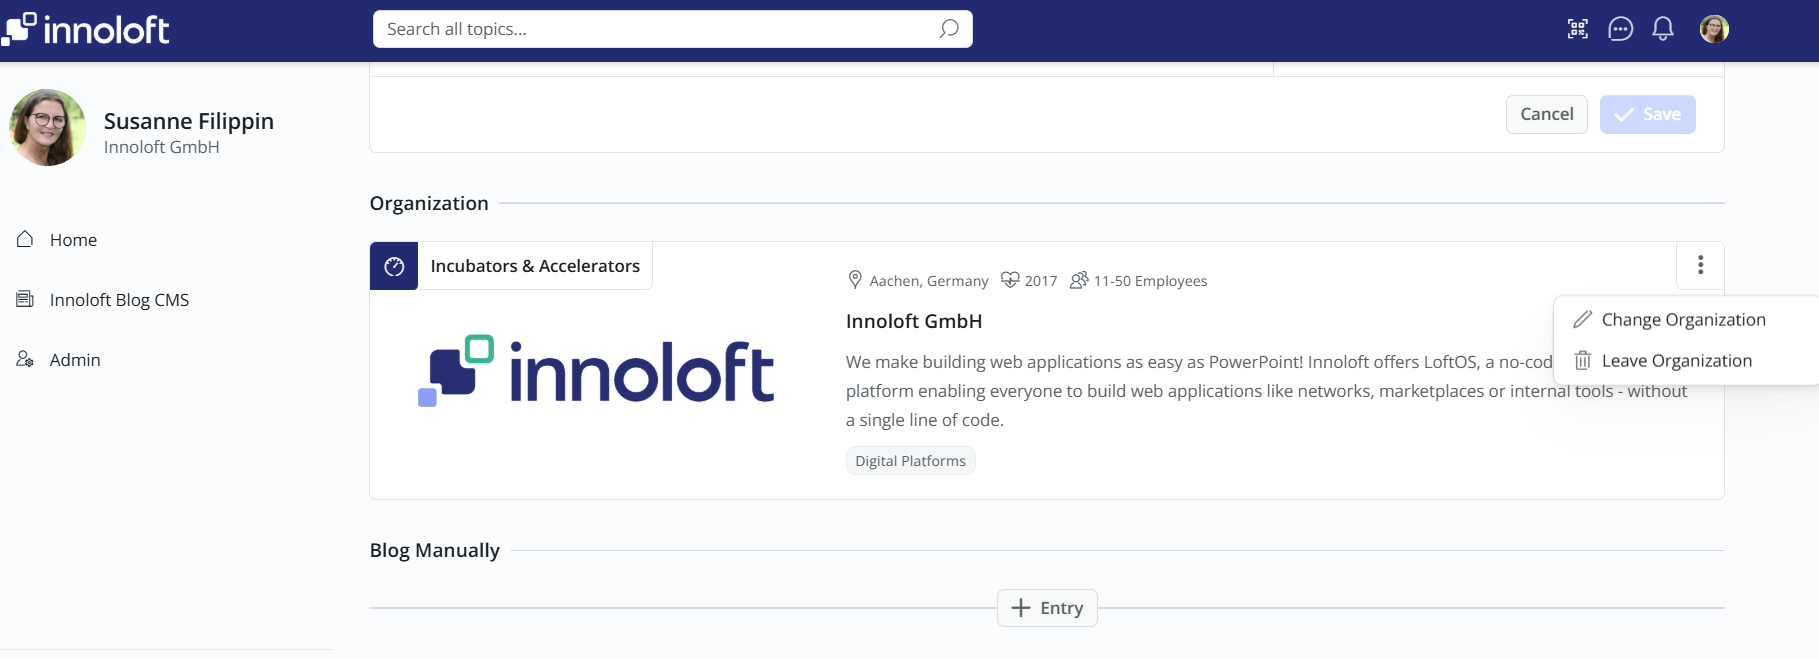
Change Organization
Below your profile picture navigate to “My Organization” → scroll to your associated organization → click on the three-dot control icon and select "Change Organization" to make any necessary adjustments. Please note that this option may depend on whether the organization section is enabled or disabled on the user profile.
Settings
Next to the "User" tab, you'll see the "Settings" tab. Here, you can make changes to your main application, such as updating your password, e-mail address, and managing your notification preferences. Additionally, you have the option to either delete your profile entirely or remove yourself from the platform altogether.
Inviting colleagues
To invite others, utilize the invitation widget located on the right side of the homepage. Input their full name and e-mail address. This method is ideal for inviting individuals who are not yet registered in the Innoloft ecosystem. Alternatively, you can share the platform URL via e-mail or other communication tools for broader outreach.
Profile Sharing via QR Code
Users can generate a QR code to instantly share their profile. A simple scan grants access, no manual links or searches are needed.
Key Features
- QR Code Sharing: Quickly share your profile with a unique QR code.
- Automated Watchlist Updates: Each share can log an entry in your watchlist for easy follow-up.
How to Use
Go to your profile page, click the QR Code icon, and let others scan the code.
🤝 Users Management
Users Database
This feature empowers you to build User databases with multiple types and segments based on various criteria such as location, expertise, and more. Moreover, you can now customize User profiles by specifying the information required when users create their profiles. This customization is facilitated through sections, similar to other modules, providing greater flexibility and control over the user management process.
Customize your Users Database
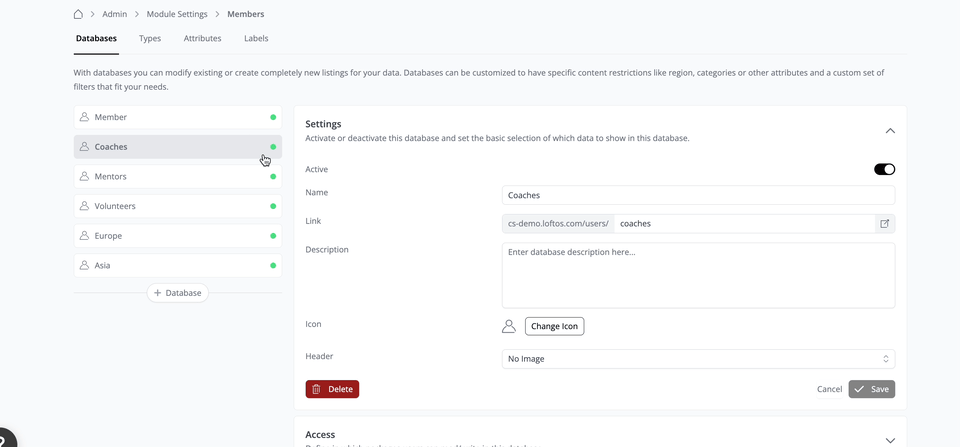
Creating a Database
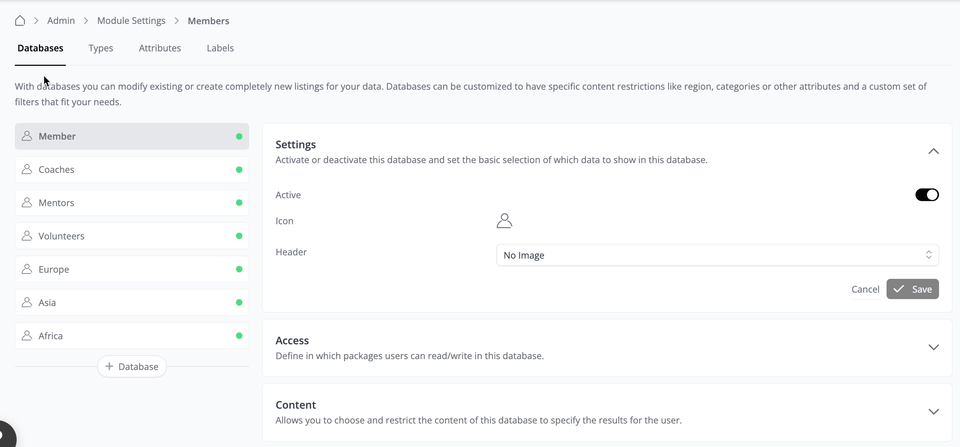
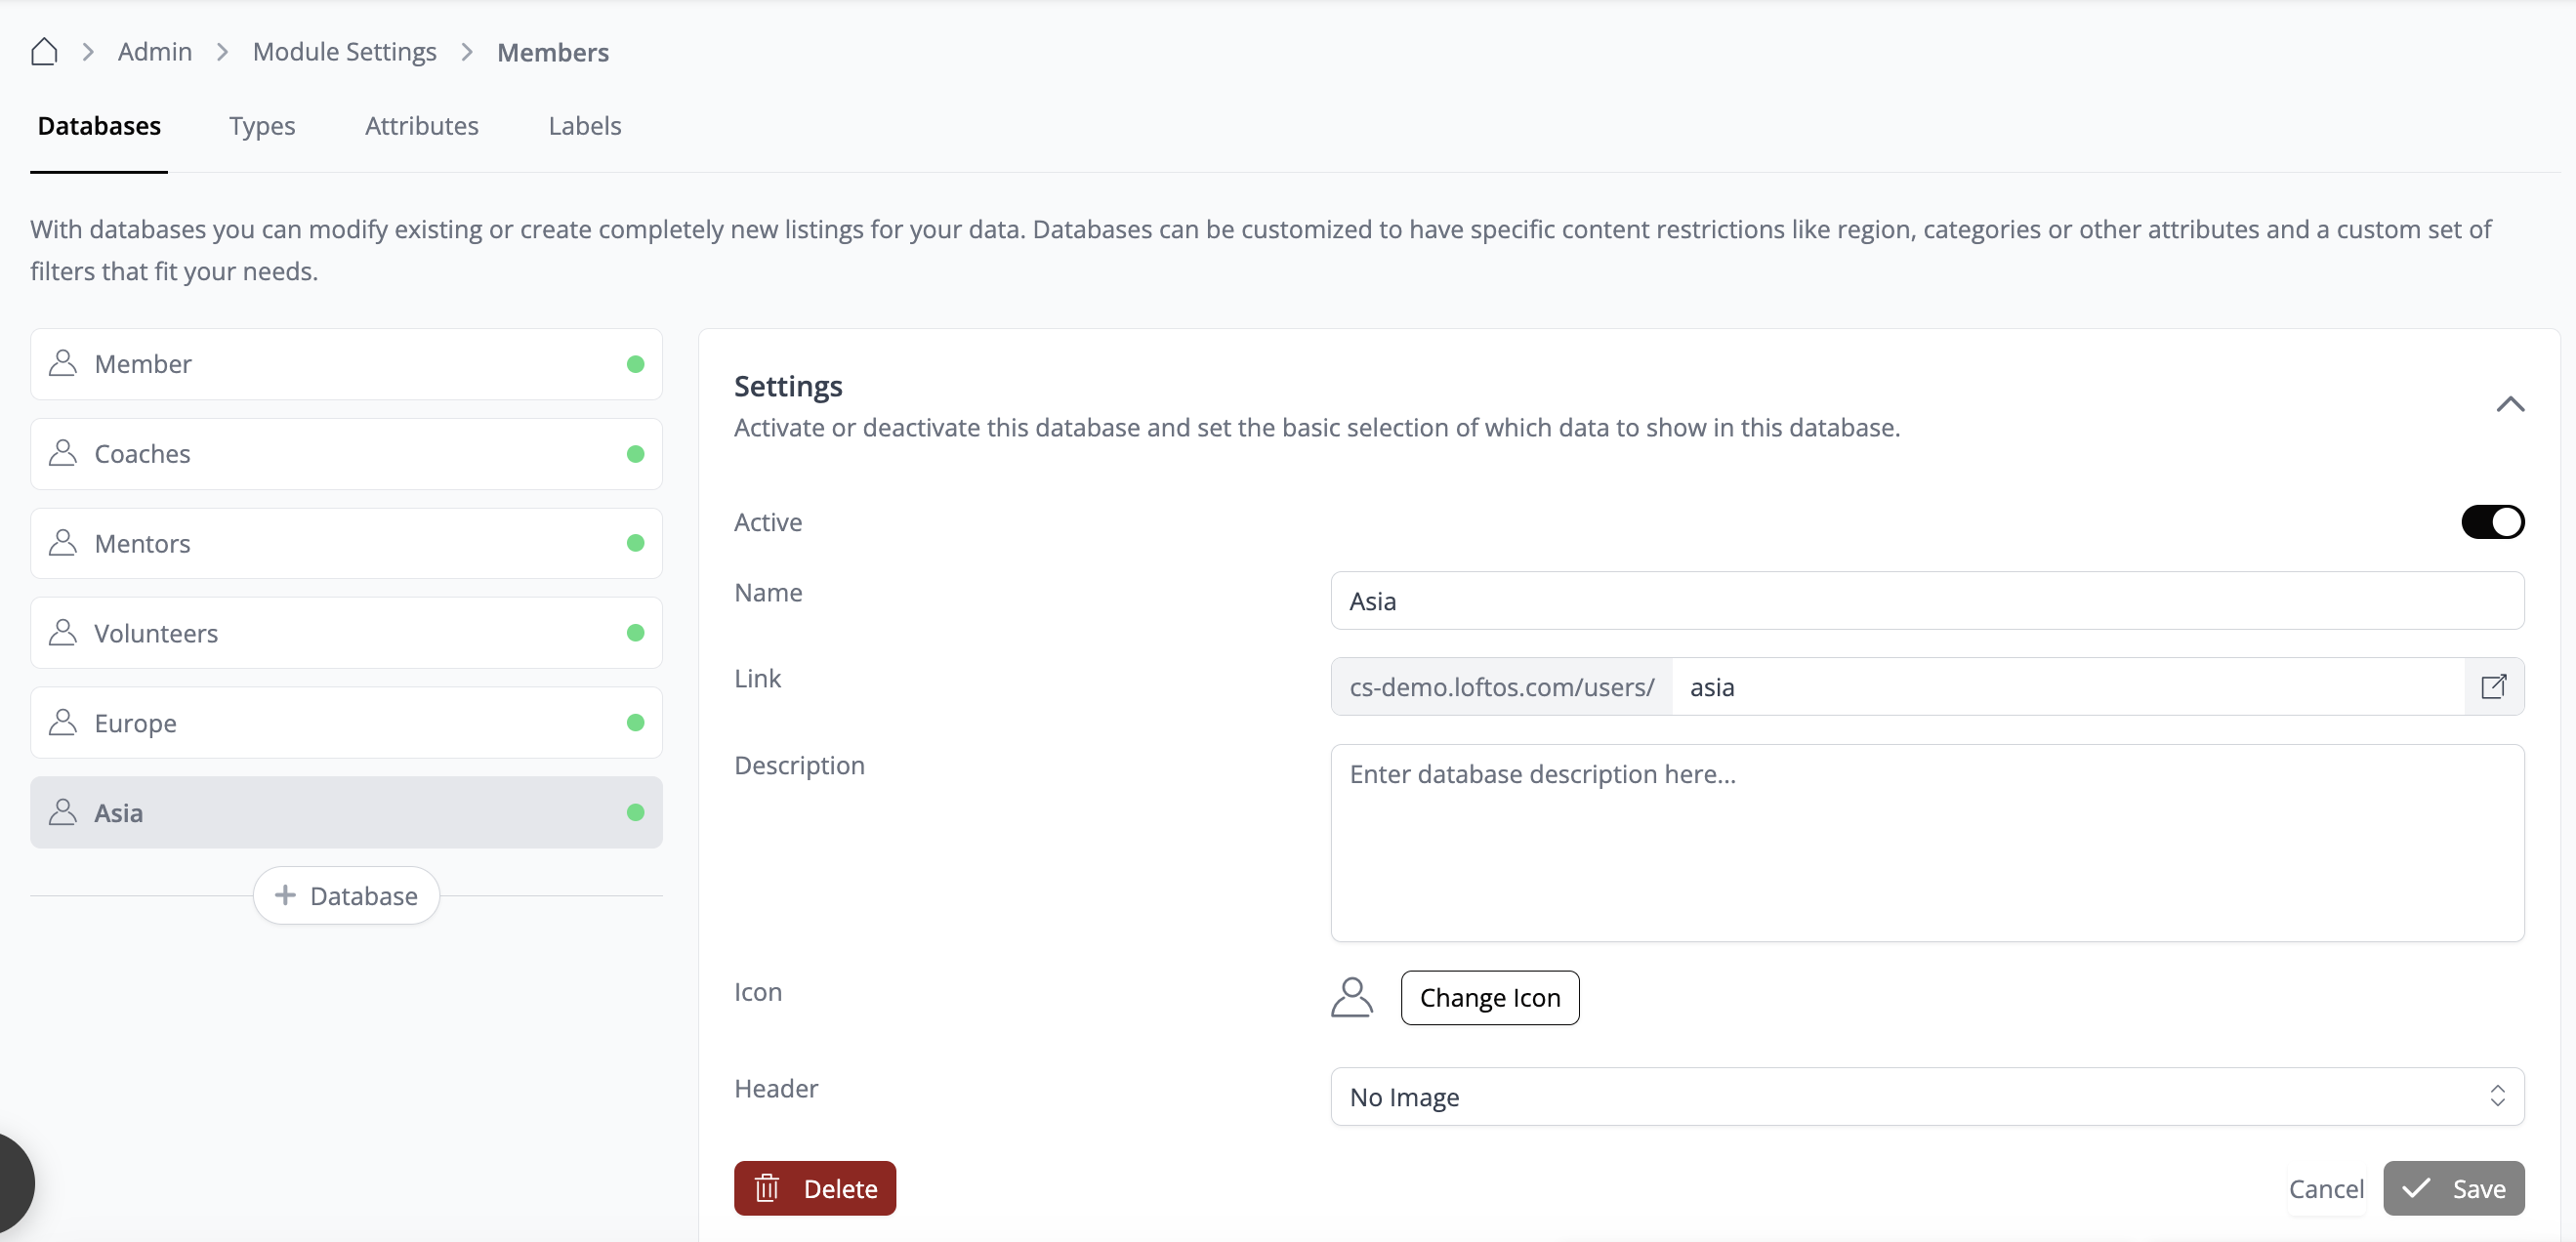
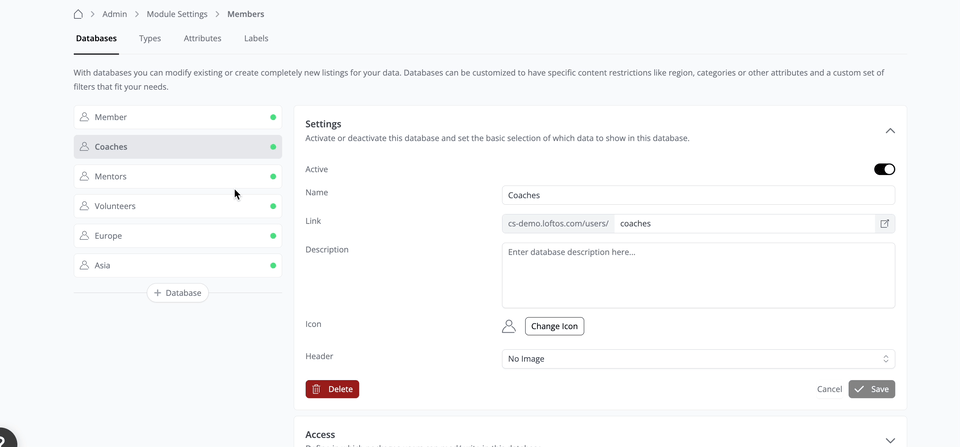
To create a User Database, navigate to the Admin area, then to Module, and click “Users”. Under the Databases tab, you can initiate the process by clicking "+ Database". Depending on your use-case, User databases can assist in segmenting your users by type, such as Coaches, Students, Mentors, or by location like Europe, Asia, Africa. Let’s say we created a user database named “Coaches”.
Creating Individual Types
To specify the Types of Users that belong to the databases, we need to define individual types. For example, if we create a "Coaches" User Database, we must determine the specific types of coaches included, such as Wellness coaches or Business coaches.
To create Individual Types, click "+ Type". Each type can be customized to your needs. When Users select their Type as “Business Coach” during registration, they will see the attributes and information fields set up by you, which they need to fill out. To do this, click "+ Section" and select an existing attribute or create a new one for users to fill out when creating their profile.
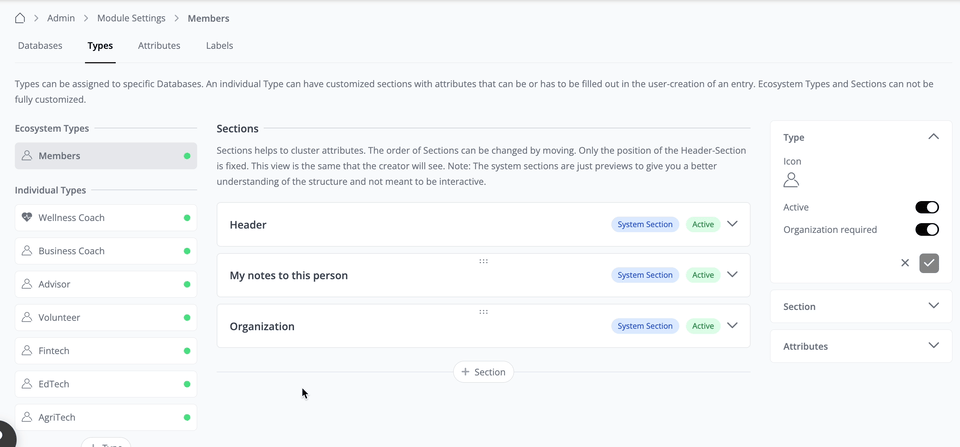
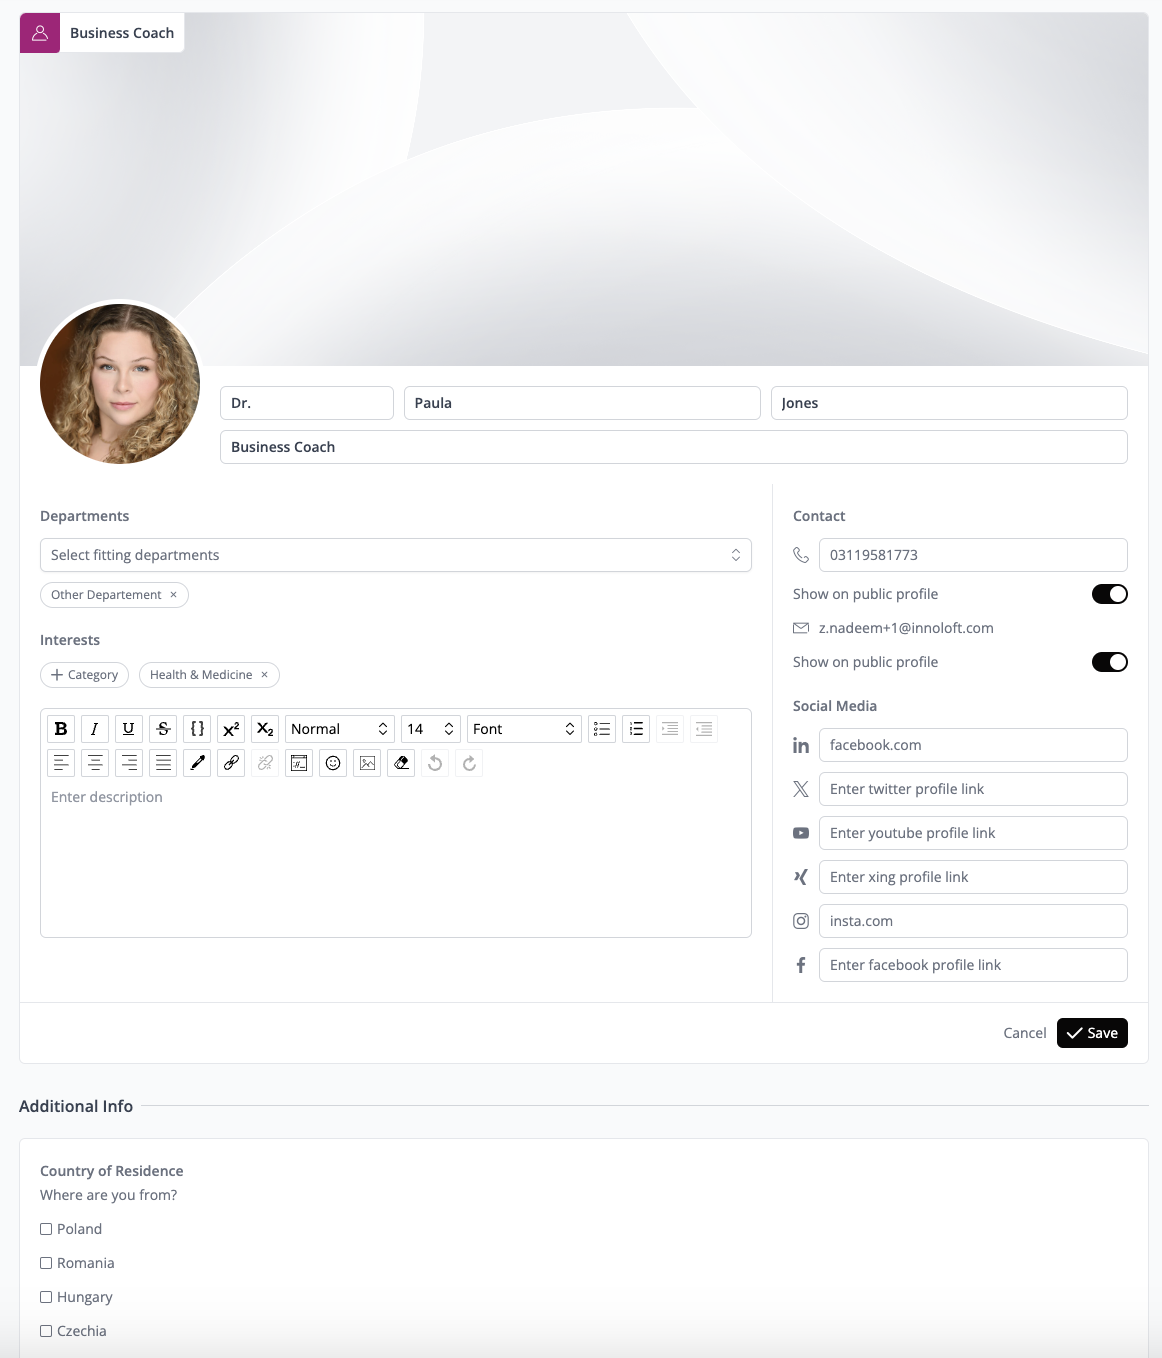
This is how it would appear to the person who would choose this User type.
⚠️ Once Individual Types are created, be sure to enable them under the Database > Content.
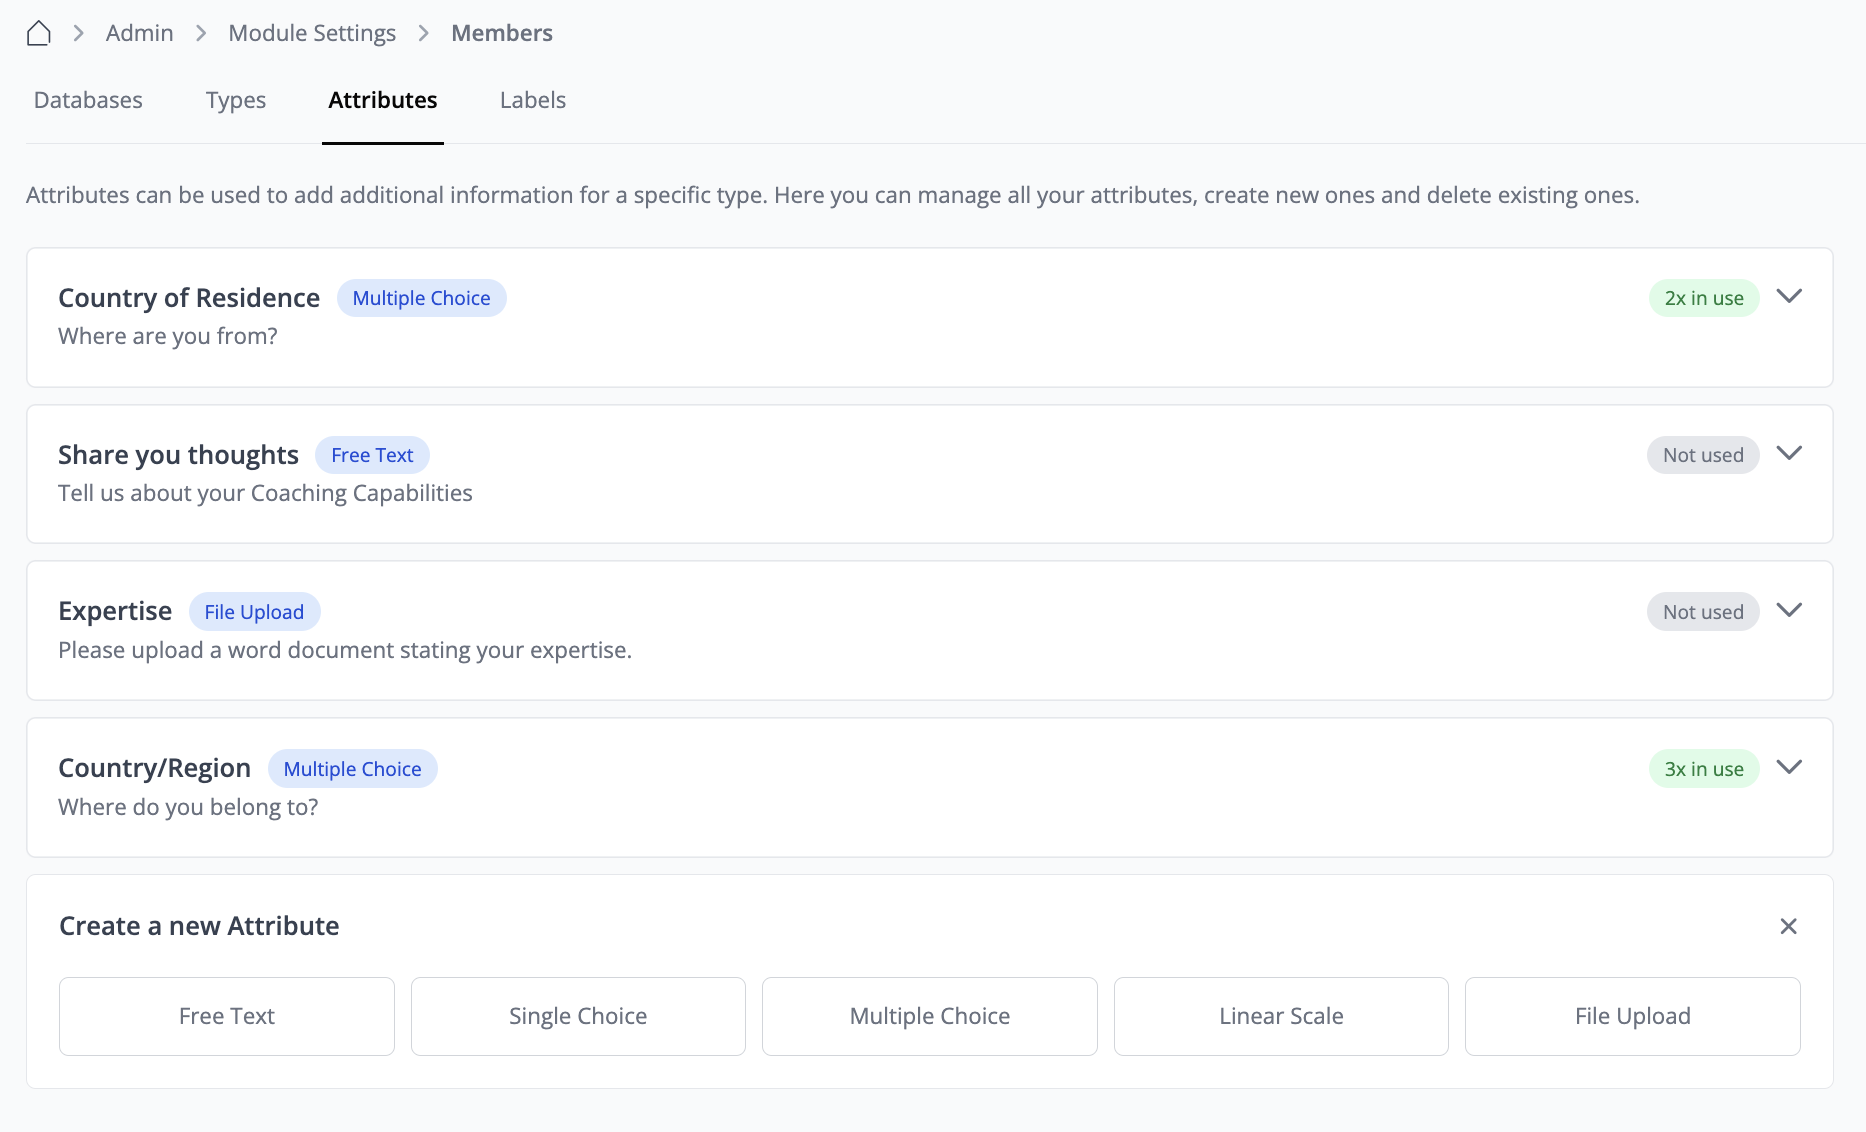
Creating Attributes
Under the Attributes section, you can create multiple Attributes at once and then utilize them as existing Attributes for each section under User type. To maximize the types of information you can collect, choose from our five options.
There is no need to create Attributes twice or three times. Custom Modules, Users, Organizations - they all share the same Attribute pool. Create an Attribute once, use it everywhere.
Look for the green "1 x in use" label (or more!) next to the Attributes of your choice. Click to see where else it's being used.
Let’s create a new Attribute and use it in the Section we created above. To create a new Attribute:
- Click on “+ Attribute”.
- Choose from different options like Free Text, Single & Multiple Choice, Linear Scale, and File Upload.
- For illustration purposes, let's use Multiple Choice.
- Type in the “Name” field.
- Add “Options” and click “Save”.
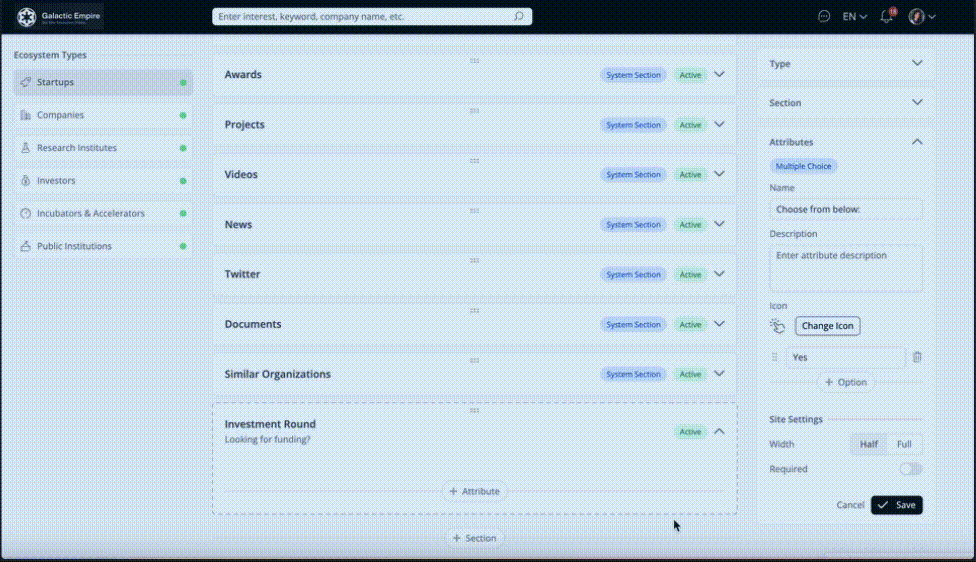
Once saved, your section is ready to be displayed. You can also adjust the order of this section by simply dragging and dropping it into your desired position.
Creating Tree Attributes
Create a custom tree:
- Go to your attribute settings.
- Select the Tree Function and start adding.
- You can build multiple levels within the tree, for instance:
- Energy
- Solar
- Biomass
- Water
- Mobility
- eMobility
- Conventional Mobility
- Energy
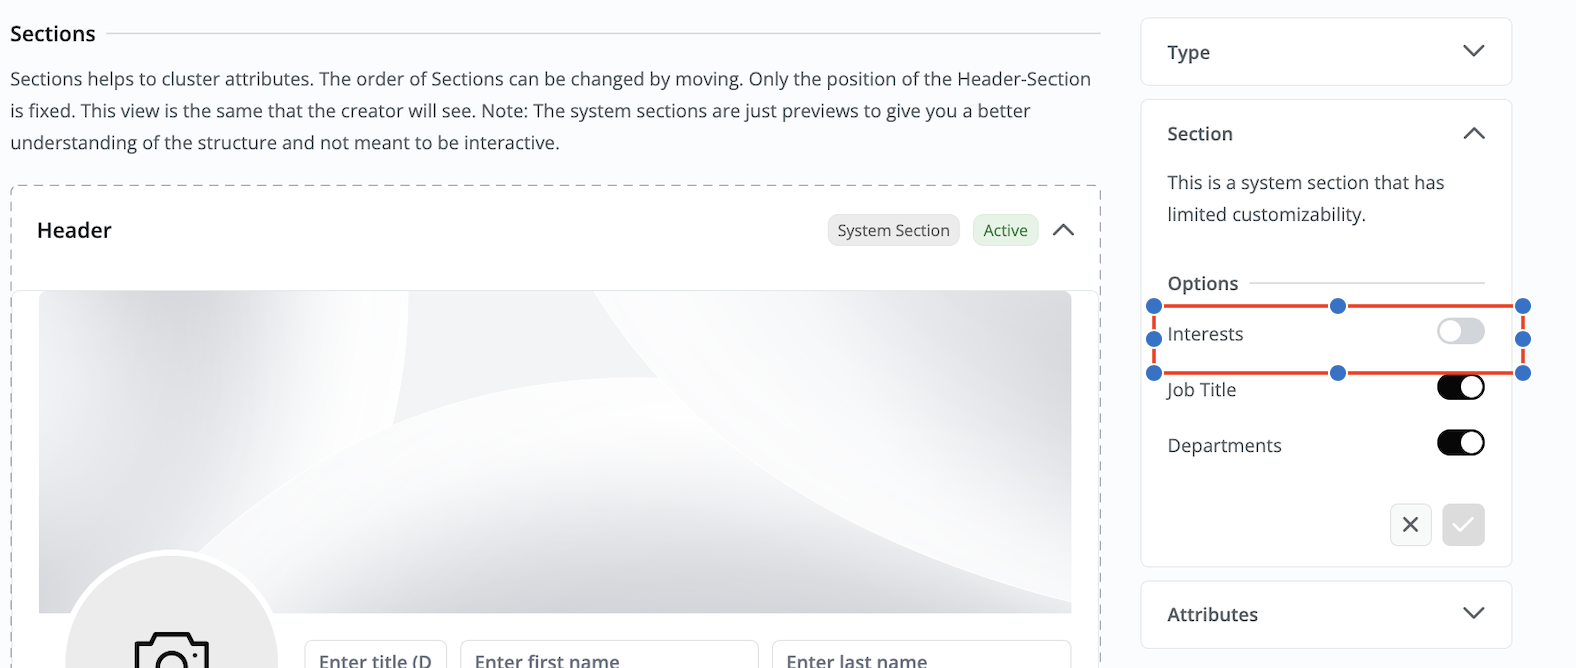
Customizing the Profile Header
You can customize the fields available in the user profile header globally. To create a leaner profile header or completely replace standard sections with your own custom attributes in lower sections, you can toggle the following elements on or off:
- Job Title
- Interests
- Departments
- Description (About Me)
- Contact (Phone and Email)
- Social Media (LinkedIn, Twitter, YouTube, Xing, Instagram, Facebook)
Preconfigured Templates
We’ve introduced preconfigured templates such as the LoftOS Category Tree, which provides a predefined set of categories you can use directly. If you don’t need all the predefined categories, you can easily modify or remove them to suit your requirements. If you want to replace these categories with the “Interests” in the header, add this attribute in a new section. Then deactivate the toggle for “Interests” in the header.
Creating Labels
Only administrators can add Labels to User profiles. While Labels allow easy organization, their main function is to act as filters or restrictions for databases.
Suppose you only want Users with a specific Label to be included in database X. For instance, only users with the "Approved by Admin" Label can be added to the Coaches’ database. To enable the Label under “Restrictions”, you can first create the label from the “Labels” tab. To create the Restriction, go to Database > Content > “+ Restriction”.
To apply Labels to all User profiles, navigate to User Profile, click “Edit →Admin tab → scroll to Labels and apply the Label accordingly”. This ensures that the User is correctly categorized and added to the designated database based on the Label restrictions set by the administrator.
⚠️ After completing the setup of your User Databases and Labels, it is essential to ensure easy access for users by creating navigation entry points. Go to Navigation Settings and add a link to your newly created databases in the navigation panel. This makes it convenient for users to access and interact with the segmented User Databases directly from the platform's navigation menu.
Editing Users
Edit a User Profile
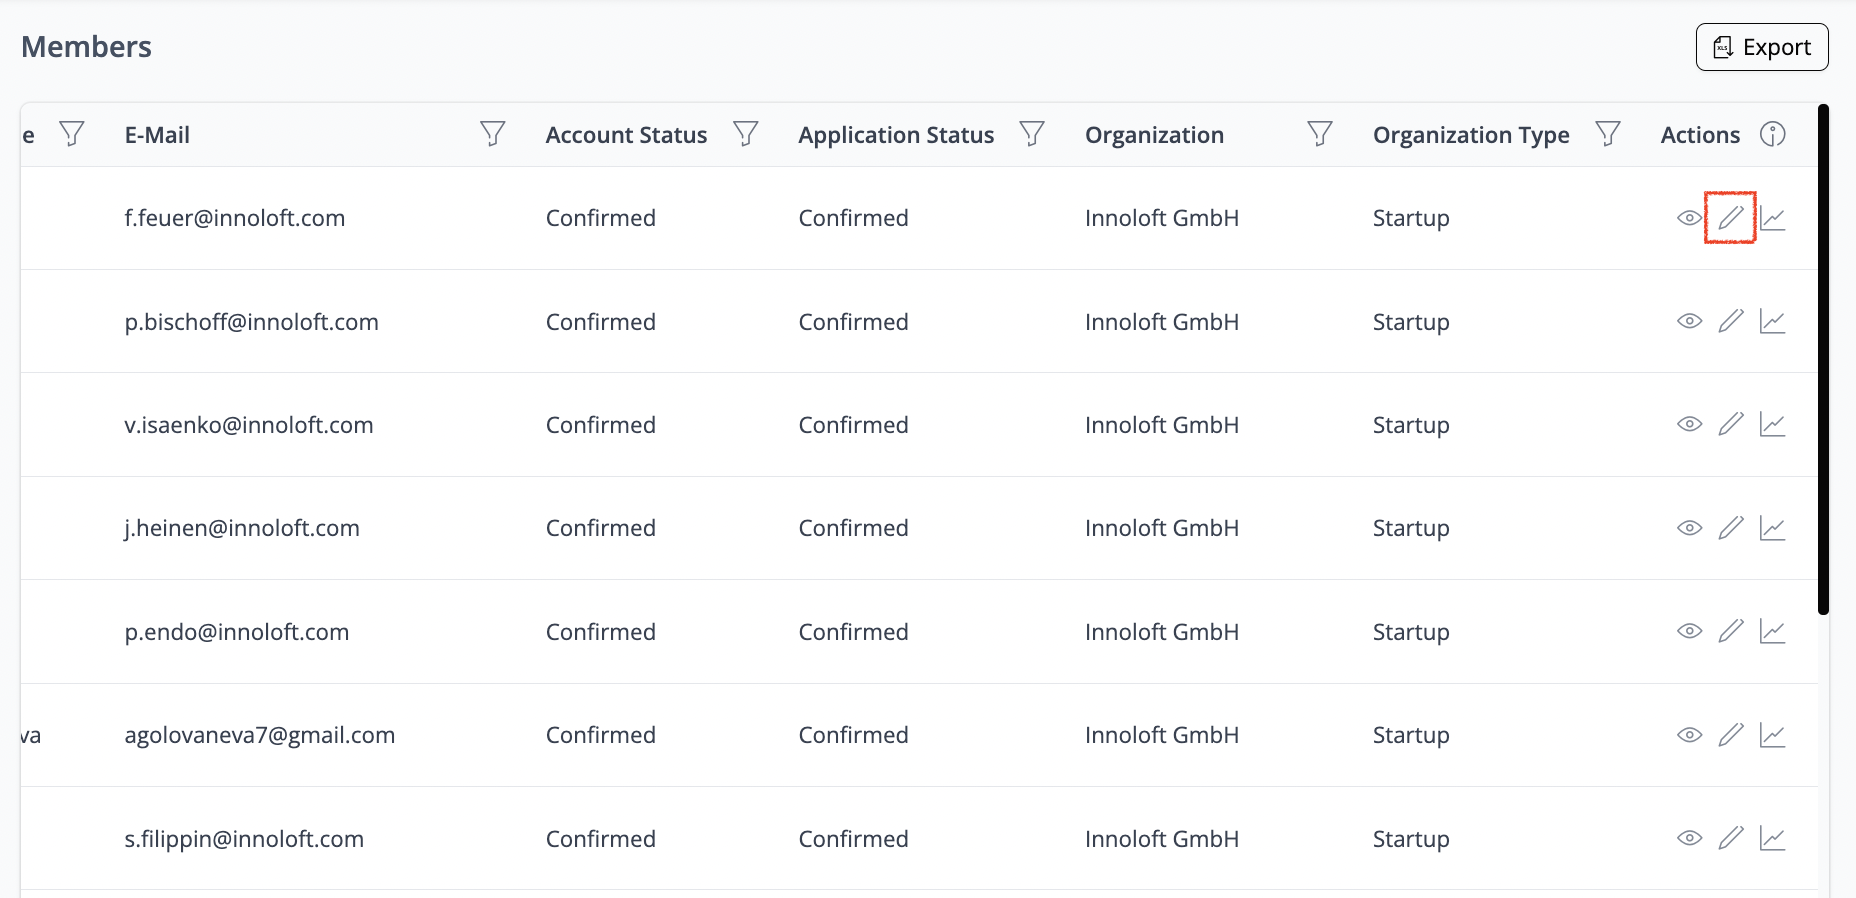
In the Admin area, navigate to "Modules" and select "Users." This will display a table containing all platform Users. You can edit User information directly by clicking on the pencil icon within the table. Alternatively, you can use the search bar on the platform to find a specific User profile, click on it, and then select "Edit" to make changes.
Navigate to the User Profile. Here, you can access analytics, apply or remove labels, hide users from the platform, change their organization affiliation, or delete their profile entirely.
Reporting a User Profile
Users can report any user profile directly from the platform by clicking the "..." menu on the profile and selecting "Report". They'll be prompted to provide a reason before submitting. Admins receive a notification when a report is submitted and can review the flagged profile from the admin area.
❓ FAQs
-
How can I export Users? Through the Users section, you can generate a User export. Locate the "Export" button at the top right corner. Clicking initiates an automatic download of a CSV file containing User data. If you encounter formatting issues or broken special characters (like Umlaute) upon opening the file, follow these steps:
- Open a blank Excel sheet.
- Navigate to "Data."
- Choose "From Text/CSV" import.
- Select the downloaded CSV file.
- Specify the desired format settings.
- Click "Load." Following these steps should resolve any formatting or character display issues in the exported file.
-
How can I segment my users? You can segment users by establishing User Types and assigning them accordingly. These User Types categorize users based on specific criteria, allowing for more targeted segmentation. Once categorized, users can be further organized into different databases based on their assigned User Types.
-
Can I customize the User Profile? You can customize the User Profile by creating different sections and attributes. Users can fill out these sections and attributes when they create their profile, depending on their designated User Type. This customization allows for tailored profiles that capture relevant information based on user roles or characteristics.
-
How can I assign a User to an organization? Navigate to the user’s profile, click on “edit” and go to the admin tab. Go to the bottom of the page to find the section “organization”. Click on the pencil and type in the name of the organization. Click on it to assign the user.
-
How to remove Users from my organization?
-
Log in
Navigate to your organization page
-
Access Organisation Settings
Click on ‘Organisation’ in the top navigation bar.
-
Disable Admin by Default
Scroll to the ‘Admin by Default’ section and switch the toggle to off.
-
Remove Users
Locate the team User you wish to remove. Click the three dots next to their profile and select ‘Remove from organization’.
-
-
What happens if a User is hidden on the platform? If an admin hides a User, their profile will no longer appear in searches and will not be shown in the user database, making them inaccessible to other Users. However, any content they have previously created, such as posts, comments, or shared resources, will remain visible on the platform unless manually removed. This ensures that valuable contributions are preserved while restricting direct interaction with the hidden User.
-
How can I change a User Type? Navigate to the User’s profile, click the edit button, and select the User icon. From there, you can reassign the User to any of your active User Types.
.png)