 LoftOS Knowledge Base
Best Practices & Design Guide
Create your individual Landing Page
Create the entry point to your digital platform on your own. The design and layout adapt to your specific corporate design with a custom URL. The landing page communicates the added values of your digital platform and your organization. Use the templates to create your own webpage.
Create a Welcome - Page with instructions for your users
Craft a concise guide for your platform using Pages. Share insights about your identity, mission, and the valuable benefits users can gain. Consider including a step-by-step tutorial to assist users in optimizing their profiles seamlessly.
Point out your Projects
Create a Page to highlight your different project areas and link them to individual project databases. By doing so, you streamline navigation for users, requiring only one entry in the user menu.
Add Testimonials or Reviews to your Page
Select Testimonials from the Pages Templates to show case your satisfied Customers and Review ratings.
Add Packages and pricing to your Page
Select "Pricing" from the Pages Templates to show case your different packages and pricing to your Users. Adapt your branding style and use attributes from the style guide in the right-hand side panel.
Analytics
Every visit to your page is recorded. To view detailed analytics, select your page and open Analytics from the settings menu in the top-right corner. Here, you can see each visitor, their organization, and the time of their visit.
Link content from organizations, custom models, and events
Data Cards work like the regular Card templates you're familiar with but offer the added ability to link content from organizations, custom models, and events directly within your webpages.
This feature allows you to highlight your most engaging content as lead magnets, encouraging users to dive deeper into your platform.
Go to Admin → Pages → Select the page you want to edit →Data Cards → select the Module from which you would like to import the card, choose between manual or latest and decide how many items should be shown. Then save.
Group Pages by Project
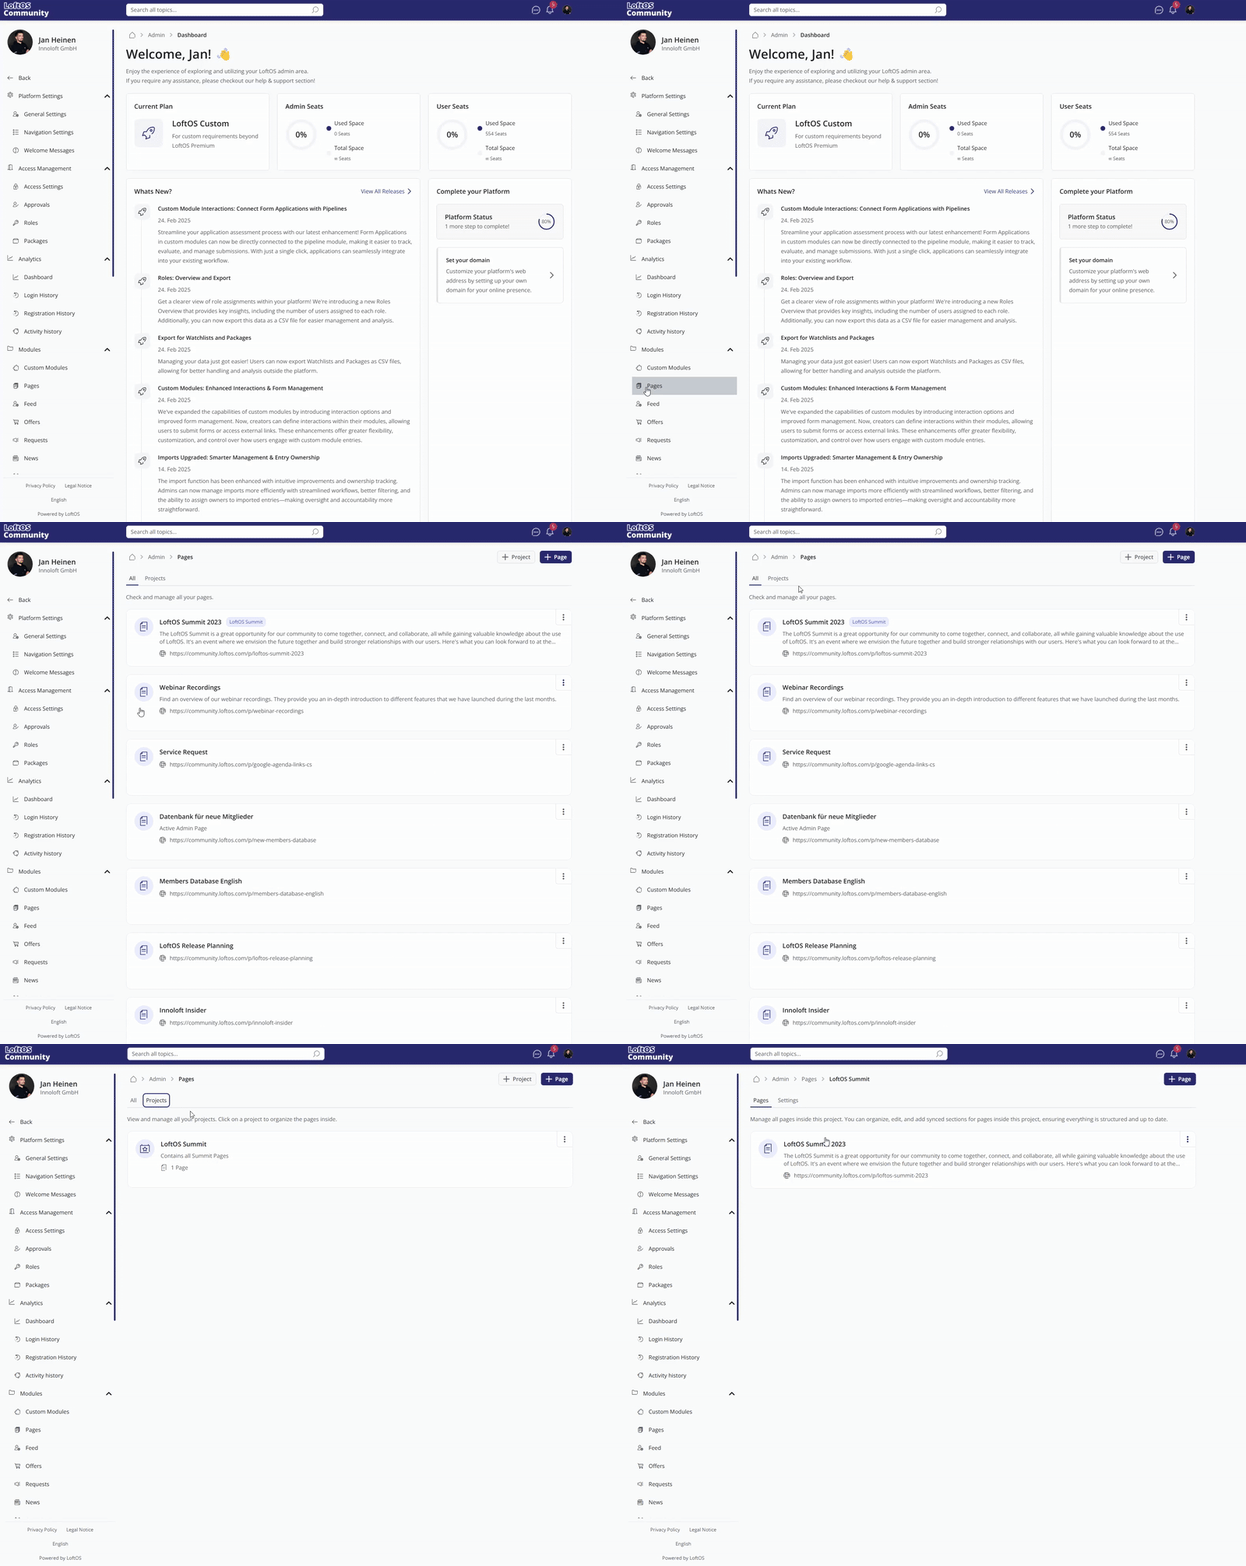
Group pages by projects, making it easier to organize, manage, and navigate your content efficiently.
Project-Based Grouping: Organize your pages within clearly defined projects, creating a structured and intuitive workspace that keeps everything in its right place.
Streamlined Navigation: Easily locate relevant pages without scrolling through an unstructured list, saving time and improving efficiency.
Enhanced Project Management: Keep all related pages together, ensuring smoother collaboration, better context, and a more seamless workflow for teams working on shared initiatives.
Get Started:
Head over to the Pages section and start grouping your pages by projects to create a more structured and efficient content management experience.
Find it here: Admin → Modules → Pages → Projects tab →Create your first project.
Side map indexing
Choose the pages you want to have indexed by Google or other search engines. Go to your page's settings, and toggle on "enable page in sitemap" for pages you want to index on Google or another search engine. Add then the URL ({yourdomain}/p/sitemap.xml) in the Google Search Console, or reach out to your CSM to have the pages added for you.
Unified Color Scheme
Employing a consistent color scheme throughout the landing page, with particular emphasis on brand colors, helps maintain a cohesive design aesthetic. While exceptions may exist, adhering to a primary text color and title color enhances clarity and coherence for users.
Utilizing Established Color Palettes
Design your page using colors from the palette that match your images or existing brand colors.
Choose and add colors as needed using the color picker in the style guide on the right. The color picker remembers every shade you use, ensuring you never lose track of your perfect brand colors.
Choose the gradient option to individualize your background colours
Select Header in the navigation bar. In the right-hand side properties bar, scroll down to the Background section. Select "Gradient." Customize the gradient to personalize your image.
You can also choose a Radial Gradient background. In the same Background section, select "Radial Gradient" to apply a circular gradient that radiates from a center point — great for hero sections, headers, and any element where you want a softer, more dynamic background effect. Configure the gradient colors using the color picker as usual.
Consistent Typography
Maintaining consistency in font sizes and spacings across different elements of the landing page enhances readability and visual appeal. Typically, font sizes like 4px, 8px, 16px, etc., are commonly employed. For instance, headlines may share the same font size, such as 40px, while descriptions maintain a uniform size, like 24px. It's advisable to keep the line height either equal to or larger than the font size to ensure legibility.
Flexible Spacing with Padding and Gaps
Adjust image heights. Given the varying screen sizes of desktop and mobile devices, employing a fixed viewport height (VH) or a specific height in pixels may lead to display issues, especially on smaller devices. Instead, utilizing padding and gaps between elements provides flexibility in spacing, ensuring optimal presentation across different screen sizes. While separate styling for desktop and mobile devices is ideal in the long term, for landing pages, prioritizing auto heights alongside padding and gaps offers a more consistent user experience.
Add Anchor Links for Seamless Navigation
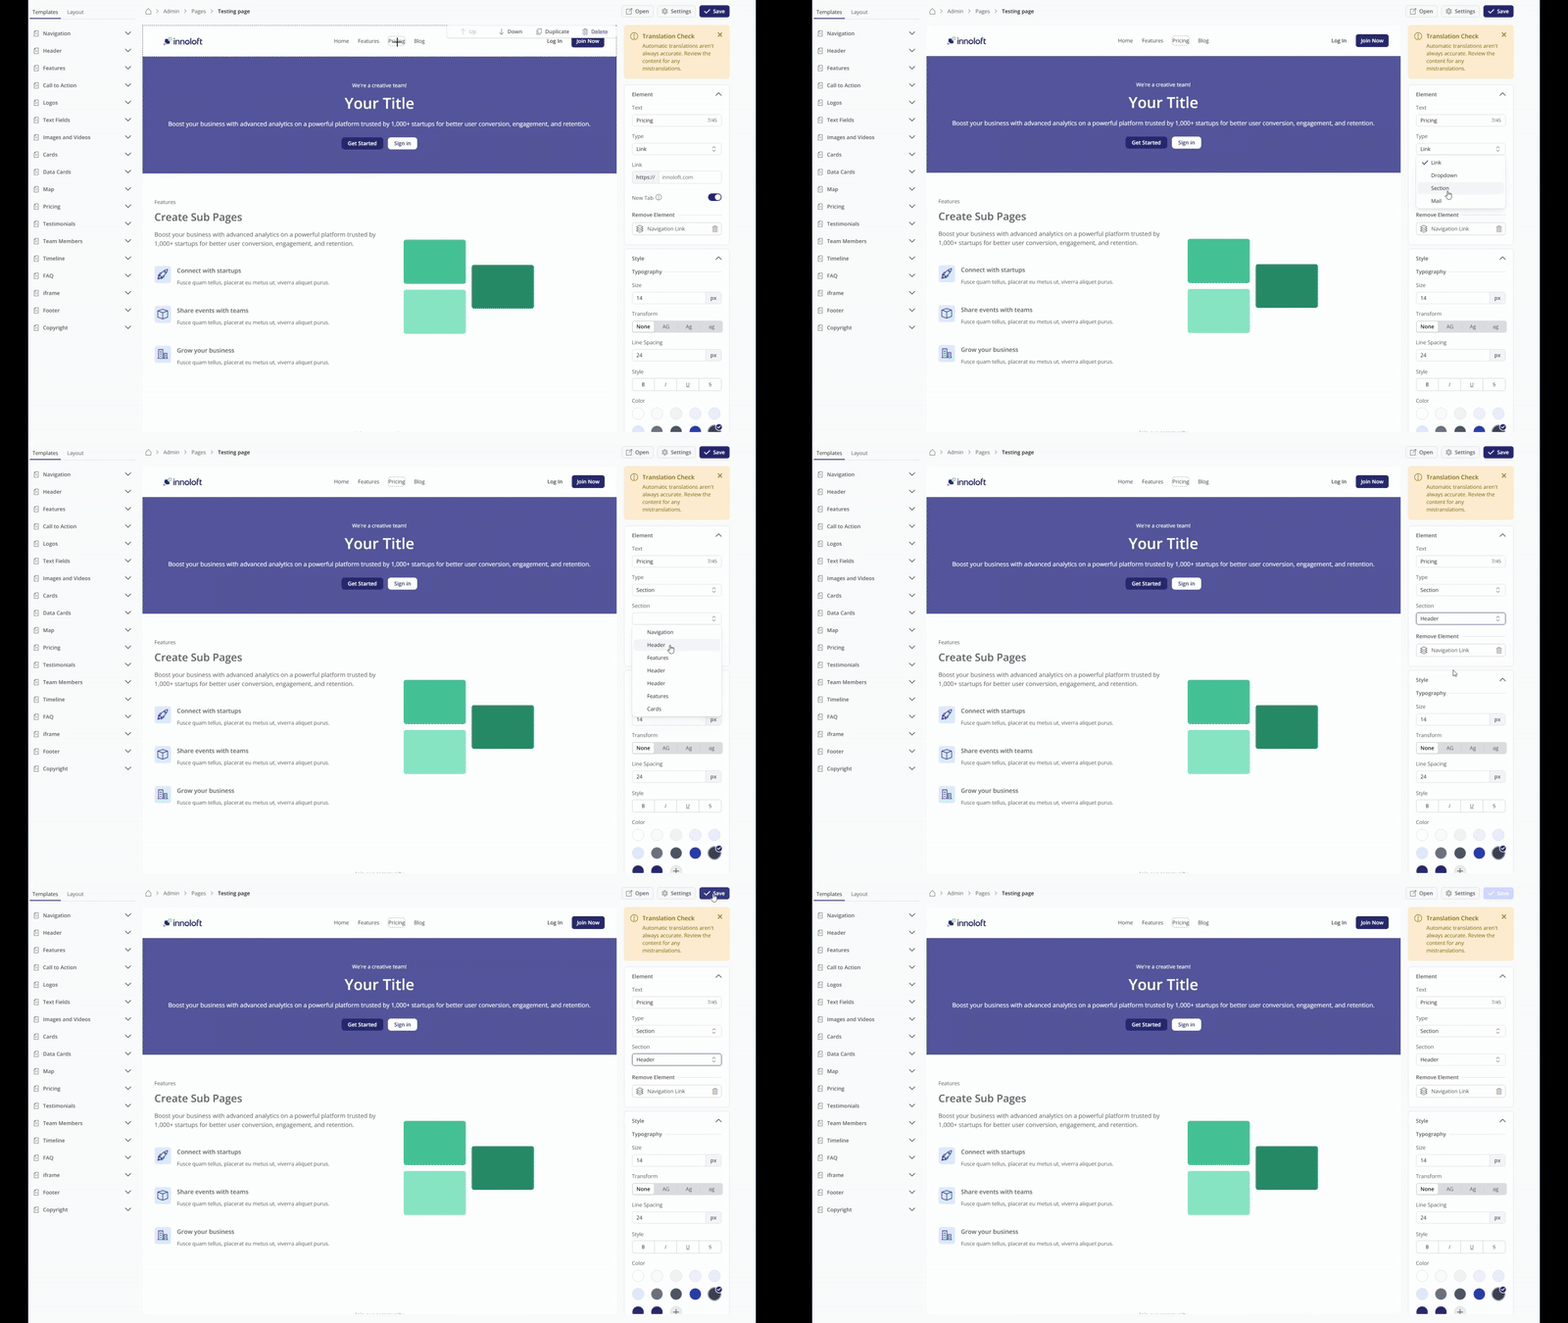
With Anchor Links, you can link directly to specific sections within a page—making it easier to highlight key content and improve navigation.
- Direct Linking – Instantly guide users to important sections without endless scrolling.
- Better Structure & Organization – Make key content more accessible and easy to find.
- Enhanced Usability – Create a smoother, more interactive experience for your audience.
Open the page where you want to add anchor links. Select a link from your navigation bar, then in the right-hand menu, select "Section" and choose the desired page section from the dropdown. Click "Save" to create the anchor link.
Set synced sections for projects
Keep Your Project Pages Consistent and Efficient
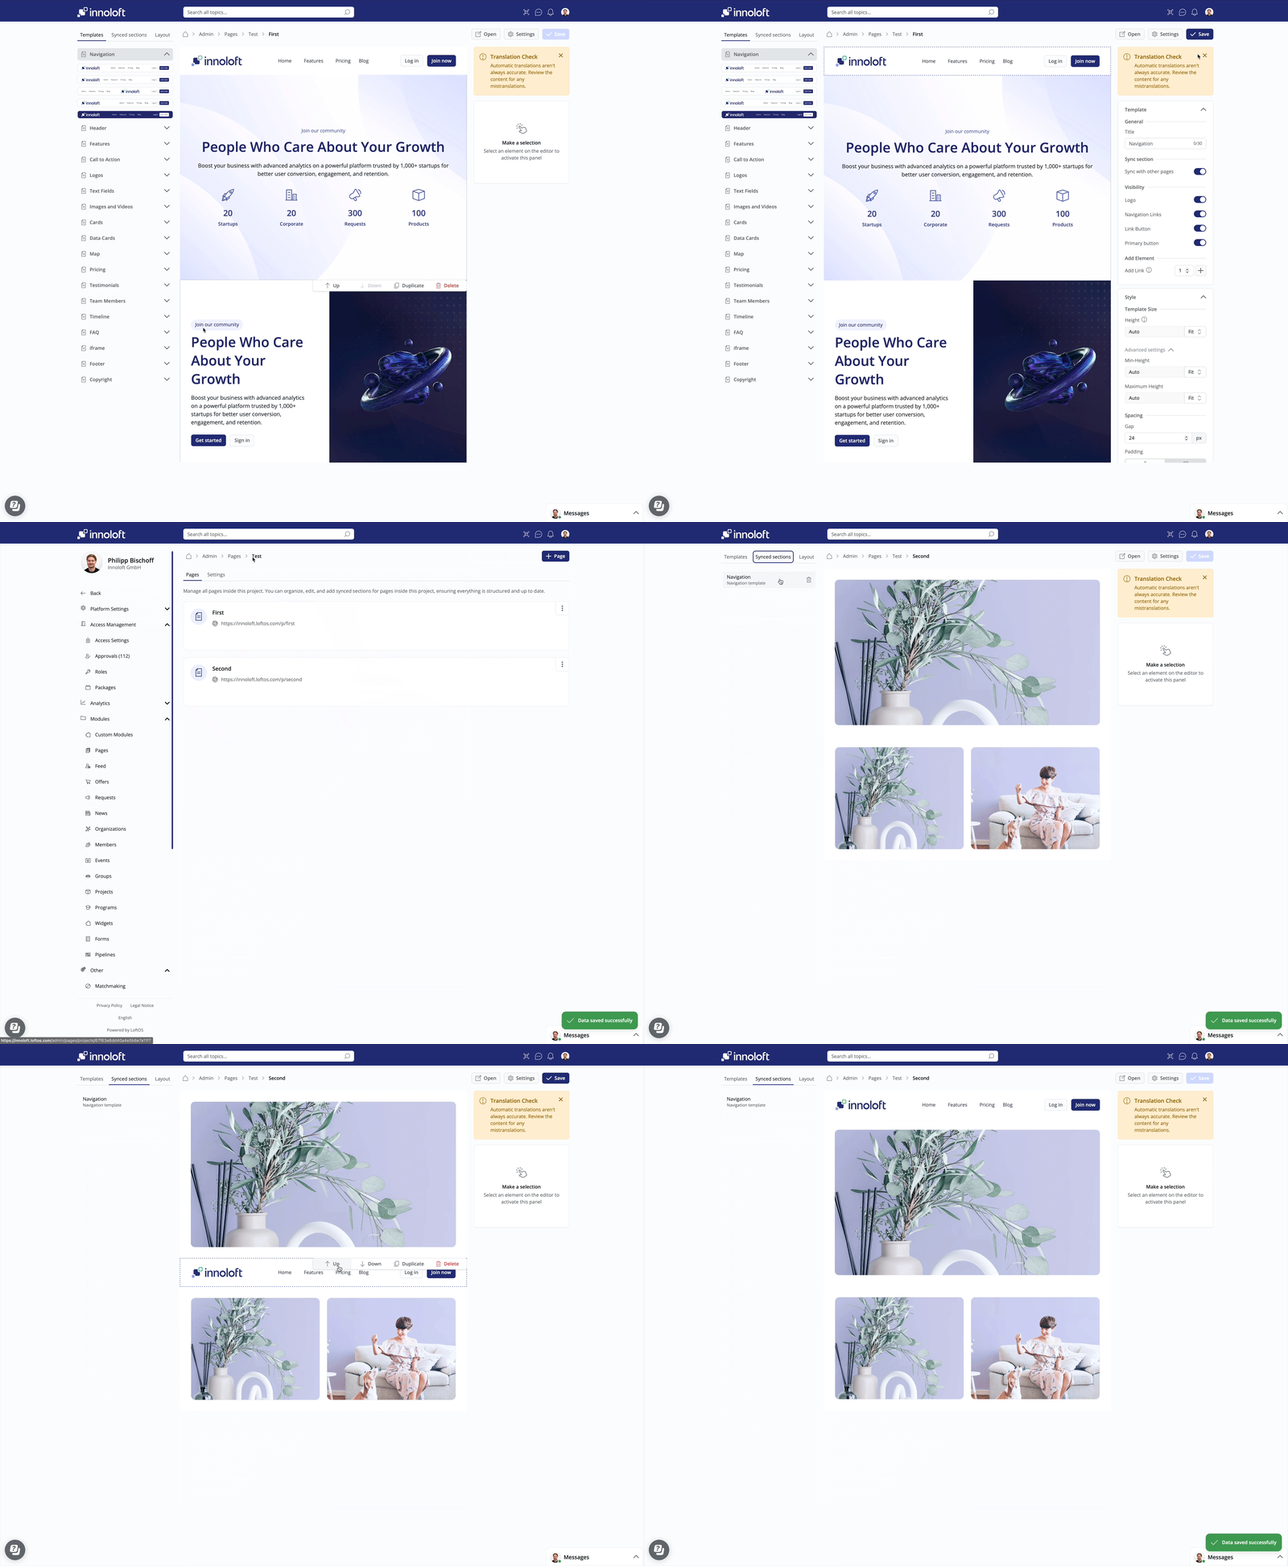
With Synced Sections, you can create shared content areas—like navigation bars—that automatically update across all pages in a project. This means you only need to make changes once, and they'll be reflected everywhere, saving time and reducing errors.
Use cases
- Create Shared Sections Designate parts of a page (like a header or navigation menu) as synced. These will appear on all pages in the same project.
- Automatic Updates Update a link or item in one synced section, and it will automatically update on every connected page.
- Simplify Page Management Ideal for projects with many subpages or complex structures—ensures consistent layout and navigation without repetitive edits.
How to Set Up a Synced Section
-
Go to Admin
Navigate to the Admin panel and select Pages.
-
Create a Project
Click +Project and follow the steps to set it up.
-
Add a Page
Click +Page and in the top navigation bar, open Templates. Choose a template for your page and save it.
-
Enable Synced Sections
Click an element on your page which opens the right-hand panel.
Locate Synced Section, toggle it on, and save your changes.
-
Create Additional Pages
Use +Page to add more pages to your project. Go to Synced Sections again to view and reuse the shared content you've already created.
This setup ensures all your project pages stay in sync—making updates faster, easier, and more reliable.
🧑🏼🏫 Use cases
- Events
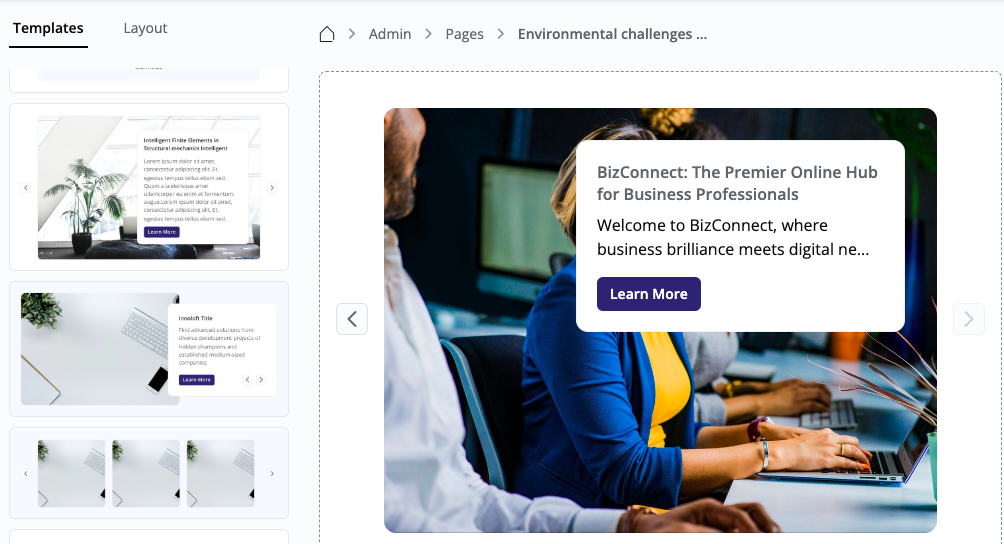
Highlight your event and select data cards featuring a large image and text overlay.
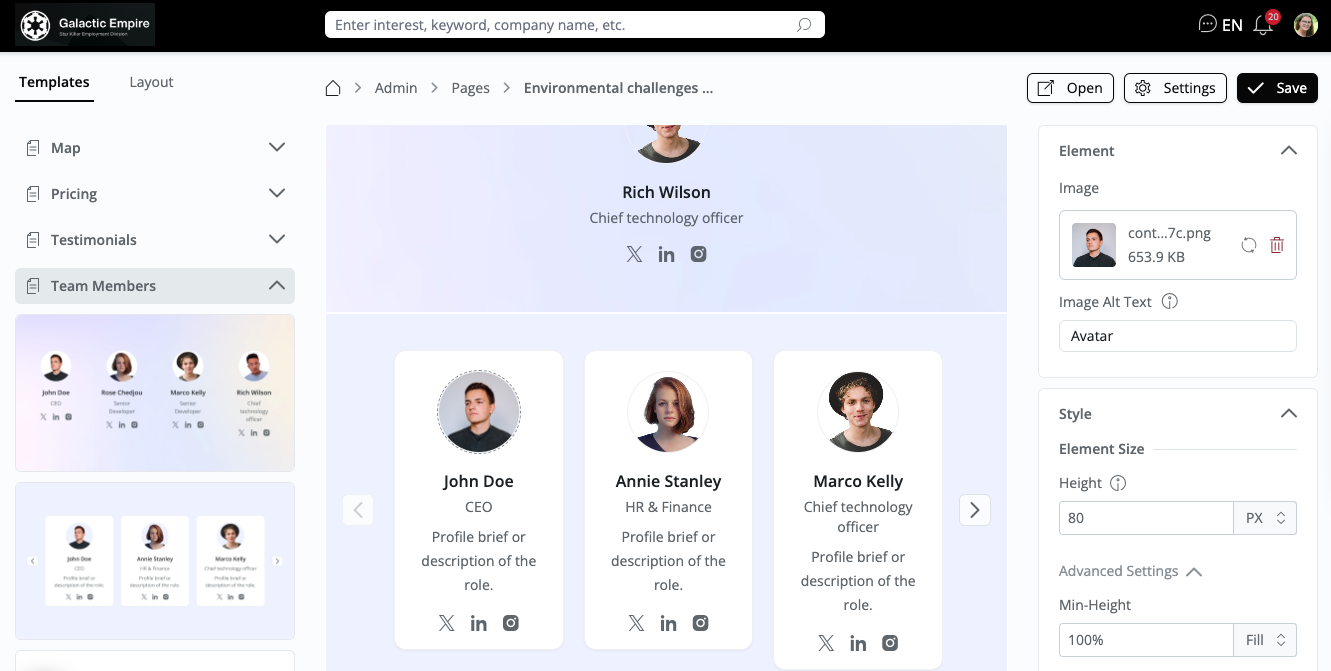
- Team members
Highlight your team by selecting from various Team Member templates. Personalize the information using the right-hand side panel.
❓ FAQs
General
- What platform content can be displayed via Pages? Almost any content that also non-registered users can see on the platform. Depending on what is shown on your platform (e.g. News, Offers, Requests, Projects, Organizations).
- Can a video be added to Pages? Yes, use our video & image templates.
- Can we have Pages in different languages? Yes, this is possible with our automated translation. Please be aware that the system only translates your initial draft. Any modifications must be manually translated into each platform language. Make sure that your platform is set to the page you want to translate into before adding any text.
- Who can create/edit Pages? Only platform administrators have the possibility to create new Pages and edit existing Pages. A platform administrator can also edit and manage Pages of other platform administrators.
- Can I customize the design of my landing page to match my corporate branding? Yes, you can customize the design and layout of your landing page to align with your organization's branding using the available templates and customization options.
- Is there a limit to the number of Pages I can create? There is no set limit to the number of Pages you can create.
- A project or organization is missing on a map, why? Troubleshoot: Please verify first if the organisation does not show even when zooming in. If it is still not showing, please verify that an address is filled in the organisation or project profile. Otherwise, please report a bug.
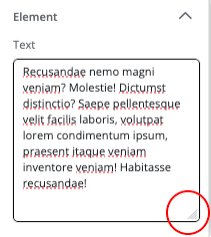
- The text box in Pages is too small. How can I adjust a long text in the best way?
Resize the Textbox: Locate the arrow at the bottom right corner of the textbox and drag it downwards. This action will dynamically expand the textbox, accommodating longer text seamlessly.
- Best Practices to display on Mobile Devices: To ensure your page displays optimally on a Mobile Device, set the gap in the settings higher than '0'. Screen Recording 2024-07-04 at 09.59.34.mov
- How can I link a package in the pricing template? You can either manually attribute packages or use automatic attribution. Manual attribution is more user-friendly but requires additional effort. Click into the field that you want to edit. An editing box will appear in the editor on the right-hand side. Drag the bottom right corner to enlarge the editing field and edit your text.
- How can I change the order of my cards? To change the order of your cards, navigate to the Layout section. Open the navigation menu, then use the six-dot handles to rearrange your tiles into the desired order.
- Option to not show the chat bar On your platform you can see the chat bar in the bottom right corner. If you wish to remove it from your pages, go to "Settings" of your page and select or deselect "Show Messaging".
- Why does a page or module look broken on mobile, or different between two screens?
- Check the viewport. LoftOS layouts are responsive, so a design built full-width on desktop can wrap differently on mobile.
- Colour/theme mismatches (e.g. a nav bar showing a light colour on mobile): set the colour explicitly in Admin → Design Settings instead of relying on an inherited default.
- Avoid fixed pixel widths in section elements — use the built-in column/grid options so content reflows.
- Hard-refresh and clear the cache on the affected device, and test in a second browser.
- If a specific device (e.g. iPhone Safari) still renders incorrectly, log a ticket with a screenshot, the device/OS/browser and the page URL.
