🔗 Webhooks
Let your platform talk to other apps!
Webhooks are like automatic notifications that zip relevant details between apps, triggering actions in real-time.
This means faster workflows, smoother integrations, and happier users who get what they need instantly. A new user signs up? Trigger an automated welcome e-mail. An organization has been created on your platform? Your CRM gets notified immediately. An Event has been created? A new Custom Module has been updated? A new Form has been created? Apply Webhooks to numerous use cases.
There are many providers available, we show you here below the “how to” based on Zapier and n8n.

Webhooks provide an automated method to transmit data from your LoftOS application to external services. In LoftOS, webhooks can be activated by specific events within your application, such as the creation of an organization or an update to a user's profile and much more. You can view the complete list of triggerable events through the webhooks interface located in the admin area.
💡 Important: To make use of webhooks in Zapier or in n8n, you will need a subscription to use their service.
We also offer a self-hosted version of n8n for customers who cannot use third-party services due to data handling. This ensures that all data remains fully under our control. Access is by invitation only, please contact your CSM.
👩🏻💻 Usage
Connect a webhook with Zapier (Example: Send a welcome e-mail to a user)
Go to Admin → Other → Webhooks.
Start by selecting “+Webhook”.
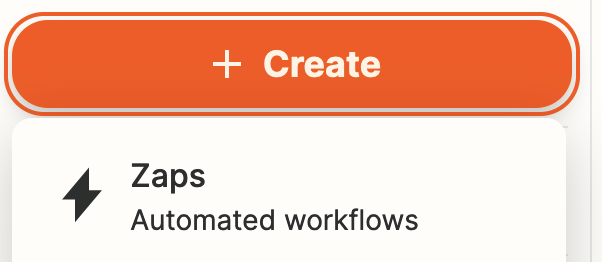
- Login to your Zapier account. Click “+Create” creating a new Zap and select “Automated workflows”.
-
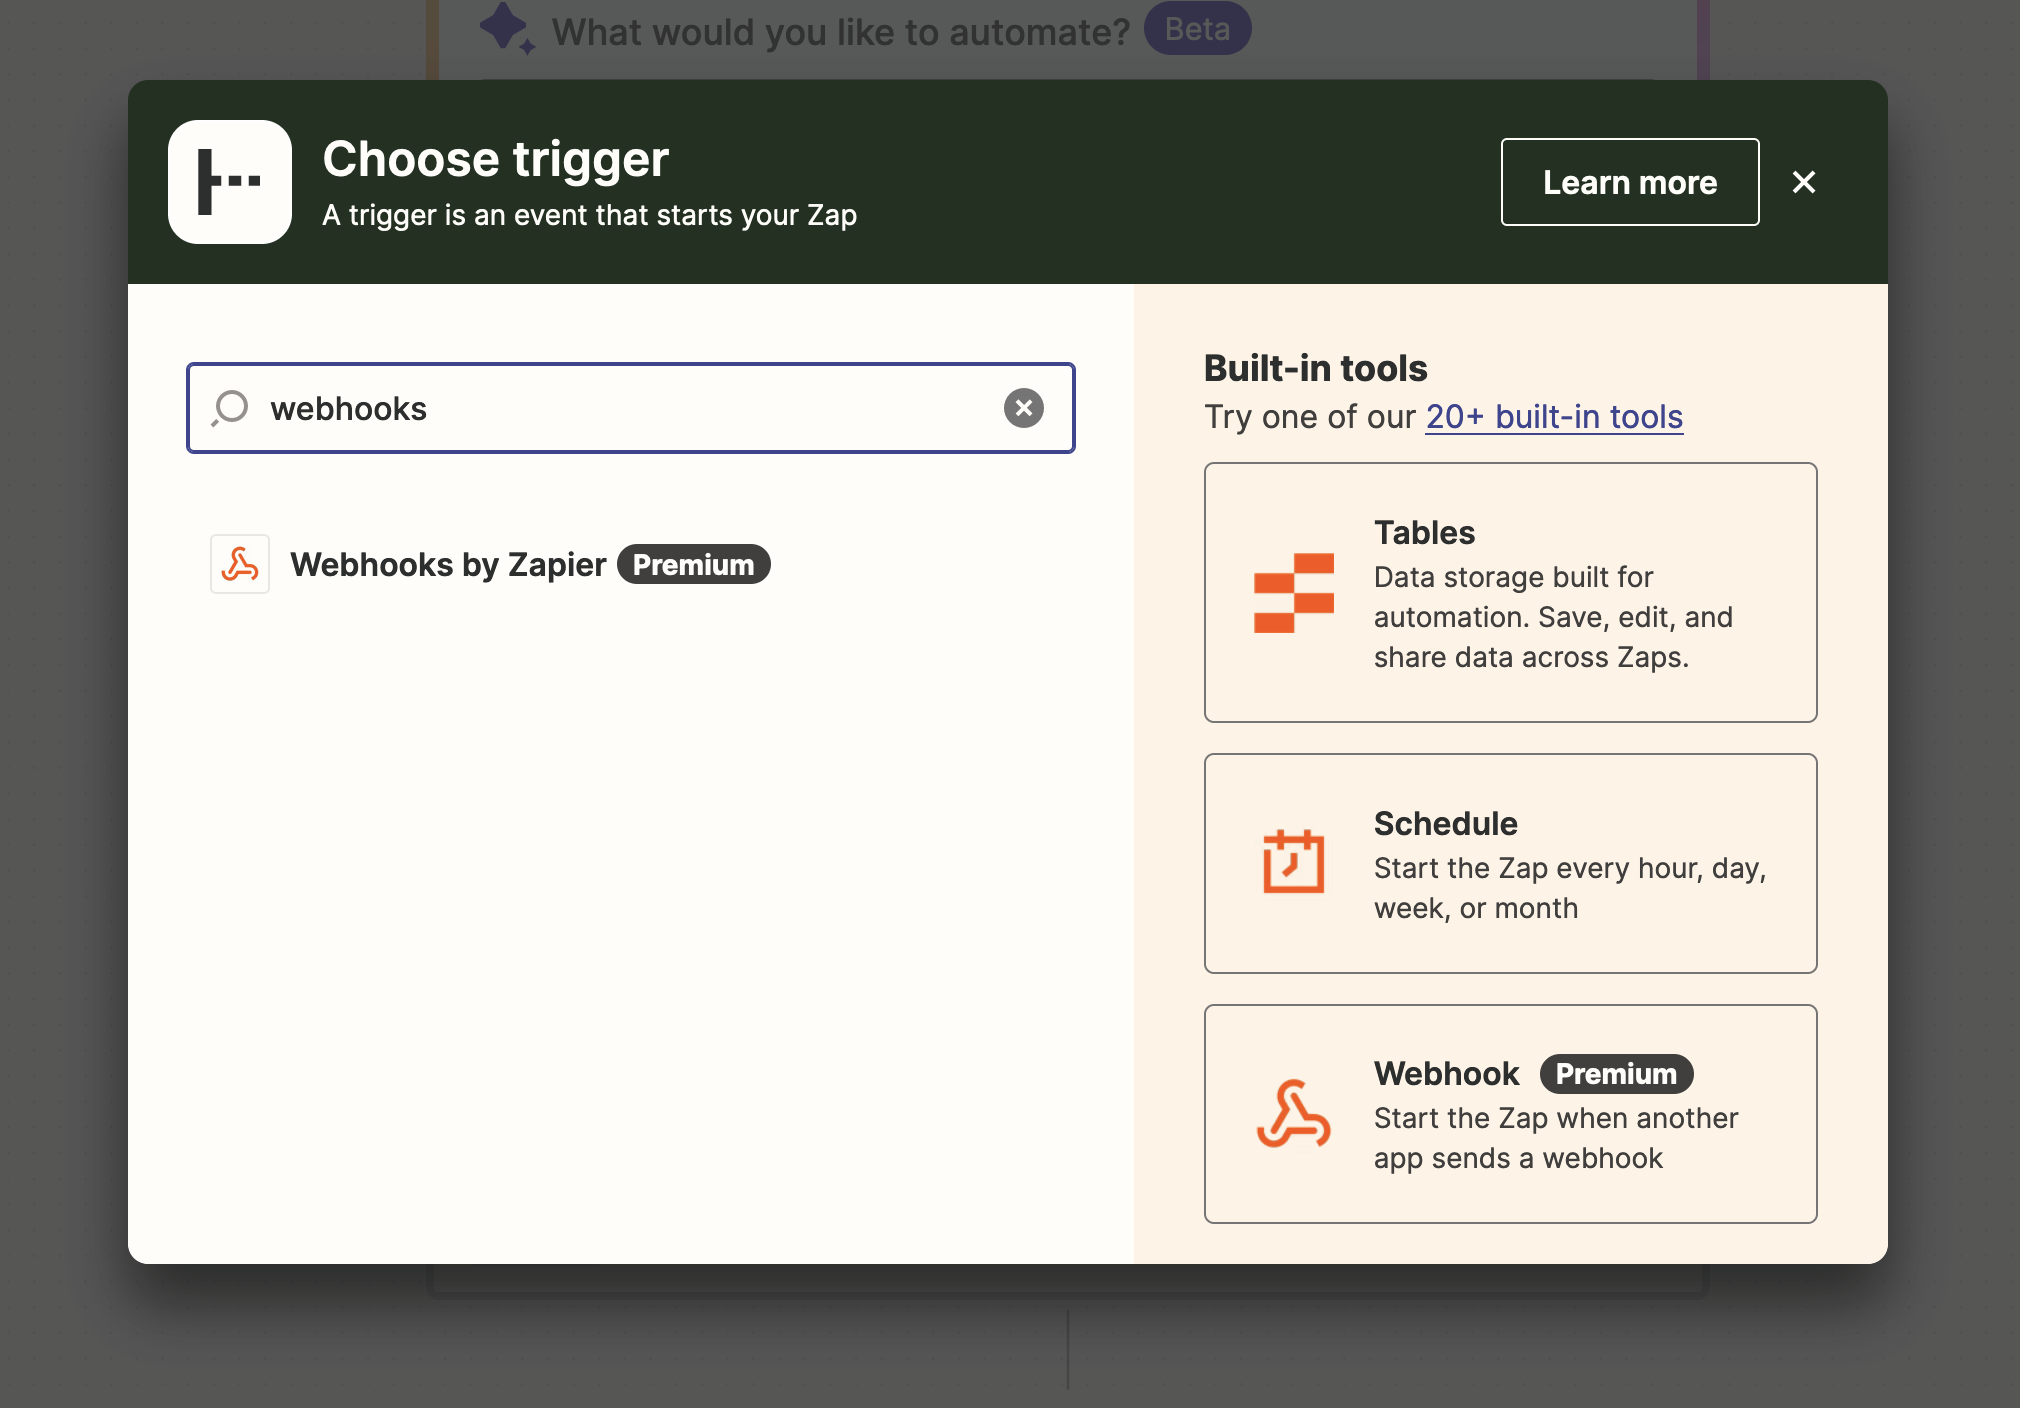
Choose the “Webhooks by Zapier” trigger.
-
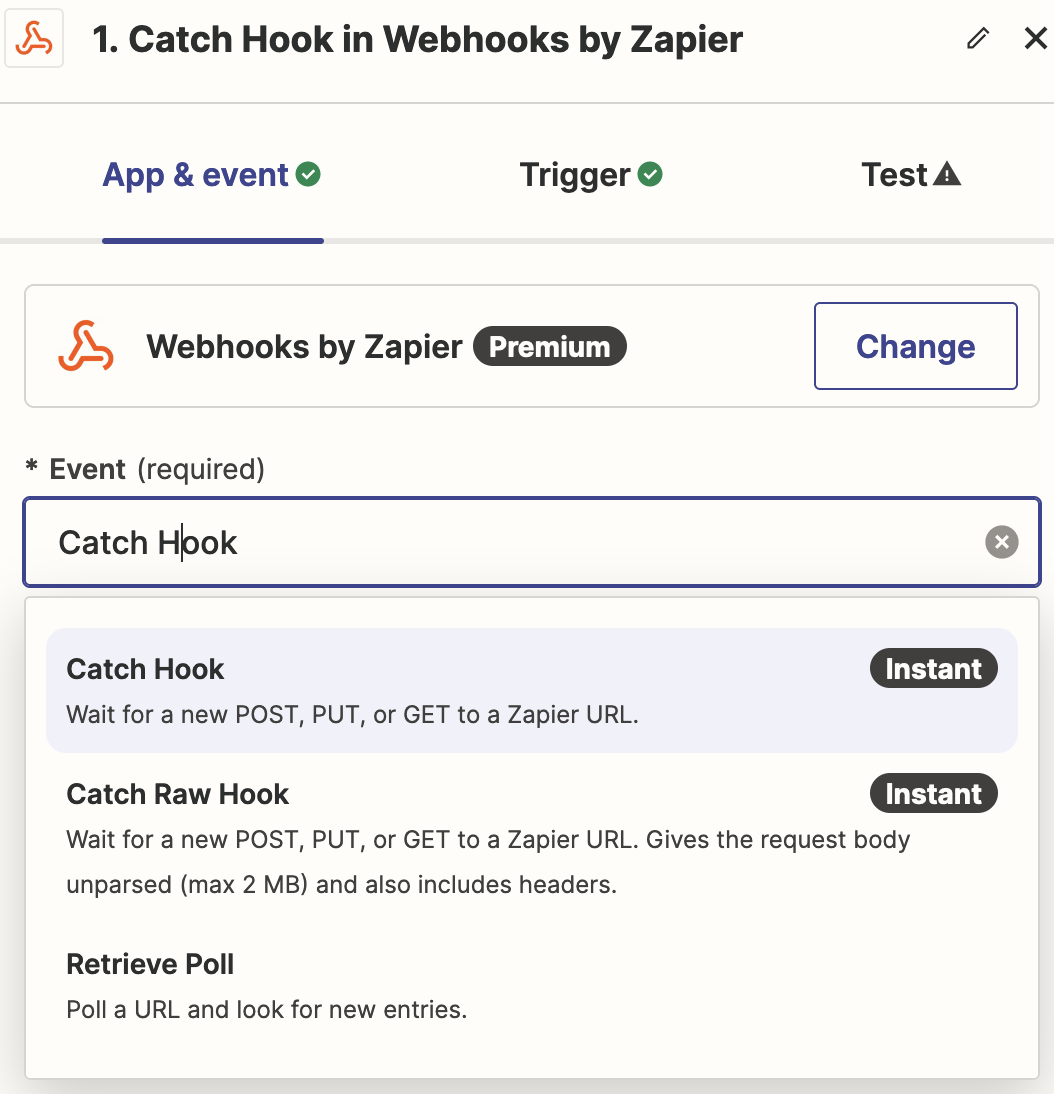
Select the added integration, use “Catch Hook” option as the event, and click “Continue”.
-
On the next screen (”Trigger”) click “Continue”.
-
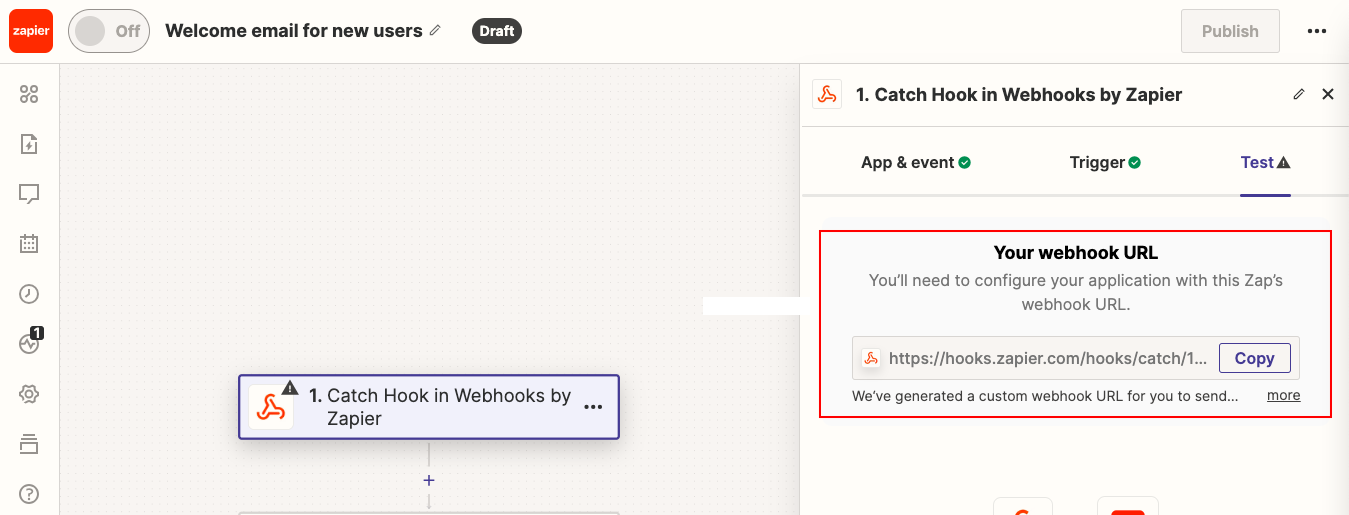
A webhook URL has been generated. “Copy the URL”.
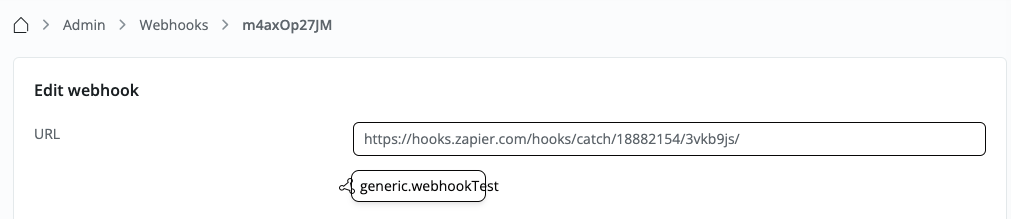
- Go back to your LoftOS application. “Paste the webhook URL” in the required field.
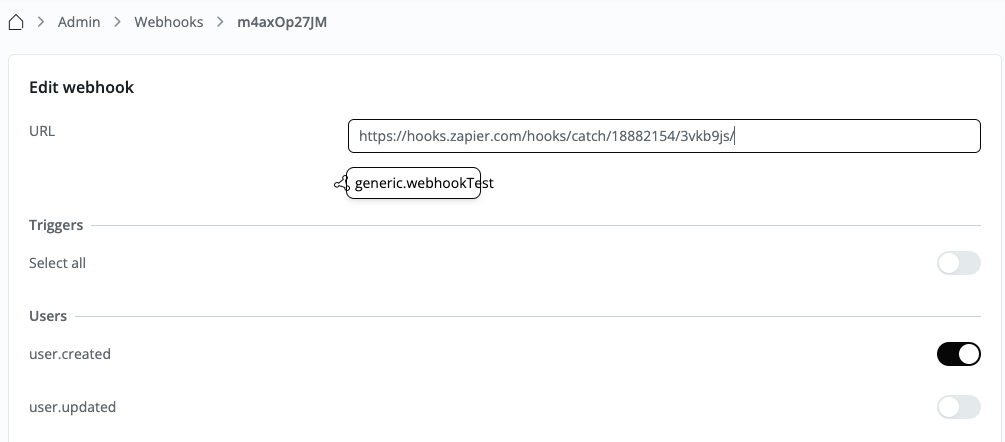
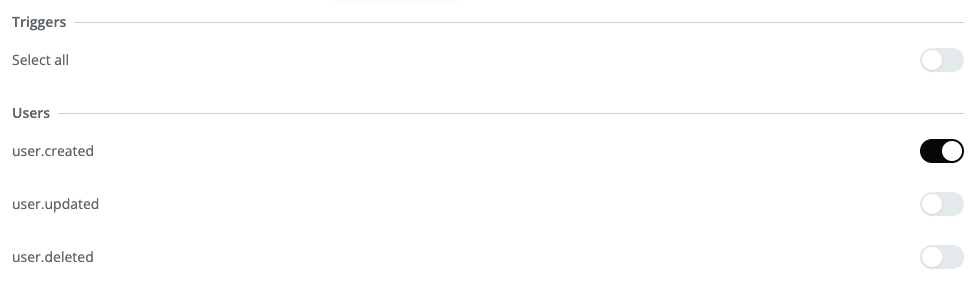
- Choose the specific event for which you want to trigger your webhook. For instance, if you wish to send a welcome e-mail to new users, select “user created” as the event, scroll to the bottom of the page, and “Save”.

- Click on “Test Webhook” to trigger the test.
- Select the event “User created”, this will trigger Zapier to create the event.

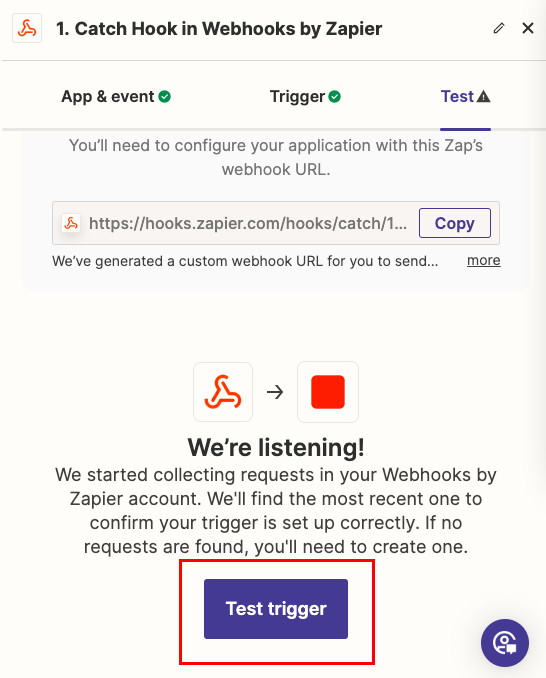
- Next, go back to your created webhook in Zapier and use “Test Trigger” , select the trigger you want to use and click “Test trigger”. This will make an example request, so Zapier knows the data it can work with.
-
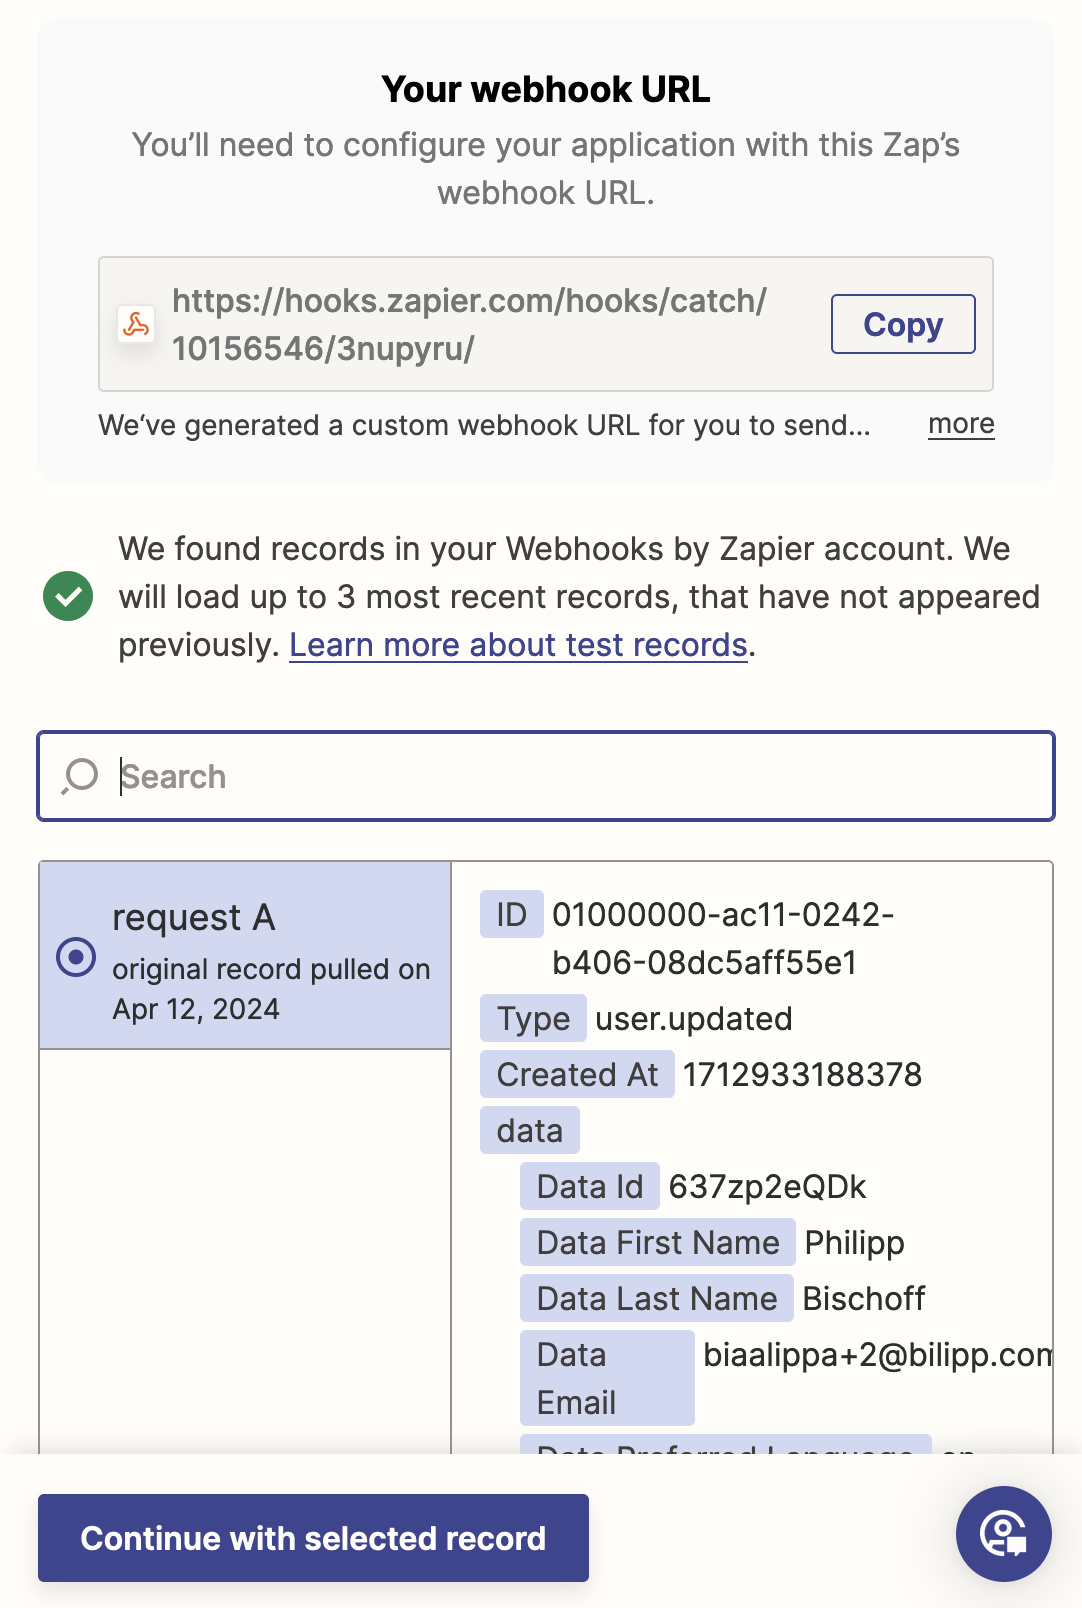
Now you should see a list with data like this:
-
Select “Continue with selected record”.
-
Next, we choose the action where we want to use our data. This can be any possible integration that Zapier offers. Like Salesforce, Pipedrive, Google Sheet or others. In this example we want to use the “Email by Zapier” action as we want to send a welcome e-mail to our new user. The sender will be Zapier. If you prefer to use your organization’s e-mail address to appear, please choose your e-mail provider.

-
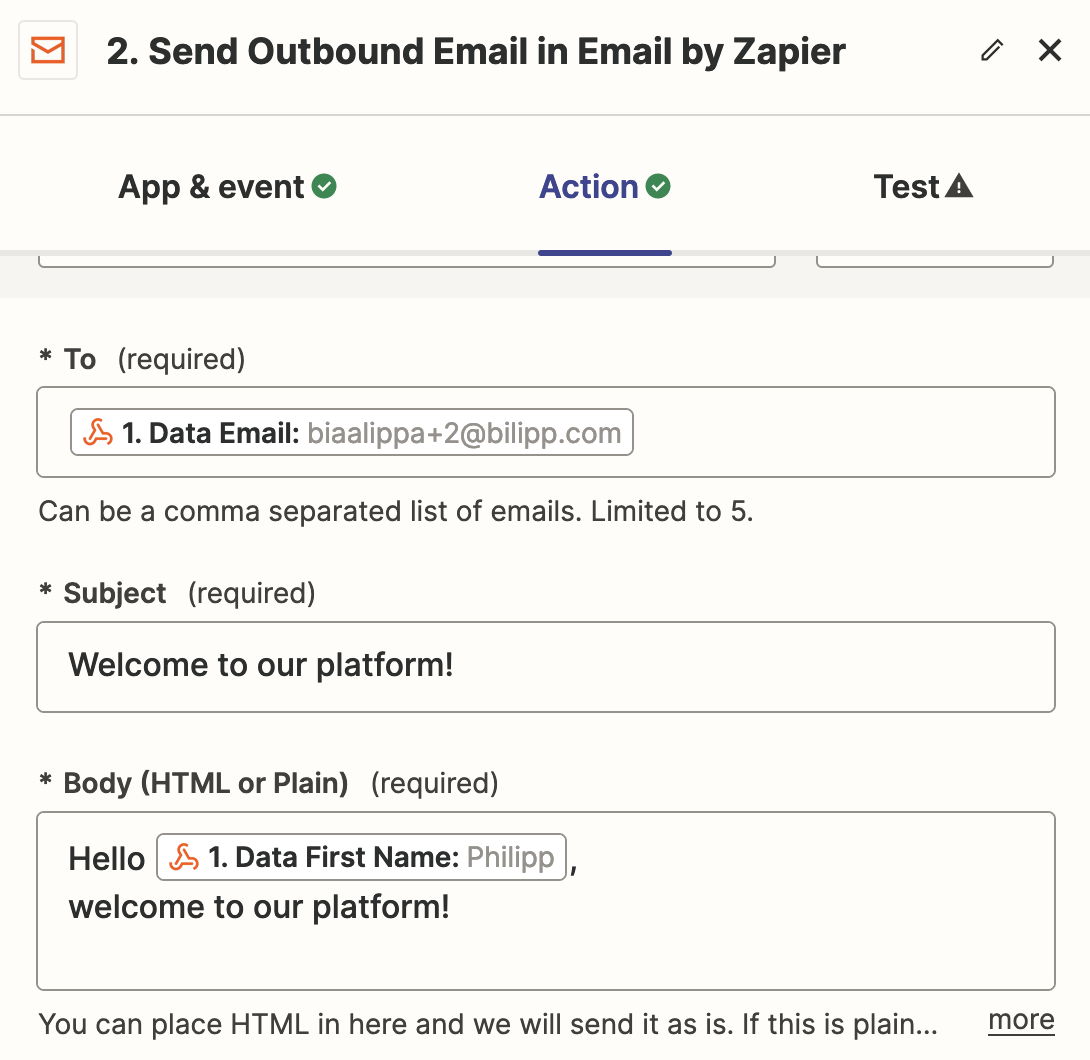
Select “Send Outbound Email” as event and click “Continue”.

-
In the next screen you can configure your e-mail. You can make use of the data that is used in the webhook. You will see the example values from the test webhook. This will be replaced with real data once the integration is activated.
-
Click “Continue” when you are done.
-
In the last step, you can test your integration.
💡 In case you require assistance with Zapier, please take a look at their Help Center.
Connect a webhook with n8n (Example: Send a welcome e-mail to a User)
Go to Admin → Other → Webhooks.
Start by selecting “+Webhook”.
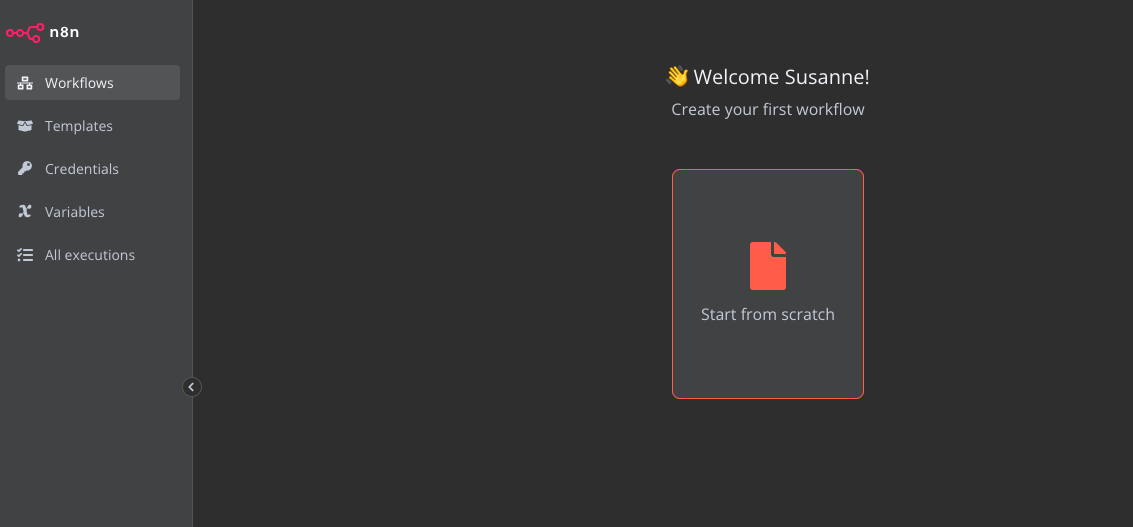
- Login to your n8n account. Select “Start from scratch”.
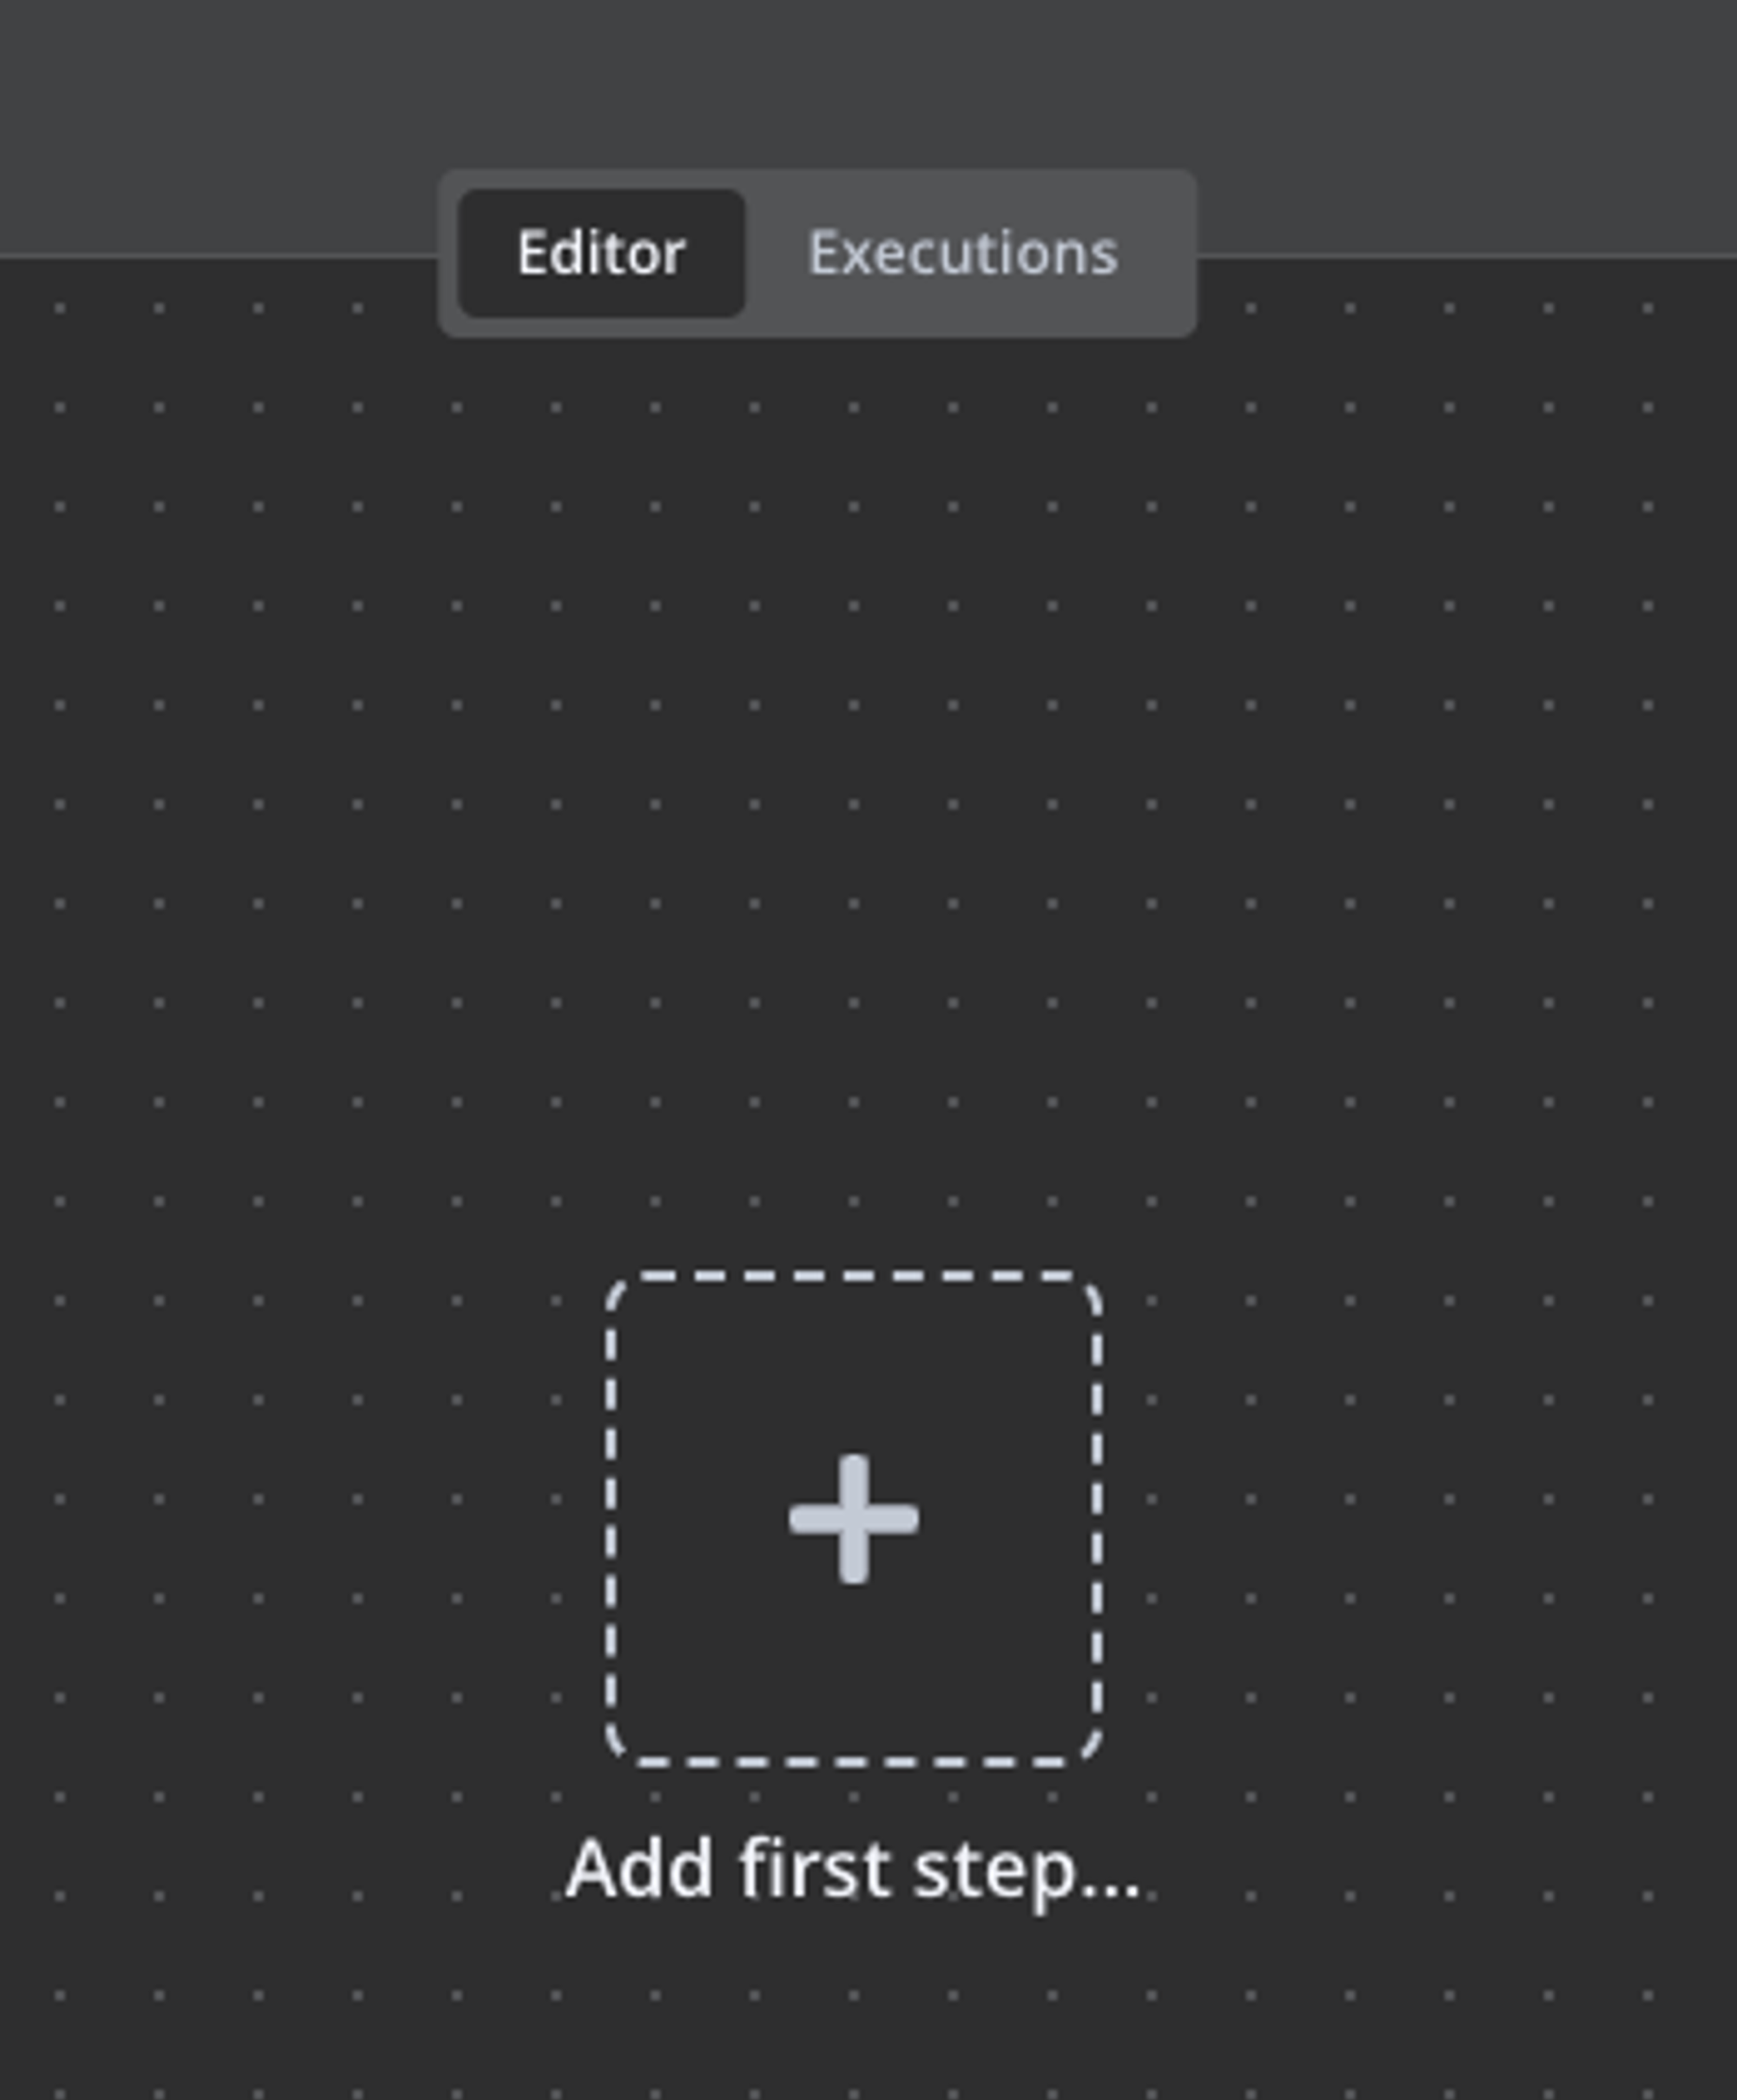
- Start by creating “Add first step…”.
-
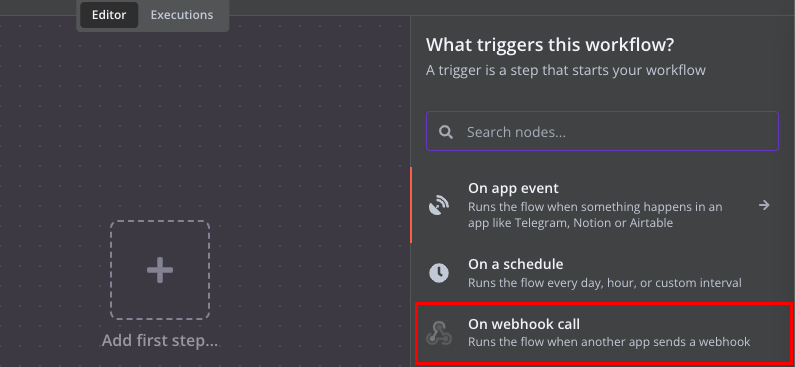
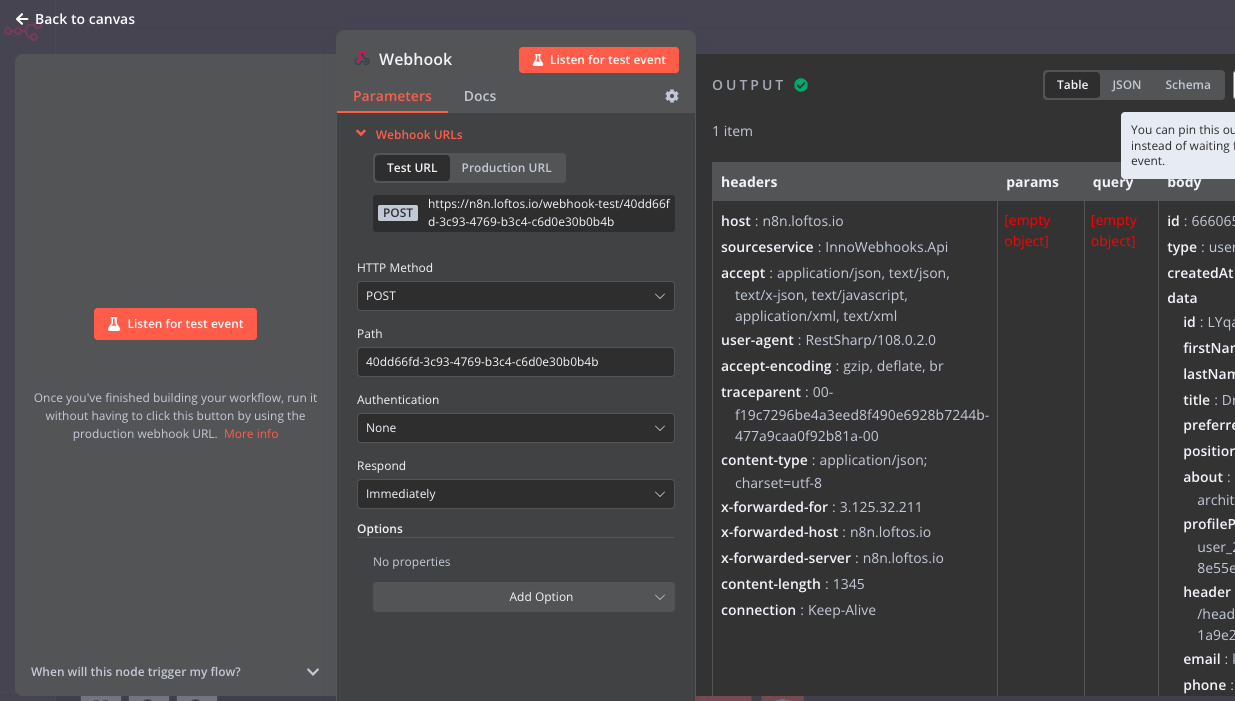
Select the “On webhook call” trigger.
-
A webhook URL has been generated. Put the HTTP Method on “POST”. “Copy the URL”.
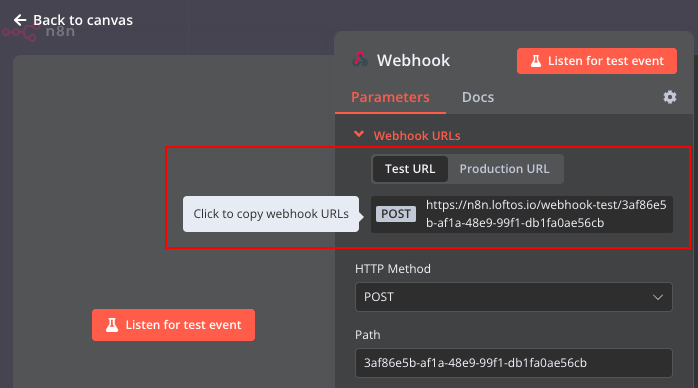
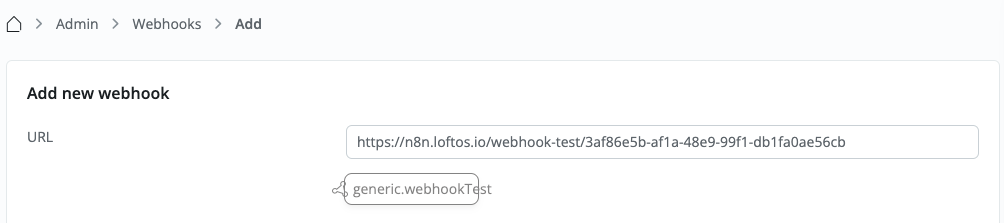
- Go back to your LoftOS application. “Paste the webhook URL”.
-
Choose the specific event for which you want to trigger your webhook. For instance, if you wish to send a welcome e-mail to new users, select “user created” as the event and “Save” at the bottom of the page.
-
Go back to your created webhook in n8n and select “Listen for test event”. Go back to your created webhook on your platform
-
Initiate the “Test Webhook”. This will trigger n8n to create the event.

-
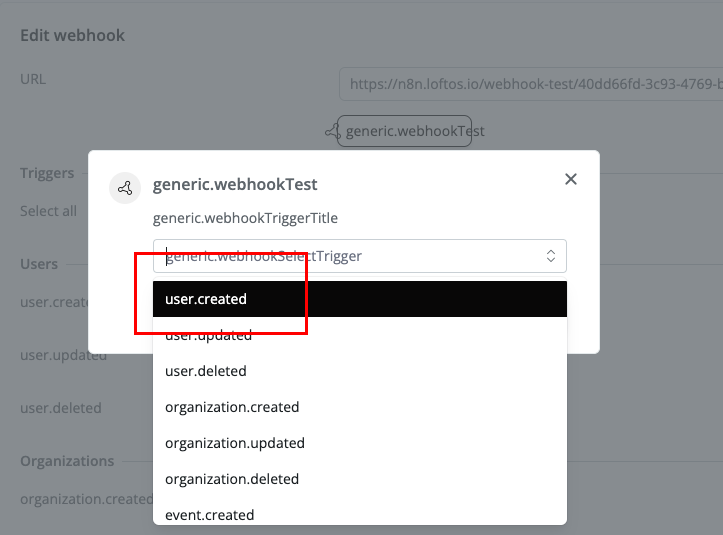
Select the event “User created” and click on “Test”.
-
You should now have data in your n8n board. Click now on Production URL and paste this URL in the webhook field on your platform.
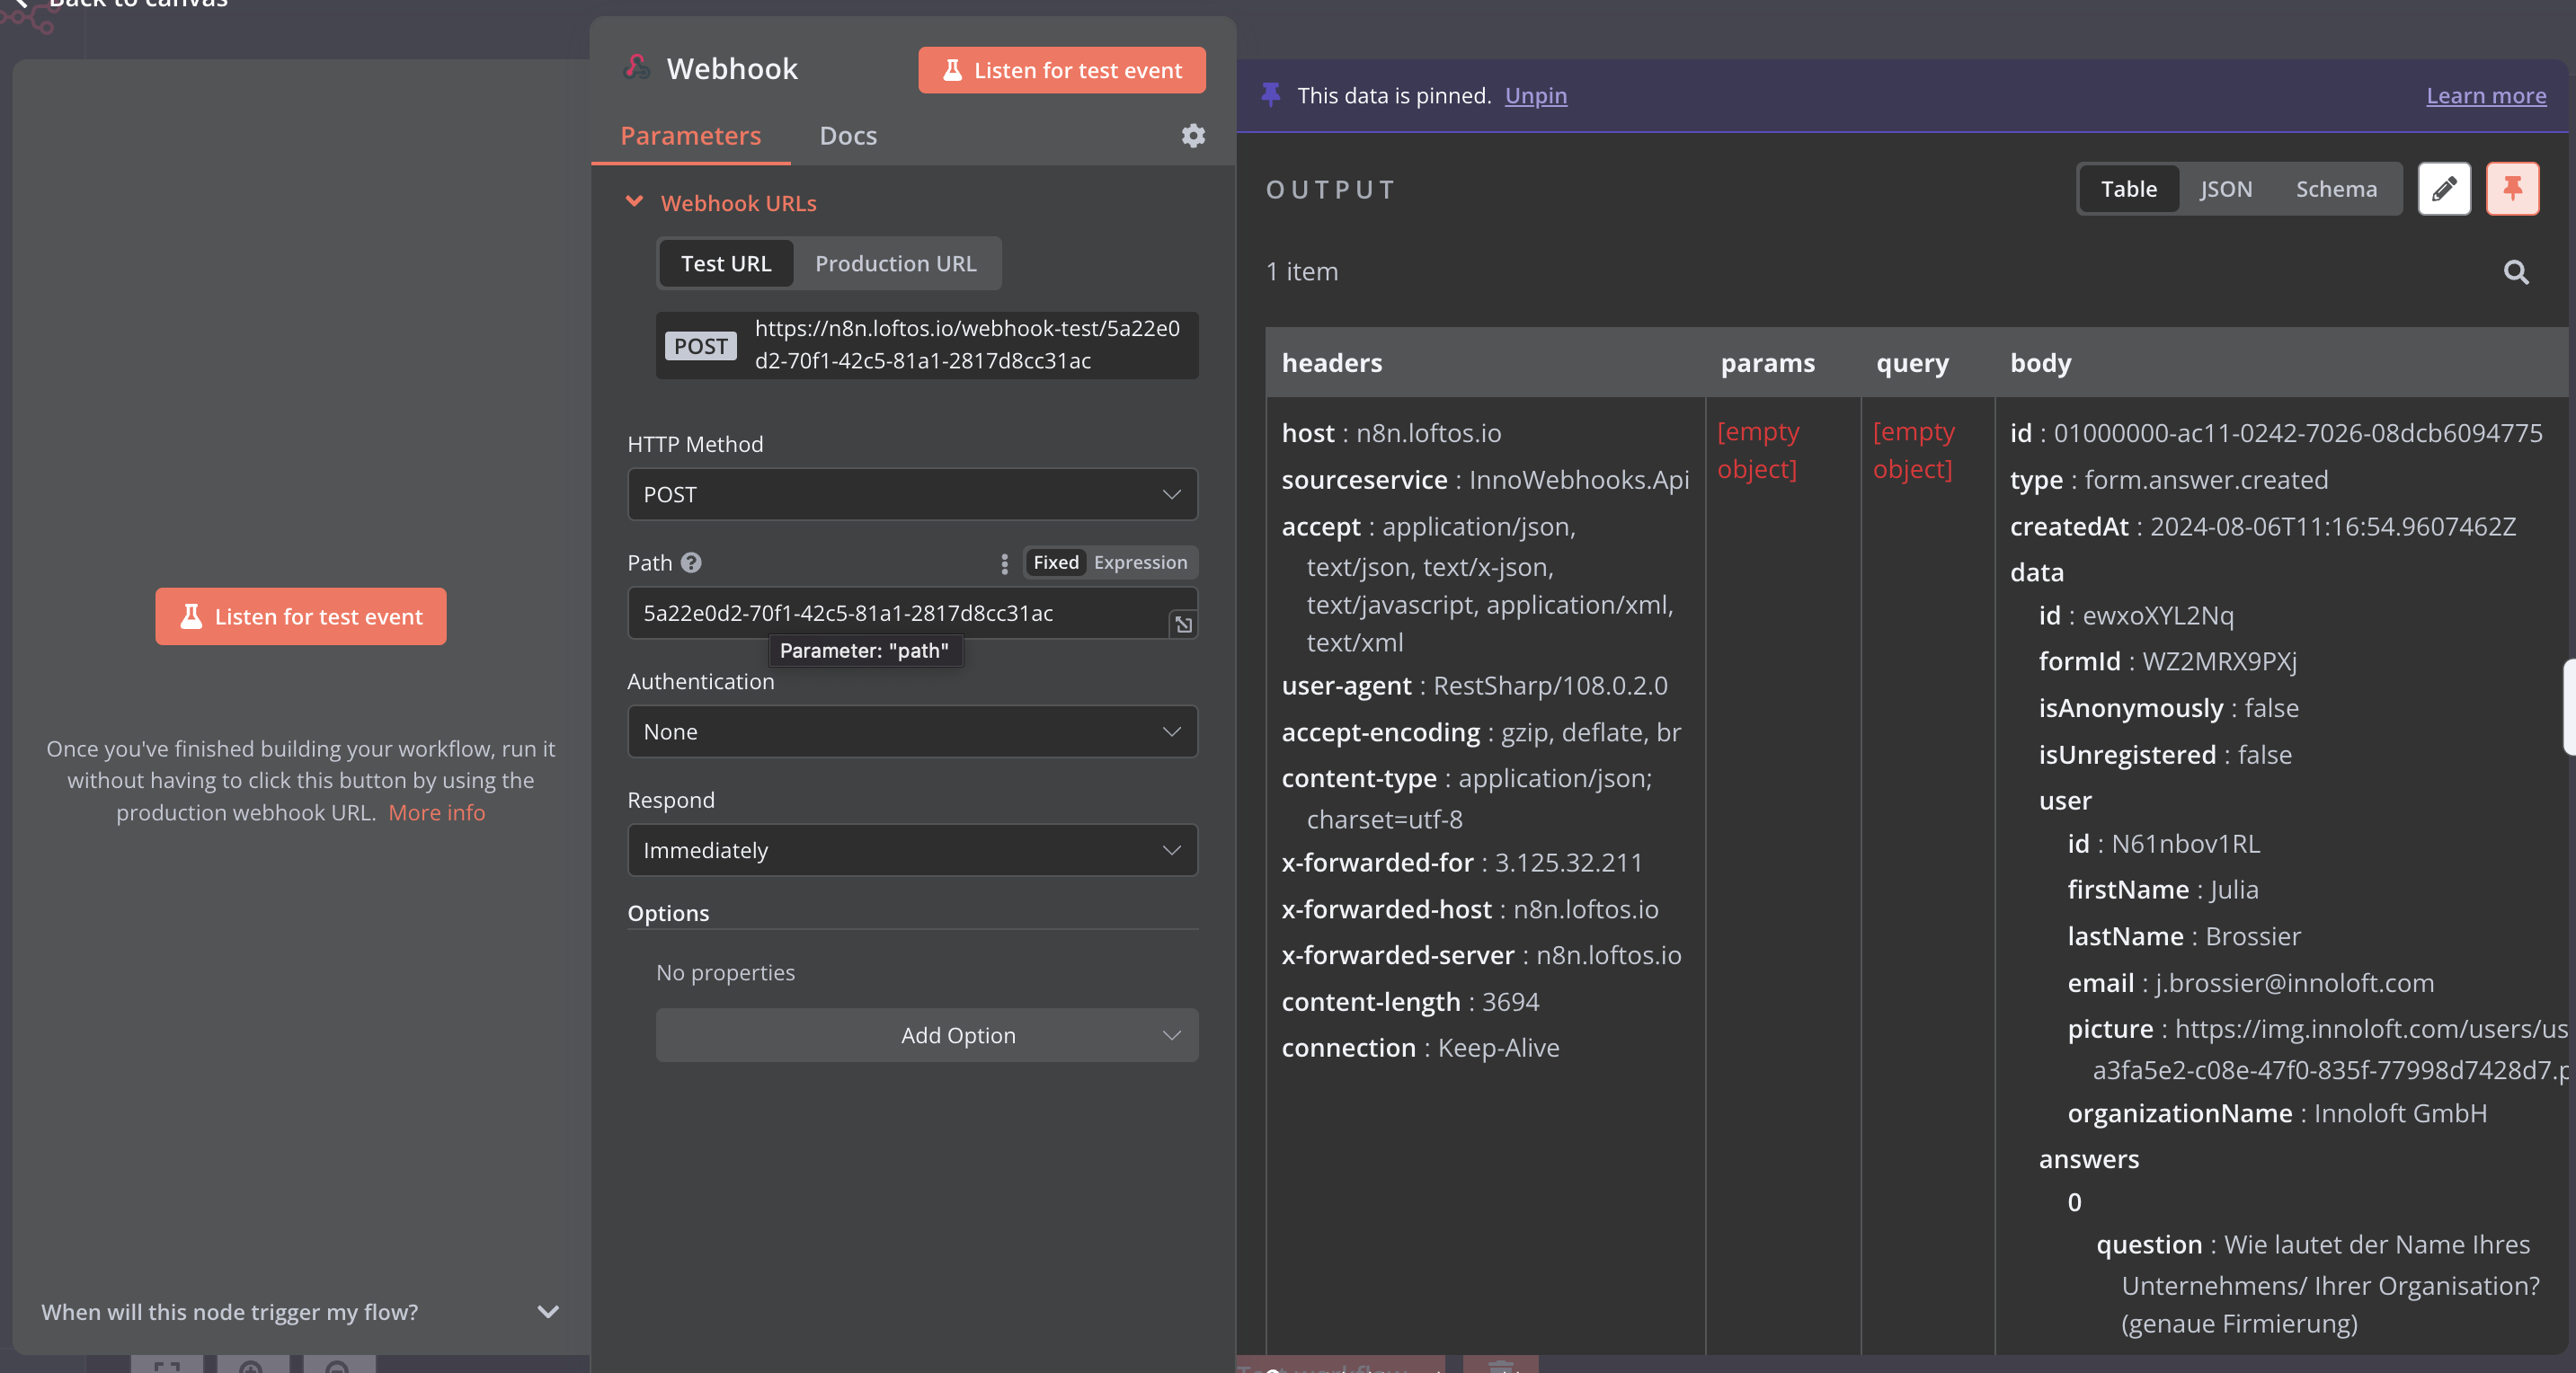
- To work with real data: Create a second webhook on your platform with the test url, linking the action you want to track.
- Click on listen, then take the action: register a user, register to an event, fill out a form, etc.
- You should now have the real data in the board on the right. Click on the pin button on the upper right.
- Next; go “Back to canvas”. Click on + and select the IF function
- On the left-hand side, look for the field “formID” and drop it in the field “value 1” of the conditions.
- Copy the value of your form, event, or custom module in the field “value 2”. Make sure that the condition is set to “equal to”.
- click on “test step”. If you get the output “branche item TRUE”, then everything is ok.
- Next, go “Back to canvas”. Click on + and select the automation you want to set up, eg. send out an email
- Connect your email account (you need to get these parameters from your email admin)
- Put the email addresses in the “To” field (if you have several addresses, you need to separate them with a “,”
- Type in the message you want to send
- Test the step.
- Go back to your canvas flow. Save your flow and activate it.
💡 In case you require assistance with n8n, please take a look at their Help Center.
Connect a webhook with Make.com
You need to create an account on make.com
Receive an email when a new user registers
-
Create a new scenario
-
Download the file here below. Then, on the bottom bar click on the three points and click on “Import blueprint”.
-
Click on the webhook icon - Add - Type in the name “New user created” - Save. Click on “copy address to clipboard”
-
Go to your platform - admin - other - webhooks.
-
Add a new webhook and paste the url from make in the field “URL”.
-
Activate the toggle “user created” and save your webhook.
-
Open your webhook and click on “test webhook”. In the dropdown list, select “user created” and click on test.
-
Now, go back to your scenario within make and click on the Gmail icon
- If you are not using Gmail, delete this icon (right click - delete), then click on +add a module and search for your email provider in the list.
-
Connect your email account.
-
Add the email address to which the email should be sent and a subject.
-
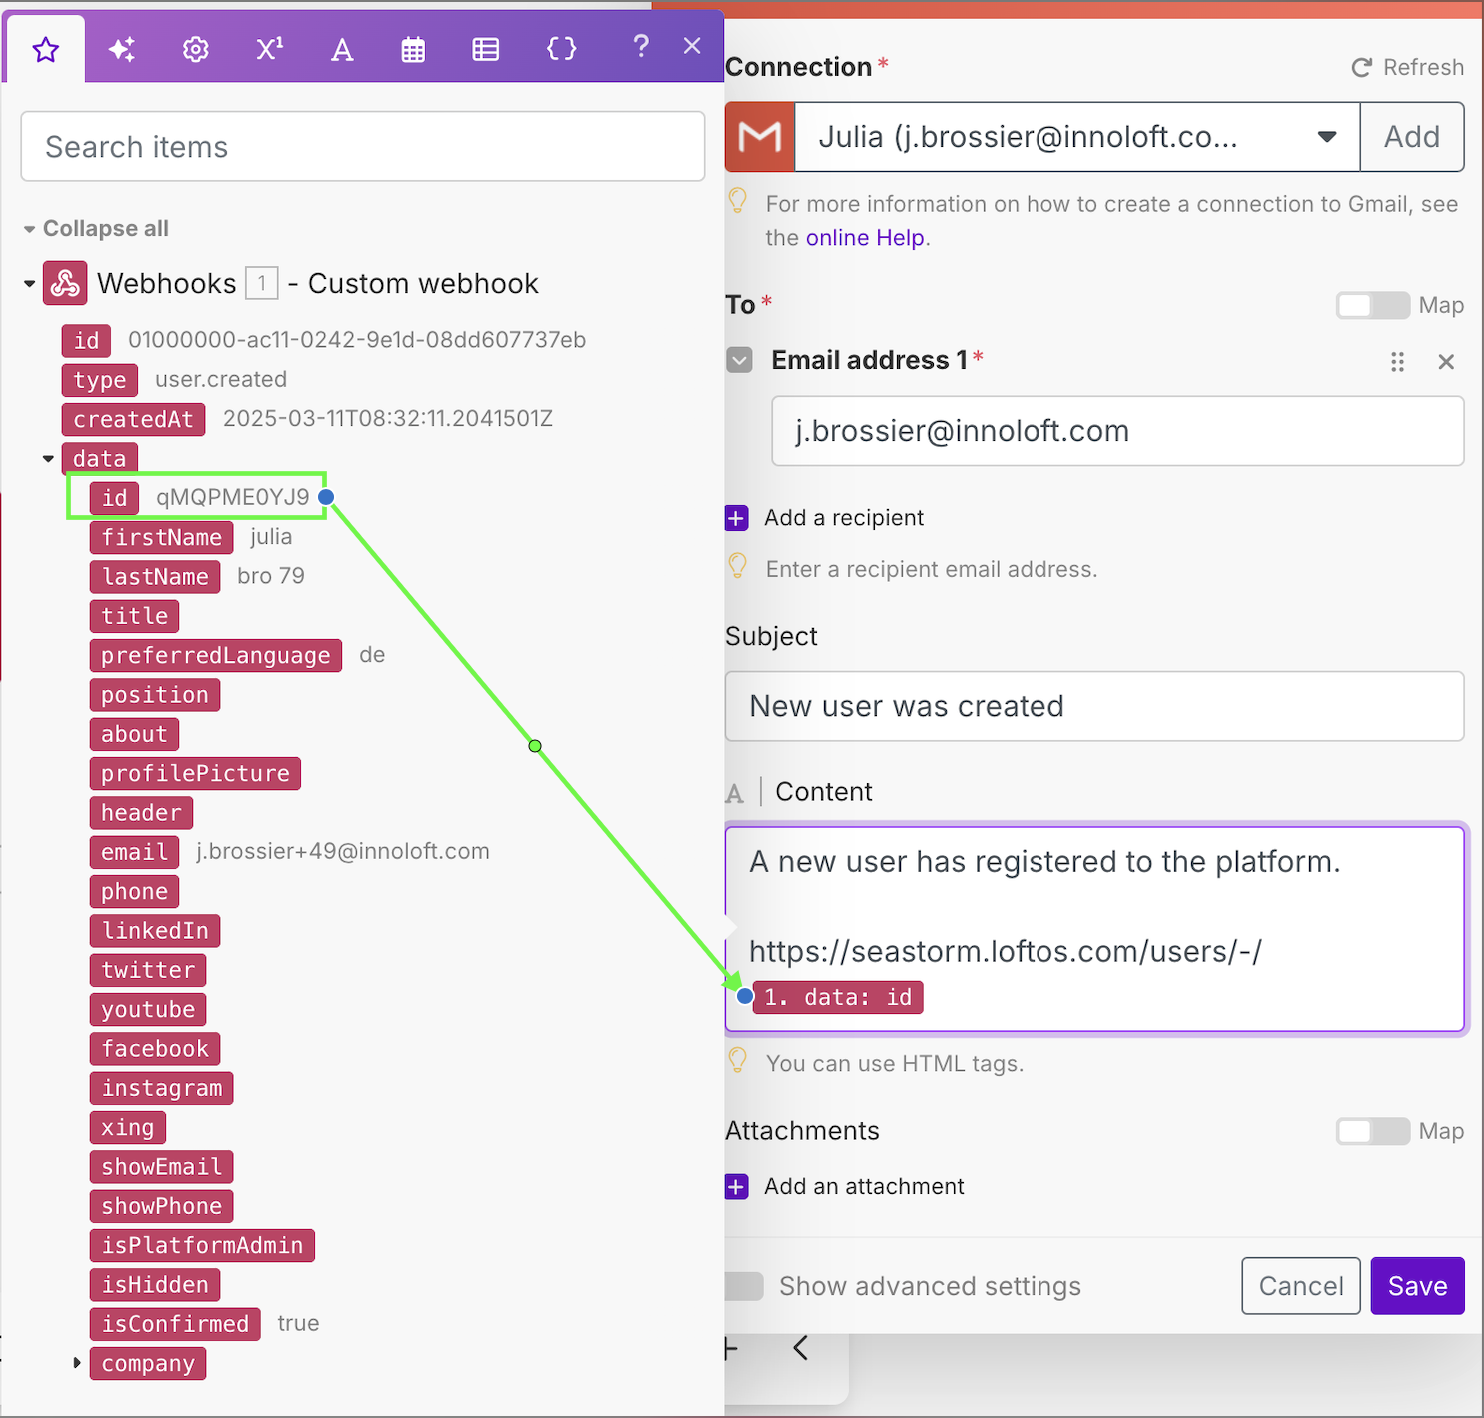
Within the content field, add your text and link the user profile by using: platformurl/users/-/”id field”. You need to drag and drop the id-field from the list of fields that pops up when you click within the content field.
-
Click on save, then right click on the email icon and choose “run this module only”. Type in an id - you should now receive a test email if the setup works.
-
Save your scenario on the bottom bar and activate the toggle next to “Immediately as data arrives”. Your scenario is now active.
-
Click on scenarios on the left: you see here an overview of all your scenarios.
-
To test your scenario, create a test user on your platform: you should receive an email with the link to the new user’s profile.
Receive an email when a user profile is updated
-
Create a new scenario
-
Download the file below. Then, on the bottom bar click on the three points and click on “Import blueprint”
-
Click on the webhook icon - Add - Type in the name “ user updated” - Save. Click on “copy address to clipboard”
-
Go to your platform - admin - other - webhooks.
-
Add a new webhook and paste the url from make in the field “URL”.
-
Activate the toggle “user updated” and save your webhook.
-
Open your webhook and click on “test webhook”. In the dropdown list, select “user updated” and click on test.
-
Now, go back to your scenario within make and click on the Gmail icon
- If you are not using Gmail, delete this icon (right click - delete), then click on +add a module and search for your email provider in the list.
-
Connect your email account.
-
Add the email address to which the email should be sent and a subject.
-
Within the content field, add your text and link the user profile by using: platformurl/users/-/”id field”. You need to drag and drop the id-field from the list of fields that pops up when you click within the content field.
-
Click on save, then right click on the email icon and choose “run this module only”. Type in an id - you should now receive a test email if the setup works.
-
Save your scenario on the bottom bar and activate the toggle next to “Immediately as data arrives”. Your scenario is now active.
-
Click on scenarios on the left: you see here an overview of all your scenarios.
-
To test your scenario, update a test user on your platform: you should receive an email with the link to the updated user’s profile.
🎨 Individualization Options
Here are several ways to use webhooks for various use cases:
A new user registers on your platform:
- Add to Email Marketing List:
- Trigger: A new user registers on your platform.
- Webhook Action: Webhook adds the user’s information to your email marketing tool (e.g., Mailchimp, Mailer lite).
- Welcome Email:
- Trigger: A new user registration.
- Webhook Action: Webhook sends a personalized welcome email to the new user via your email service (e.g., Gmail, Outlook).
- Update CRM:
- Trigger: A new user registers.
- Webhook Action: Webhook creates or updates the user's profile in your CRM (e.g., Salesforce, HubSpot).
- Notify Team on Slack:
- Trigger: A new user registration.
- Webhook Action: Webhook sends a notification to a designated Slack channel to inform your team.
- Add to Project Management Tool:
- Trigger: A new user registers.
- Webhook Action: Webhook creates a new task or entry in your project management tool (e.g., Trello, Asana) to follow up with the new user.
- Create Support Ticket:
- Trigger: A new user registration.
- Webhook Action: Webhook creates a support ticket in your helpdesk software (e.g., Zendesk, Freshdesk) for onboarding support.
- Add to Webinar or Event:
- Trigger: A new user registration.
- Webhook Action: Webhook registers the user for an upcoming webinar or event using a tool like Zoom or Eventbrite.
- Update Google Sheets:
- Trigger: A new user registers.
- Webhook Action: Webhook adds the user’s details to a Google Sheets spreadsheet for record-keeping and analysis.
Using this automation, you can ensure that new user registrations trigger a series of actions that enhance user engagement, streamline your workflows, and maintain efficient communication across your team and tools.
Event registration:
Here is an example of how you can use Webhooks to streamline your event ticket sales:
- Connect your Ticketing Platform and Email Marketing Tool:
- Trigger: A new ticket is purchased on your ticketing platform (e.g., Eventbrite).
- Webhook Action: Webhook automatically adds the purchaser's information to your email marketing tool (e.g., Mailchimp).
- Automate Confirmation Emails:
- Trigger: A ticket is sold.
- Webhook Action: Webhook sends a personalized confirmation email to the buyer via your email service (e.g., Gmail).
- Update your CRM:
- Trigger: A new ticket purchase.
- Webhook Action: Webhook creates or updates the contact information in your CRM (e.g., Salesforce).
- Post to Social Media:
- Trigger: When a certain number of tickets are sold.
- Webhook Action: Webhook posts an update on your social media accounts (e.g., Twitter, Facebook, Instagram).
- Generate and Send Invoices:
- Trigger: A ticket is sold.
- Webhook Action: Webhook creates and sends an invoice through your accounting software (e.g., QuickBooks).
These automated workflows save time, reduce manual data entry, and ensure that your customers receive timely and accurate communications.
Forms:
- Add new subscribers to an email list:
- Trigger: New form submission.
- Webhook Action: Adds the respondent’s email address and details to your email marketing tool (e.g., Mailchimp, Constant Contact).
- Notify your Team:
- Trigger: New form submission.
- Webhook Action: Sends a notification to a Slack channel or via email to inform your team about the new submission.
- Generate Support Tickets:
- Trigger: New form submission.
- Webhook Action: Creates a new support ticket in your helpdesk software (e.g., Zendesk, Freshdesk).
- Send Confirmation Emails:
- Trigger: New form submission.
- Webhook Action: Automatically sends a personalized confirmation email to the respondent via your email service provider (e.g., Gmail, Outlook).
Using Webhooks with forms helps automate data collection and processing, reducing manual effort and ensuring timely actions based on form submissions.
Custom Modules:
Here are several ways to use webhooks for example with job openings:
- Notify HR Team:
- Trigger: A new job application is submitted.
- Webhook Action: Sends an instant notification to the HR team’s Slack channel or email.
- Update Applicant Tracking System (ATS):
- Trigger: A new job application is received.
- Webhook Action: Automatically adds the applicant's information to your ATS (e.g., Greenhouse, Workable).
- Send Confirmation Emails:
- Trigger: An application is submitted.
- Webhook Action: Sends a confirmation email to the applicant.
- Create Tasks in Project Management Tools:
- Trigger: A new job application or interview is scheduled.
- Webhook Action: Creates tasks in project management tools like Asana or Trello to remind team members to review applications or prepare for interviews.
- Update Database:
- Trigger: A new job posting is created.
- Webhook Action: Updates the job openings section on your company website or internal database.
- Integrate with Calendar:
- Trigger: An interview is scheduled.
- Webhook Action: Automatically adds the interview details to the interviewer's calendar (e.g., Google Calendar, Outlook).
- Post to Job Boards:
- Trigger: A new job opening is created.
- Webhook Action: Automatically posts the job opening to various job boards and social media platforms.
- Generate Reports:
- Trigger: A certain number of applications are received.
- Webhook Action: Generates a report and sends it to the hiring manager or team.
- Custom Notifications:
- Trigger: Specific application criteria are met (e.g., a candidate with certain qualifications applies).
- Webhook Action: Sends a custom notification to relevant team members.
- Integrate with CRM:
- Trigger: A job application is submitted.
- Webhook Action: Adds the applicant's details to your CRM for follow-up and tracking.
By using webhooks, you can automate many aspects of the job application and hiring process, improving efficiency and ensuring timely communication with applicants and your team.
💡 Currently, it is not possible to receive automatic updates in LoftOS from your third-party app. For example, if you update information in your CRM, it will not be automatically reflected in LoftOS.
❓ FAQs
- Is it possible to add the event XY? Currently, the list of events that can be connected to a webhook is fixed. To discuss tracking a specific event with a webhook, please contact your CSM.