📋 Projects
💡 Introduction
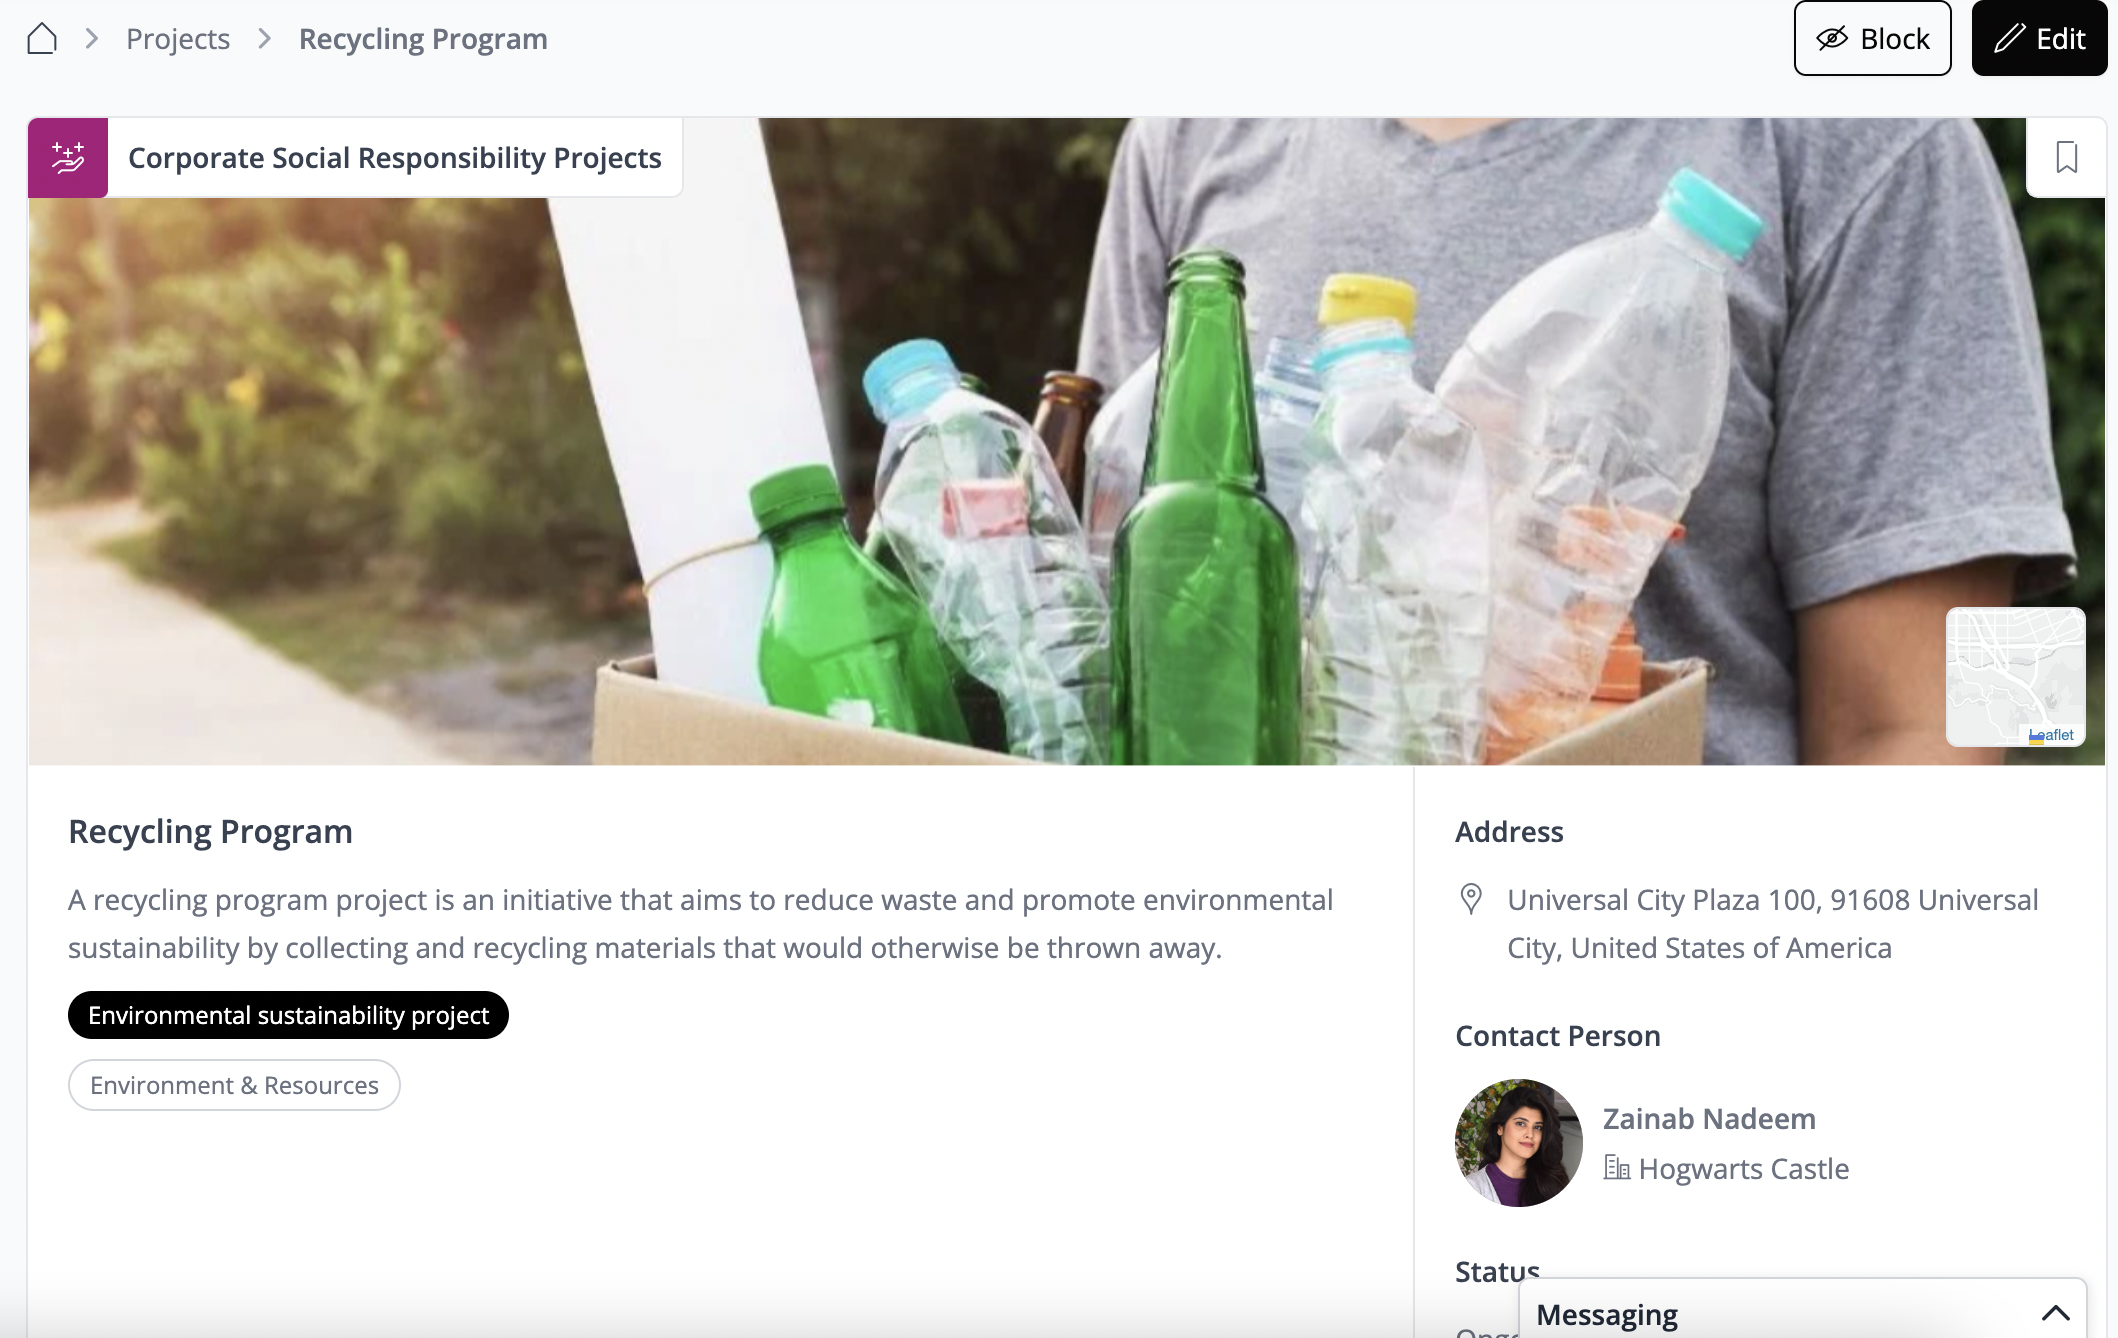
The platform empowers users to showcase innovation or research projects, facilitating knowledge exchange and community collaboration. Users have the flexibility to publish both completed and ongoing projects.
Within each project profile, users can provide a concise overview of the problem addressed, their approach, outcomes, and project budget and duration. Additionally, users can link collaborating partners to the project profile, inviting them to join the network. Through the Requests module, users can actively search for and be matched with compatible project partners, fostering meaningful collaborations.
👩🏻💻 Usage
Create a Project
🎨 Individualization Options
Project Database
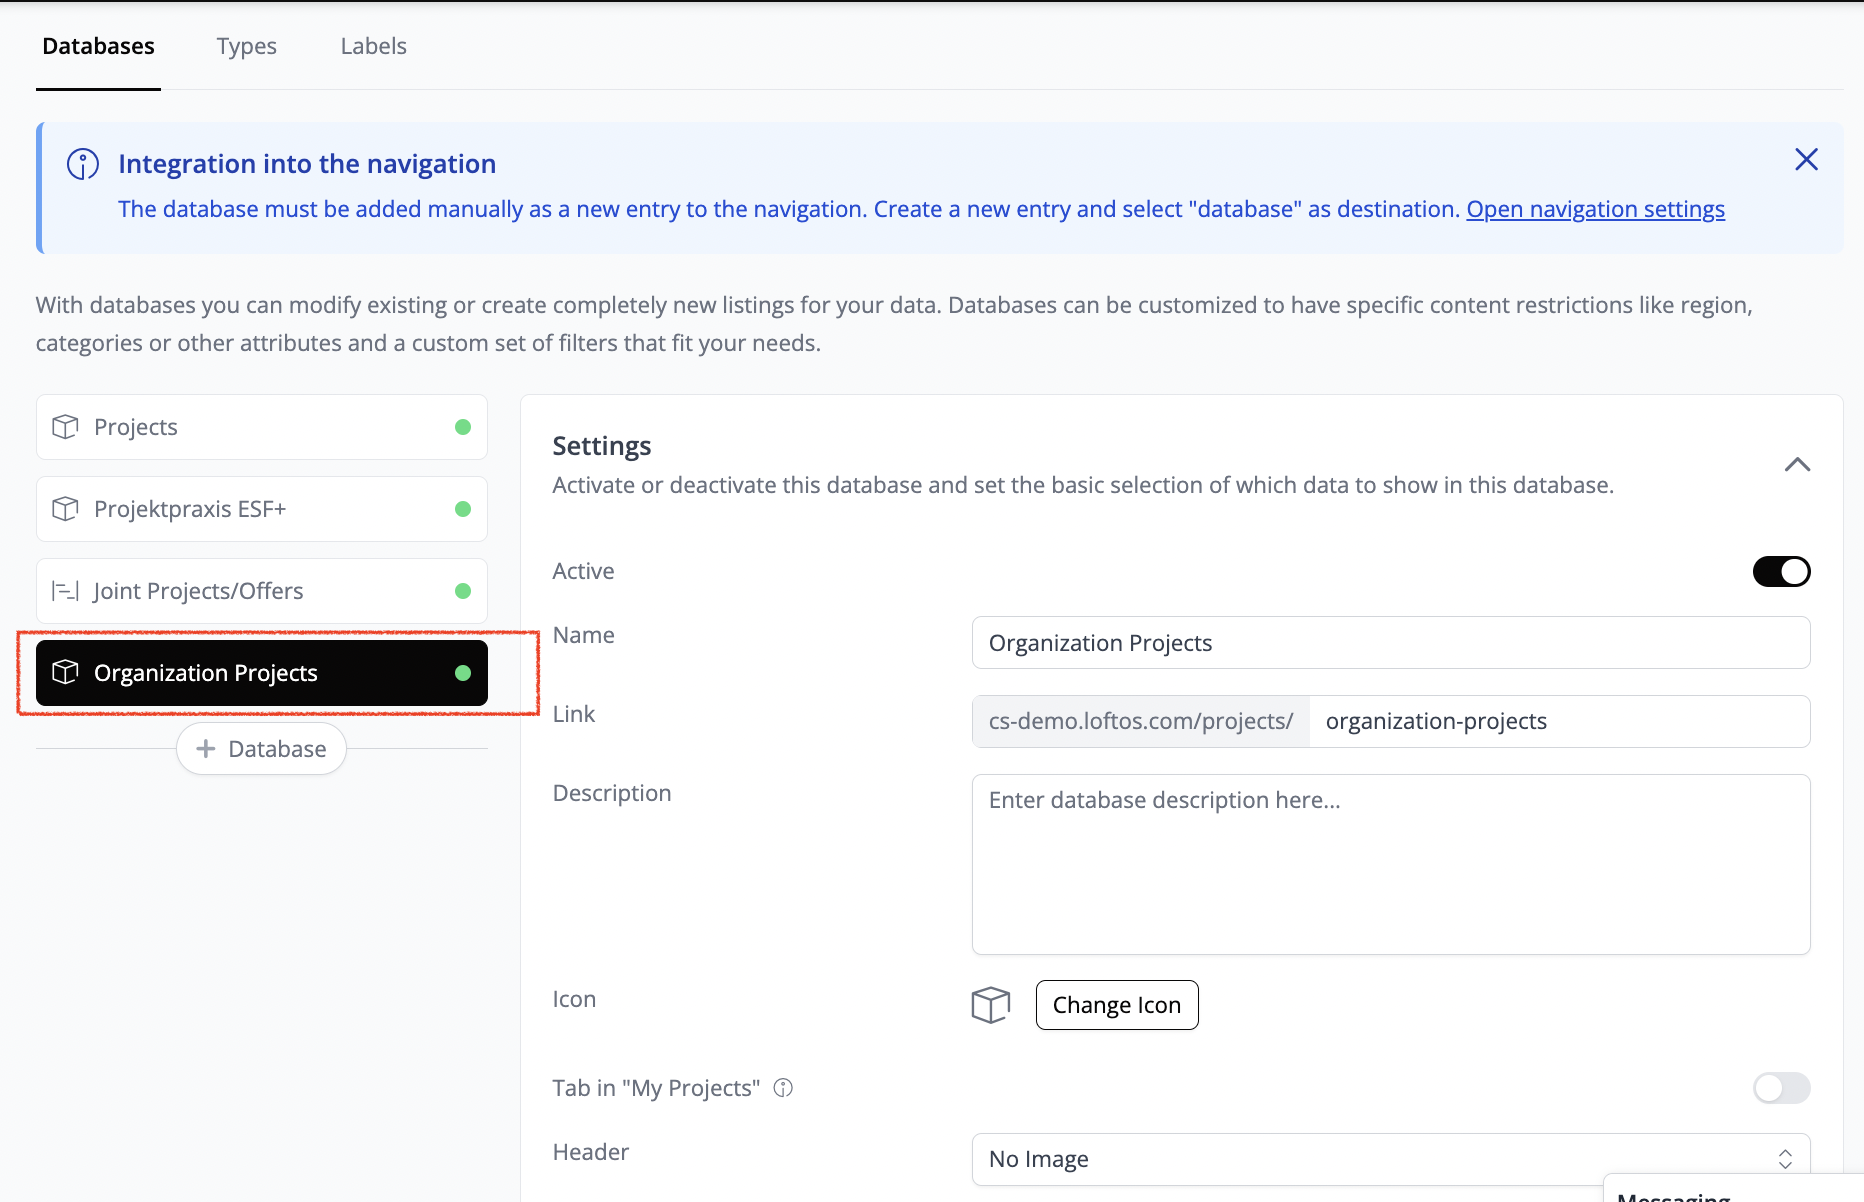
Like Offers, Requests, and News, you can configure a database, create specific types, and assign labels for Projects. Initially, we will define individual types within the default Projects database. However, you also have the flexibility to create a new database for your Projects, following the same steps outlined for Offers, Requests, and News. Be sure to activate this new database from the Navigation settings to seamlessly integrate it as a navigation point.
Types
To illustrate, let's outline the steps for creating a new individual type for Corporate Social Responsibility (CSR) Projects:
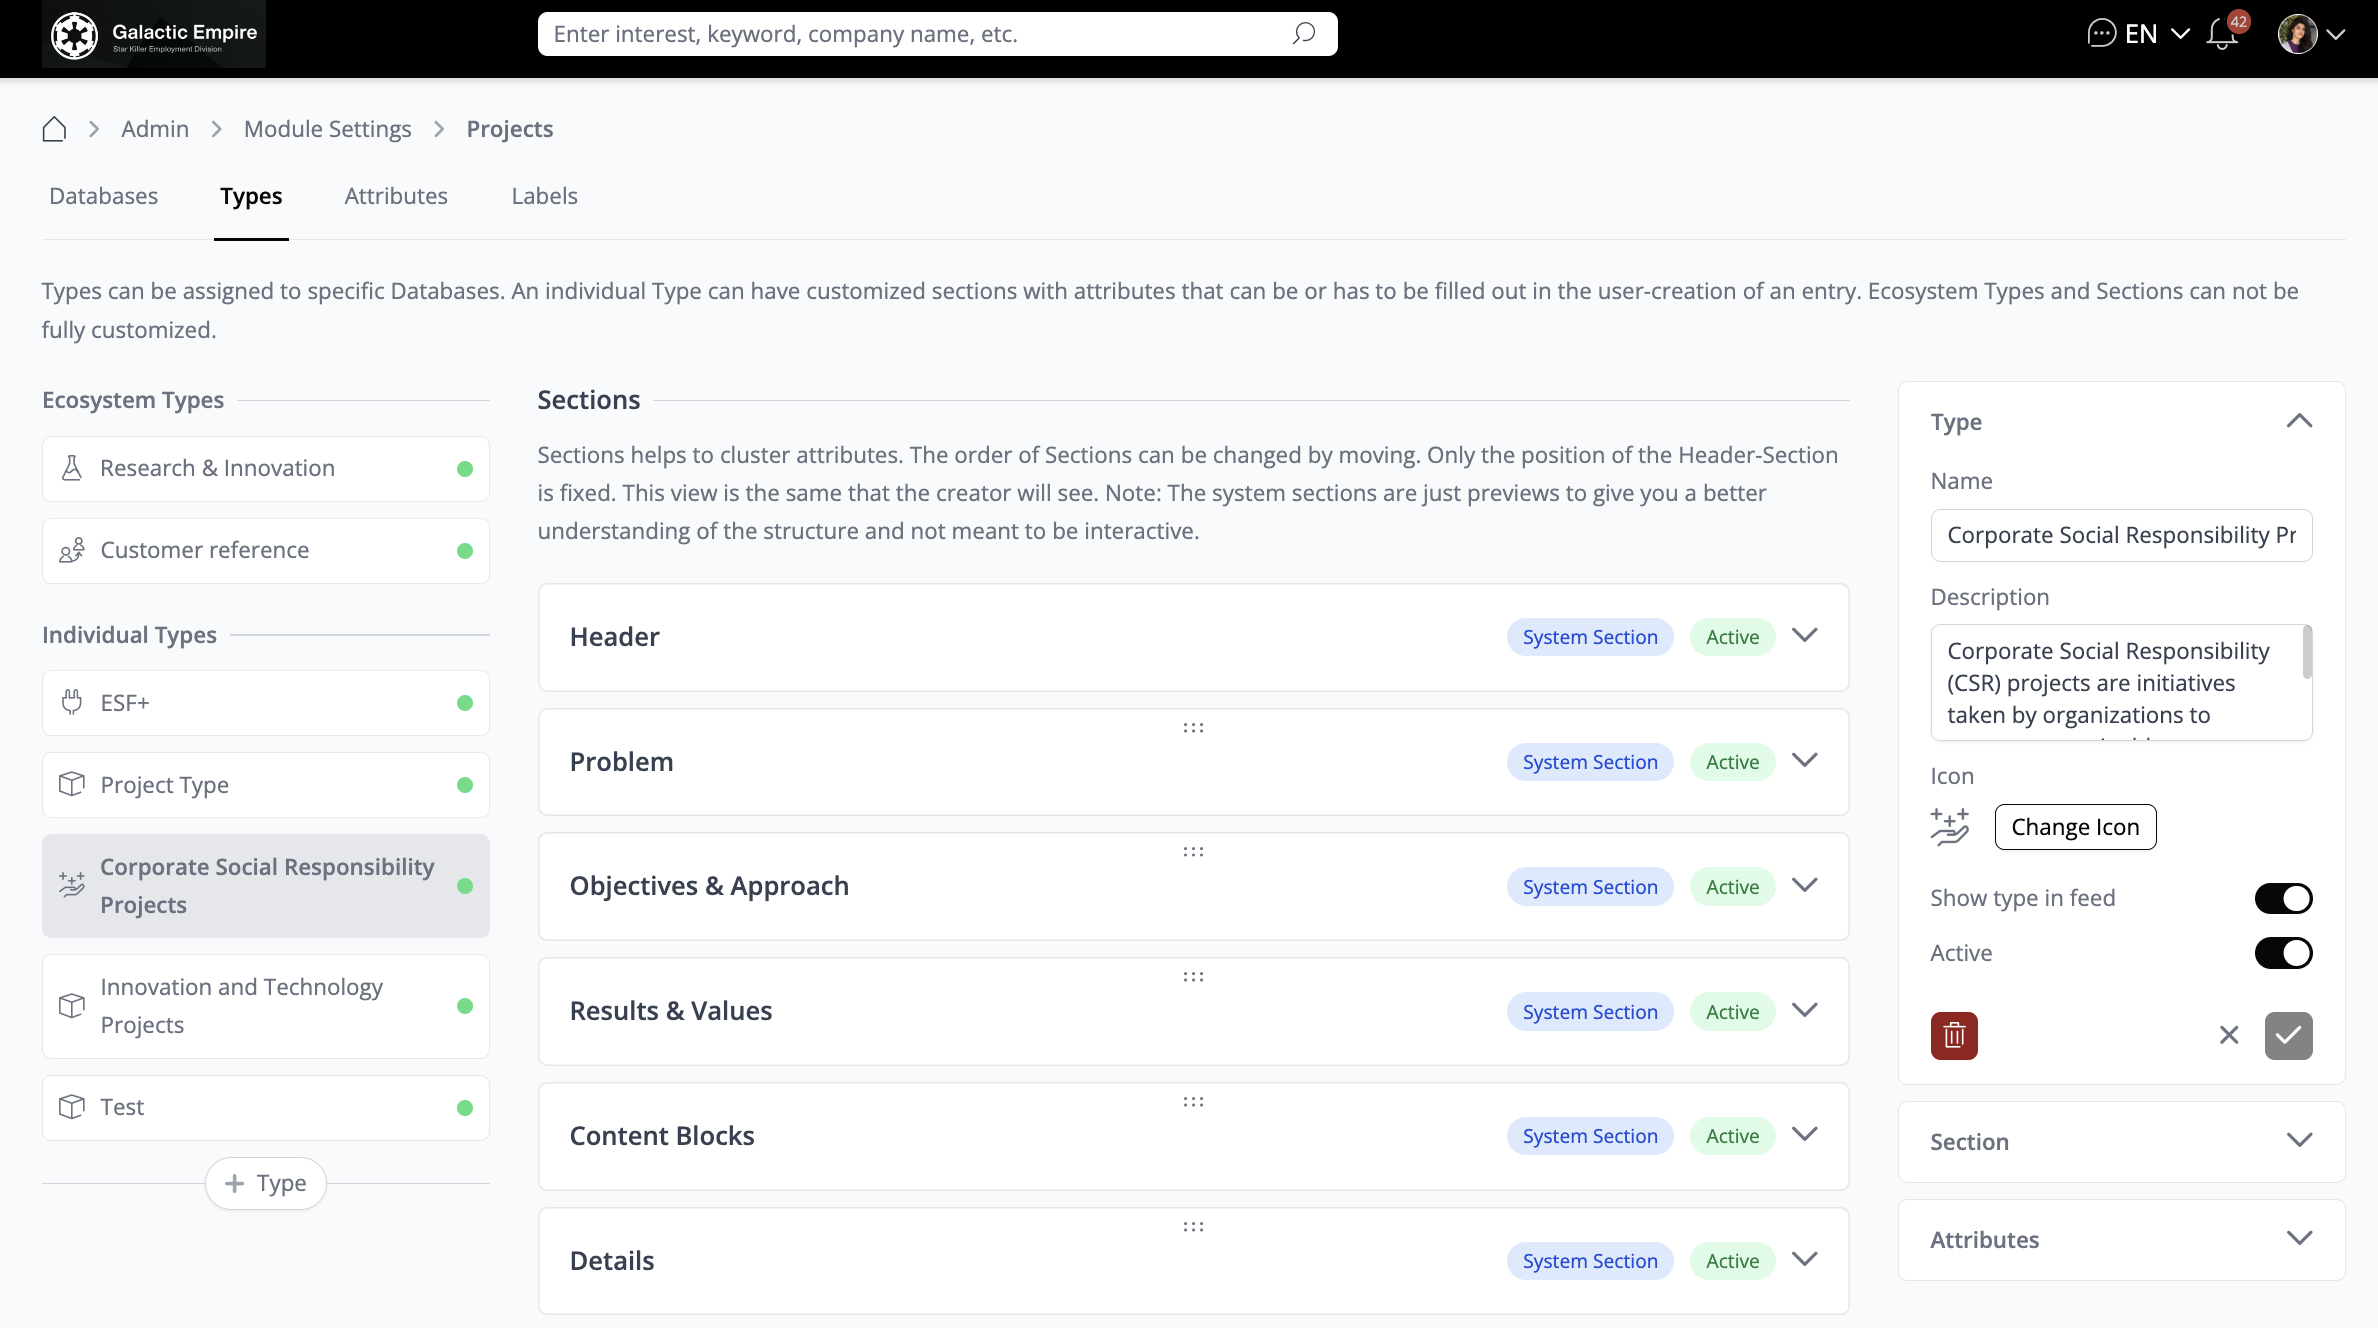
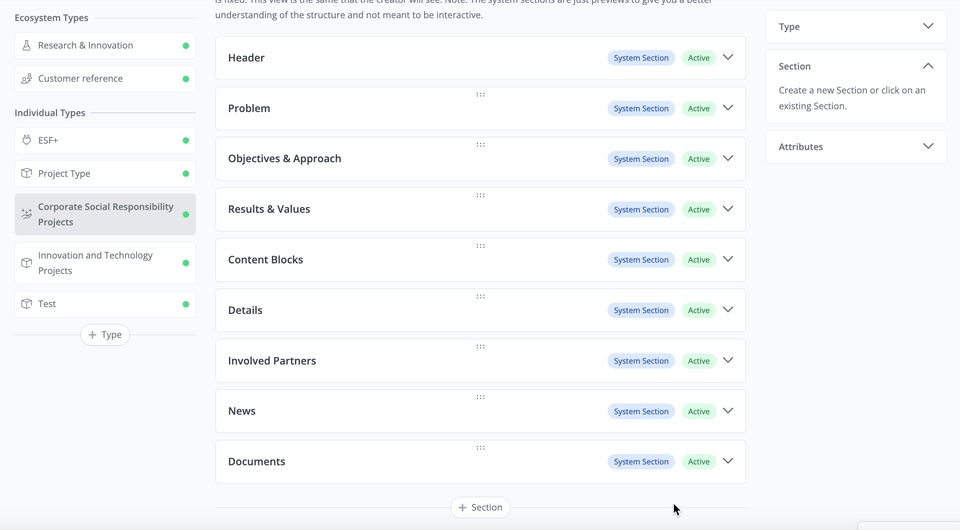
After creating the Type, you can proceed to manage its sections. While several sections are available by default, you have the option to create additional sections to cater to specific needs, such as "Additional Details” about the Project.
To create a new section and add attributes to it, follow these steps:
Attributes
To add attributes to the section, you have two options:
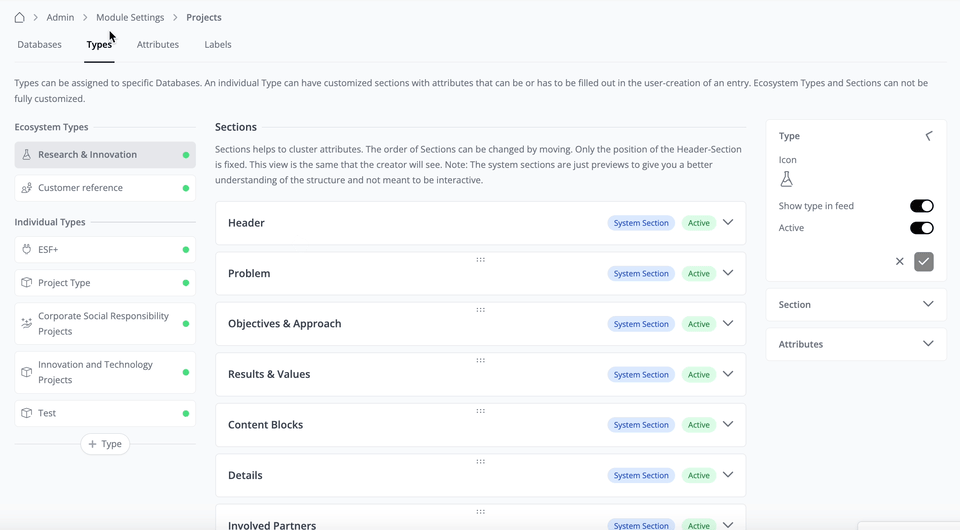
Once users create a project of this type, they will be prompted to fill out the additional Attributes that have been added as multiple-choice questions in the form. These questions will guide users to provide specific information about their project, ensuring comprehensive and standardized data entry.
Labels
To create Labels for Projects, follow these steps:
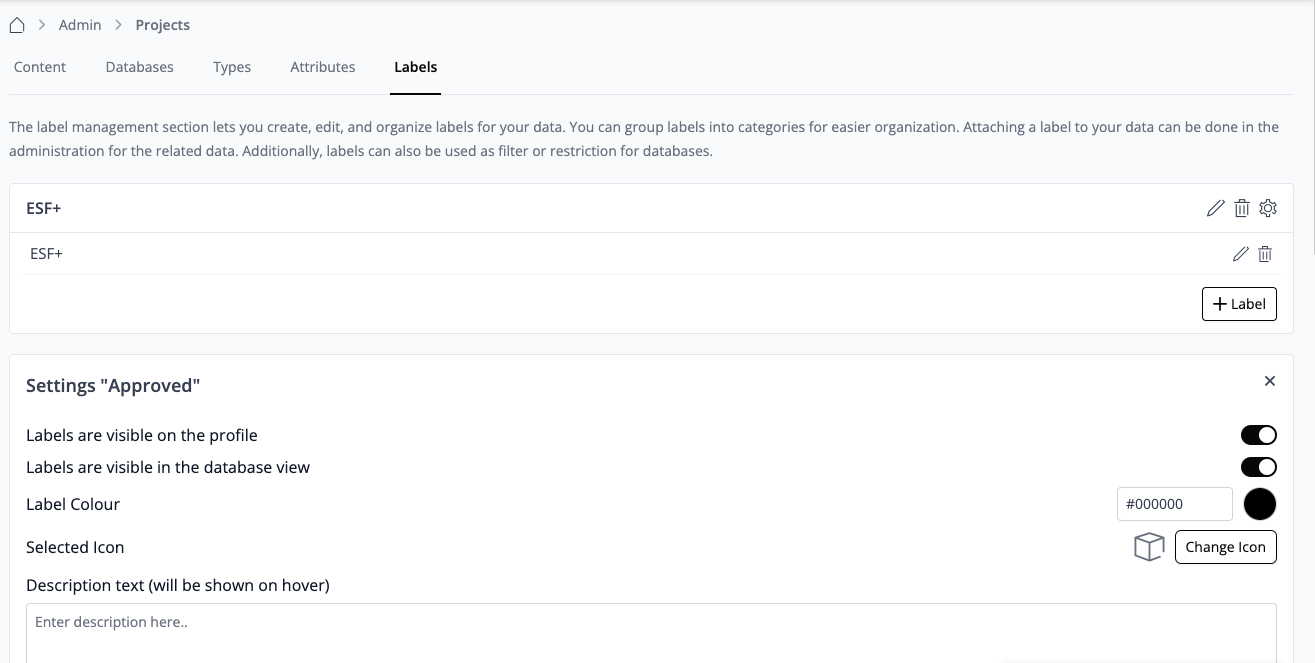
In this example, we have established the Label Group named "ESF+". By default, the Projects database should already be enabled in the navigation settings. However, if you've created a new database, ensure to activate it from the Navigation Settings.
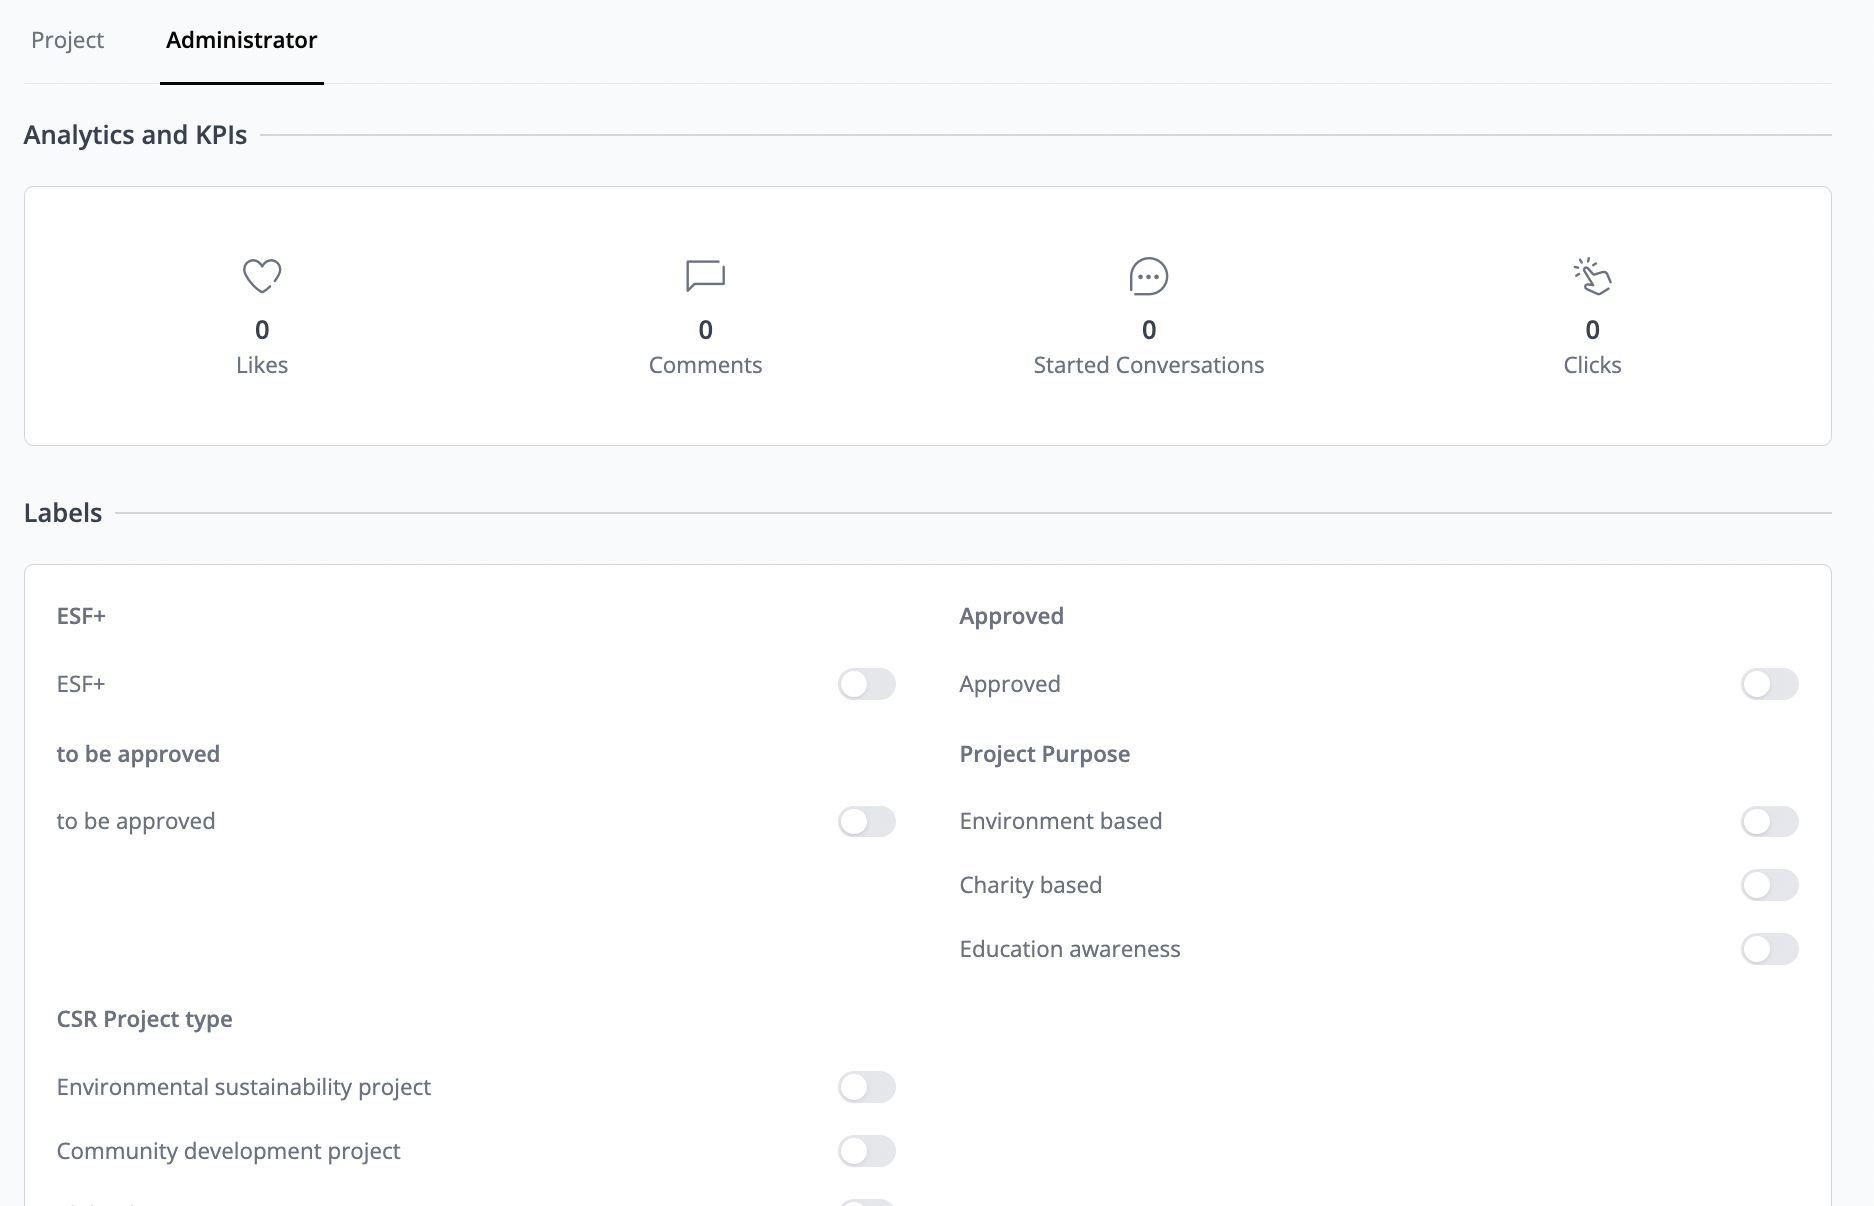
How to add a Label to a project entry
Go to a project, and click “edit”. In the admin tab, toggle the Label.
❓ FAQs (Users)
General
How can I get listed as a project partner?
To get listed as a project partner, simply click on the "speech bubbles" icon below the project profile to reach out to the contact person listed on the project.
Which categories can I apply for my project?
You can apply for various categories, including over 1200 subcategories nested within the main categories. It's recommended to utilize the category search function and look for keywords that closely align with your project. If you can't find suitable categories, try using general keywords or the industry category.
What resolution should the images have?
For the header image, it's best to use a resolution of 16:5 or 2,250px * 700px. For content blocks, the ideal resolution is 750px * 1,000px.
What is the maximum upload file size?
Uploaded files should not exceed a size of 5MB.
Can I upload files and images to my project?
Files of up to 5MB can be uploaded for each step of your project, as shown on the right-hand side in the layout. Optional you can add the Alt text and the image source for each step, as well as a link to a Website.
❓FAQs (Admins)
General
Can I assign a Project to my Package?
You can assign Project databases to your Package.
Can I restrict the visibility of my Projects to certain users only?
This can be achieved through a workaround: