💰Roles and Packages
💡 Introduction
LoftOS Roles and Packages are features that enable platform administrators to regulate the services accessible to organizations and their members. Through this functionality, administrators can precisely determine which organizations or members have reading and writing permissions on the platform by assigning tailored roles to each one.
👩🏻💻 Usage
Role and Packages Permission Management
Roles can be directly assigned to individual Users, simplifying permission management to access specific features and data based on their Roles. Link Roles to specific Packages and automatically grant organizations and their members associated with those Packages the corresponding permissions.
All confirmed Users are automatically assigned the ‘Default’ role, ensuring basic platform access. When defining custom Roles, specify only the additional permissions needed beyond the 'Default' role. This approach simplifies role creation and management.
Role permissions explained
Assigning Roles and Permissions
Roles can now be assigned not only to organizations but also to individual Users. This feature allows you to grant access to specific individuals without applying it across an entire organization. For example, if an organization has 1,000 employees, but you only want two employees to have the ability to publish events, this is now possible with individual Role assignments.
Create and manage Roles
To create a new role, go to ‘Access Management’ in the navigation bar and select “Roles”. Next, simply click “+Add”, then define the Role’s permissions for each Module. You can decide what Modules, Pages, or Programs the Role can access, offering increased flexibility in how content and data are managed.
Define specific permissions for Modules, allowing you to set whether Users can read, write, or have limited access. For instance, Users in a particular Role might be allowed to write but not read certain content, offering more granular control over what Users can do.
To manage permissions to a Module, select the Module under the ‘Permissions’ tab and start editing under “Actions”.
‼️ Attention: Whenever you add a new page or module to your platform, it will be automatically added to ALL of your roles. Please remember removing them from the roles that should not have access to this new content.
Roles & Packages: Overview and Export
Keep track of Role and package assignments across your platform. This feature gives you key insights into the distribution of Roles and Packages, including the total number of Users per Role and Package – helping you manage user permissions more effectively.
Key Features
Roles Overview: See how many Users are assigned to each Role at a glance.
CSV Export: Download Role data as a CSV file for external analysis and reporting.
Improved Management: Gain better control over User Roles, similar to how you manage package subscriptions.
How to Use It
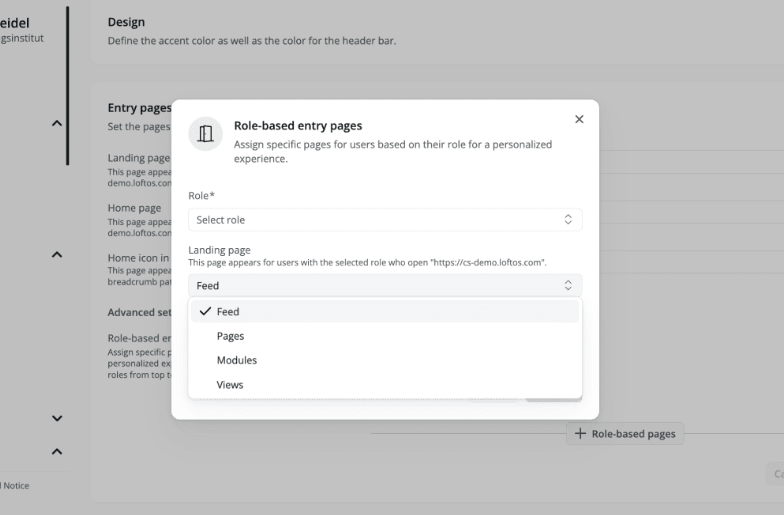
Entry Pages Based on Roles
Assign a dedicated entry page to each role, ensuring a tailored experience. For example, managers can be directed to the Feed, Event attendees to a dedicated Event page. Go to: Admin → General Settings → Entry Pages → Roles-based Entry Pages → Select your role and desired page.
🥇 Best Practices
Handling Multiple Roles
Users can now be assigned multiple Roles, and the platform will aggregate all permissions from these Roles. If one Role denies access while another grants it, the Role that allows access will override the other.
Packages: Now primarily handle access selection. You can specify whether Users can choose a Package or not. Each Package links Users to a Role.
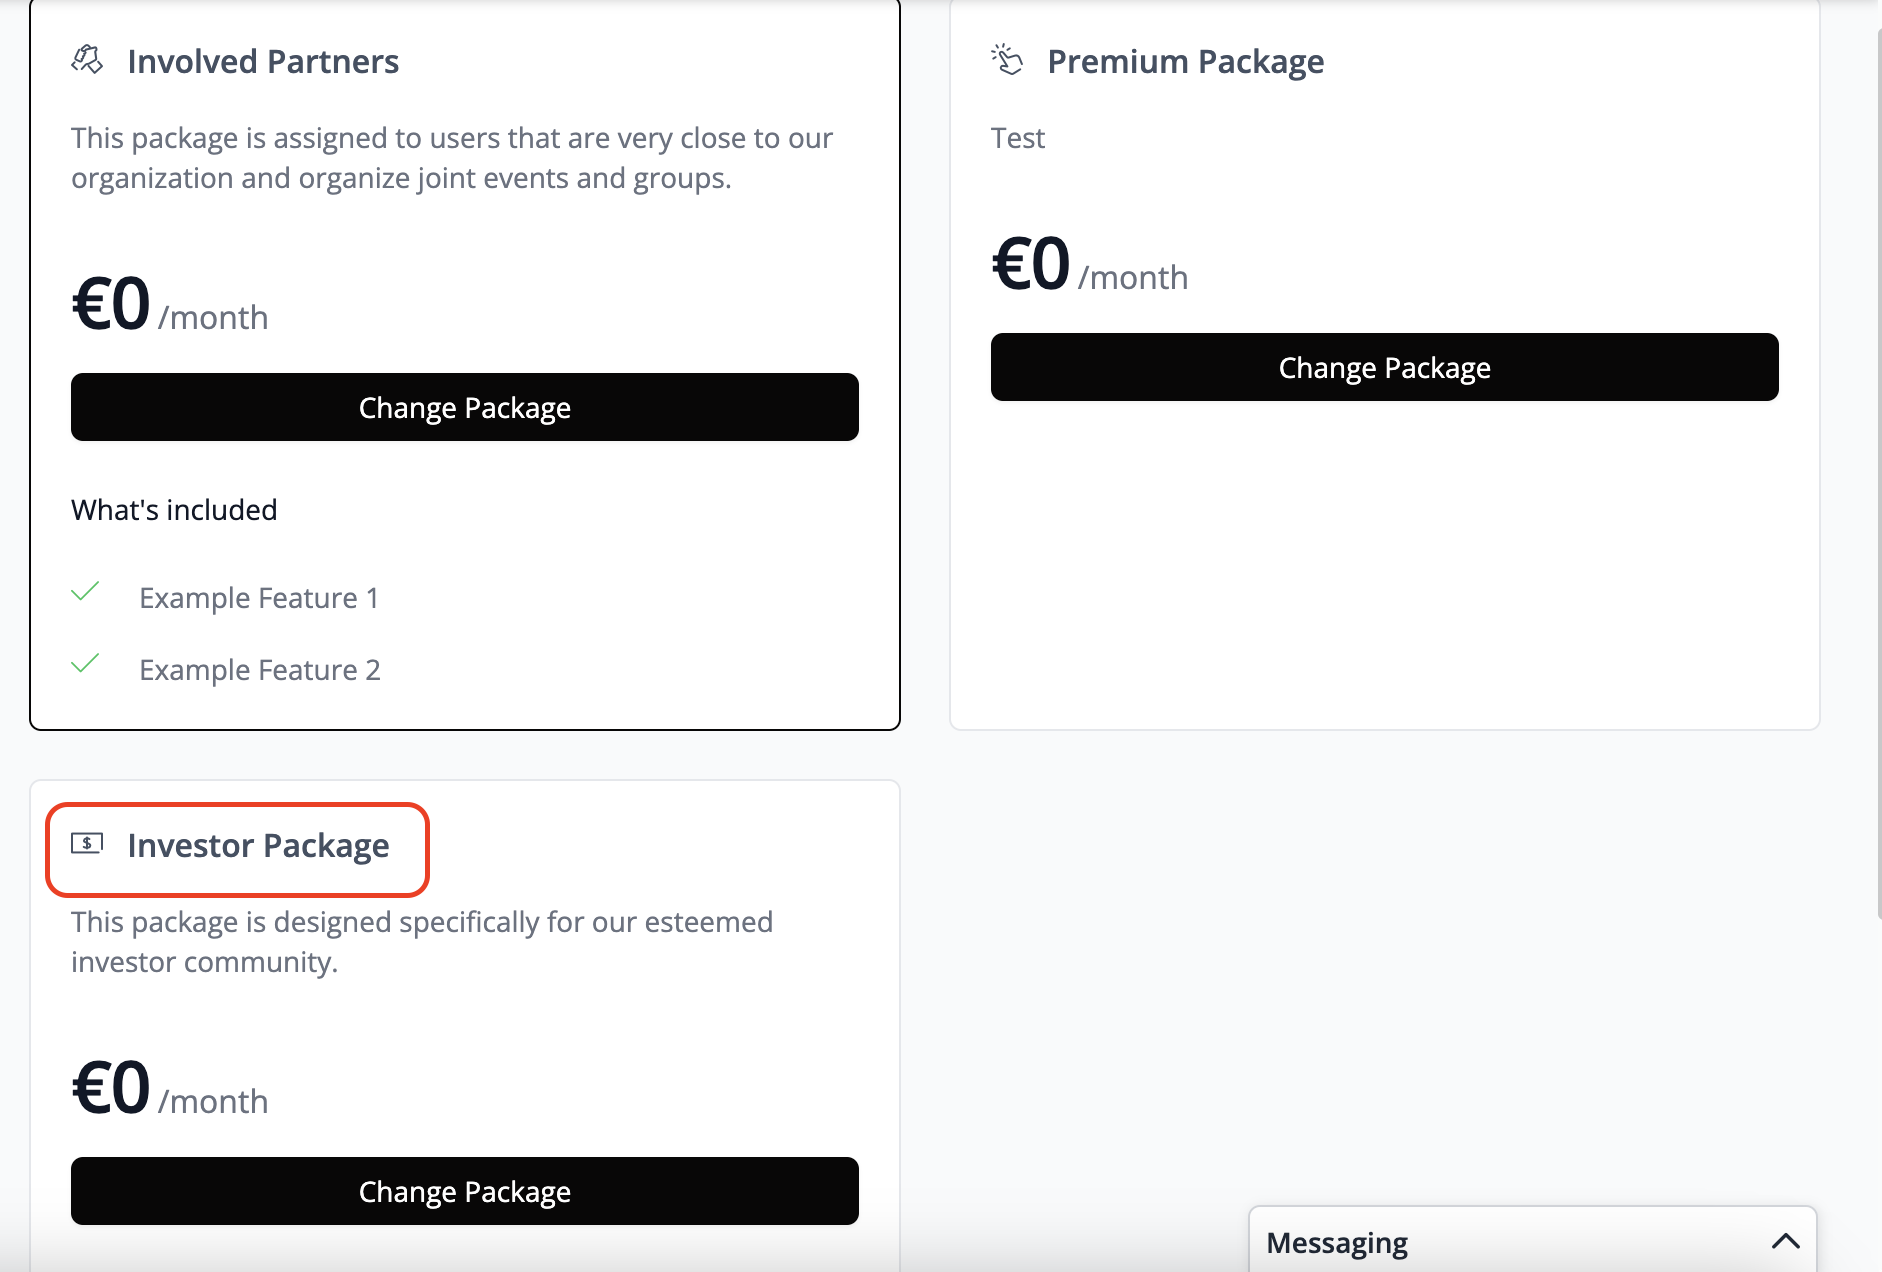
Explanation of Package Details
Customizable Packages
General Use Case: Customizable Packages are employed to assign distinct roles and permissions on a platform to all members of an organization, allowing varied levels of access and capabilities. This ensures that each organization can interact within designated areas relevant to their operations.
Create a Package
To customize a Package, follow these steps:
Navigate to the Access Management section of your platform. Choose "Packages" from the menu. To create a new Package, click "+Package".
Should you opt not to enable this function, the new Package won't be visible to Users in the overview. Consequently, only you, as the platform admin, will have the authority to assign the Package to the relevant organizations.
Package Visibility
You have the option to make Packages either visible or invisible, depending on your specific use cases and circumstances. The following two sections outline a few examples of how each option can be utilized:
Visible Packages
Visible Packages serve to highlight existing upgrade options to Users, drawing their attention to these Packages in the Package overview. If there are platform areas inaccessible to Users due to a lack of Package upgrade, they will receive the following notification:
Many Users express interest in accessing additional features, prompting them to either attempt to modify their Package independently or seek assistance from the platform administrator.
How to set up a visible access restriction?
You have already determined which areas and modules each Package can be viewed and edited. Now you need to adjust the navigation settings of these areas so that users receive a message when they don't have permission to access them. Use the following path for the setting: Admin Area -> Platform Settings -> Navigation Settings: Open the navigation that you want to adjust so that certain Packages do not have access, however a Package upgrade could grant access. This way, the navigation remains visible, but the content is not displayed if the user has not booked the appropriate Package.
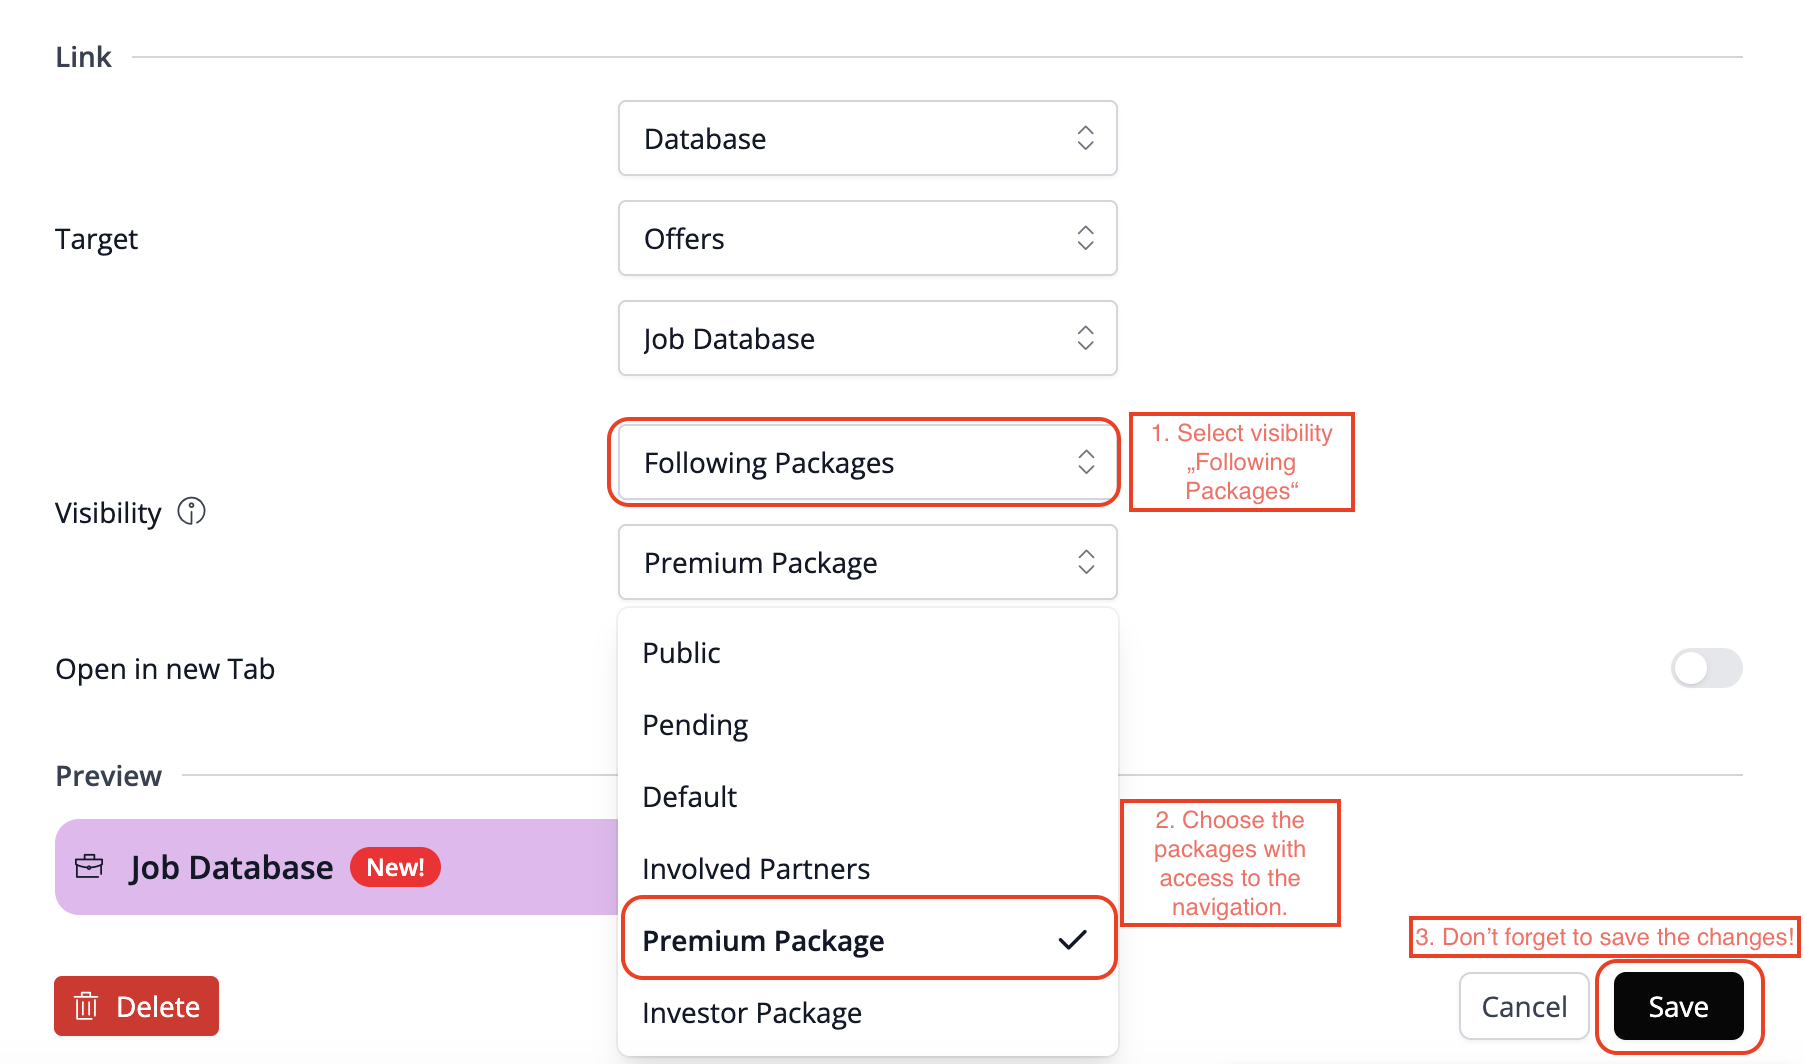
How to configure a visible access restriction?
Once you've specified the areas and modules accessible to each Package, you'll need to tailor the navigation settings accordingly to inform users when access is restricted. Navigate to Admin Area > Platform Settings > Navigation Settings. Open the relevant navigation section where certain Packages shouldn't have access but could gain it through an upgrade. This ensures that while the navigation remains visible, content isn't displayed unless users have the appropriate Package booked.
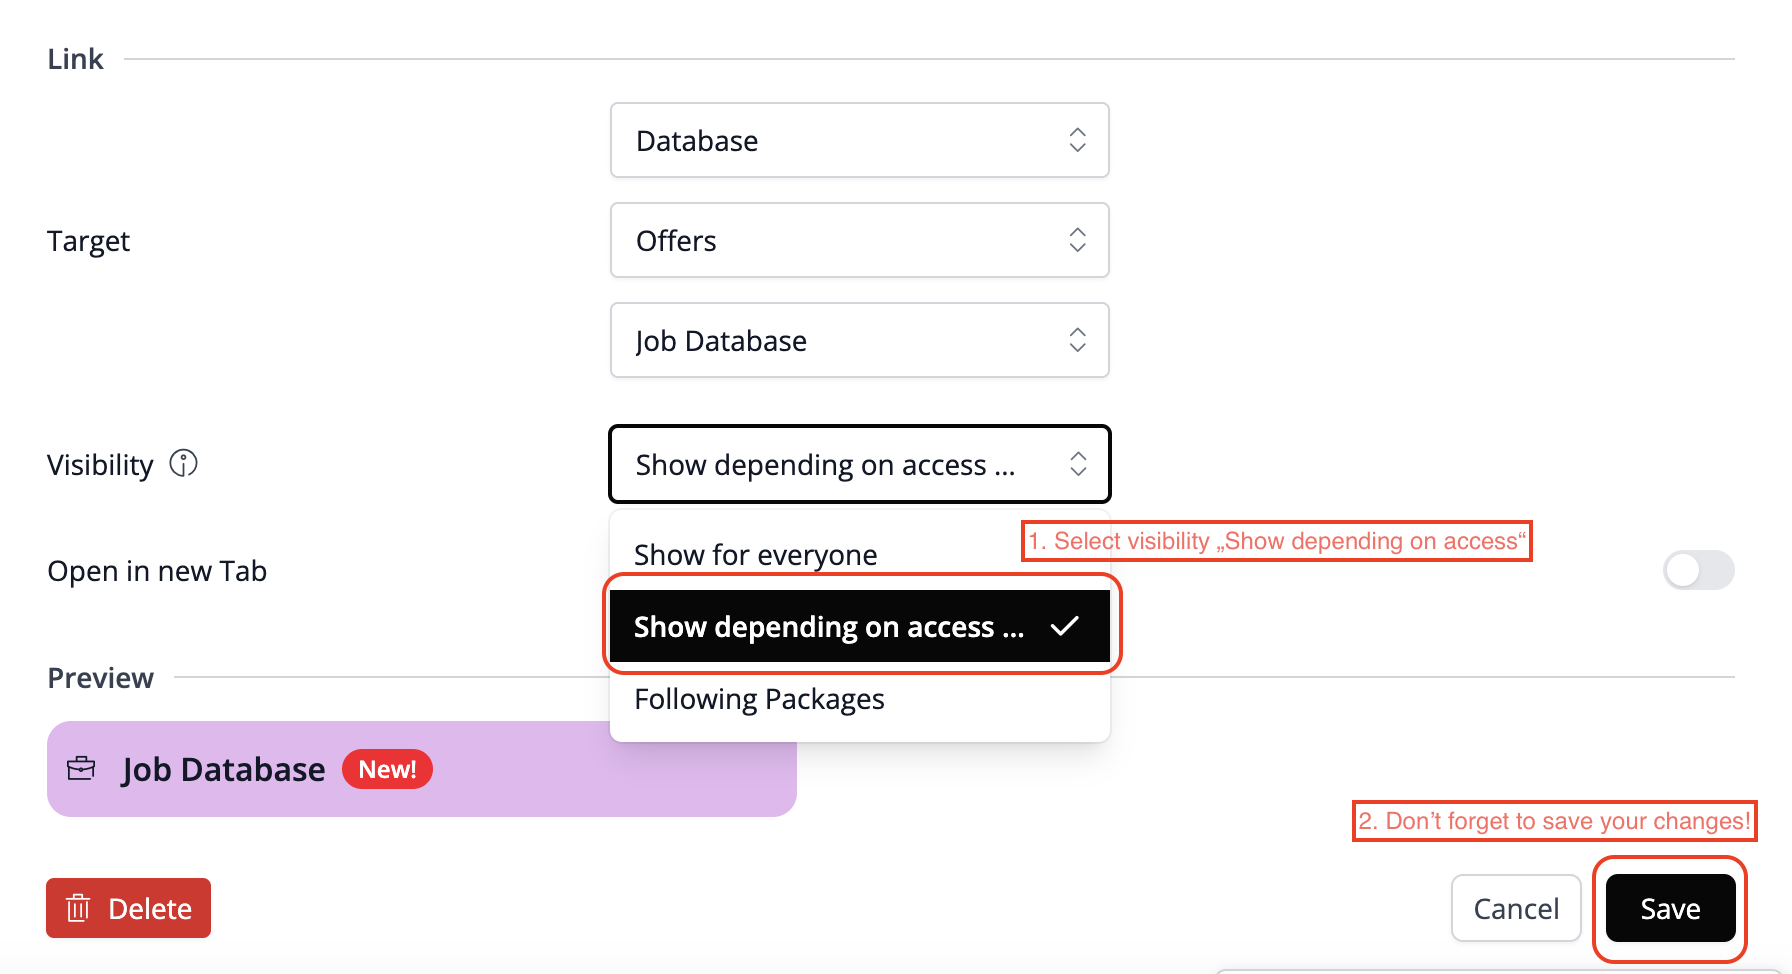
How to set up an invisible access restriction?
You've already specified the areas and modules accessible to each Package. Now, customize the navigation settings to restrict visibility only to exclusive Packages. Navigate to Admin Area > Platform Settings > Navigation Settings. To enable exclusive access for specific Packages, adjust the relevant navigation. This ensures that if you don't have the right Package, the navigation remains hidden, and its content won't be displayed in the menu.
Hidden Packages
When certain Packages are tailored for specific organizations with exclusive areas on the platform, you may opt not to display them to other Users. By adjusting the navigation settings, you can restrict the visibility of these Packages to their respective owners. Consequently, the Package won't appear under "My Packages" or in the menu. For example, you could create a job board exclusive to startups, inaccessible to other platform users such as companies and investors.
Package Approval
In the "Create a Customized Package" section, you can designate Package assignments that require approval from a platform administrator. If visible, users can choose to switch to another Package. When a selected Package requires approval, the process begins when the user clicks the "Buy" button. They receive the following message:
When a user clicks on “Continue”, it leads to the Package Overview:
Request pending is visible.
In the meantime, the platform admin receives an email that there is a new message waiting for him on the platform.
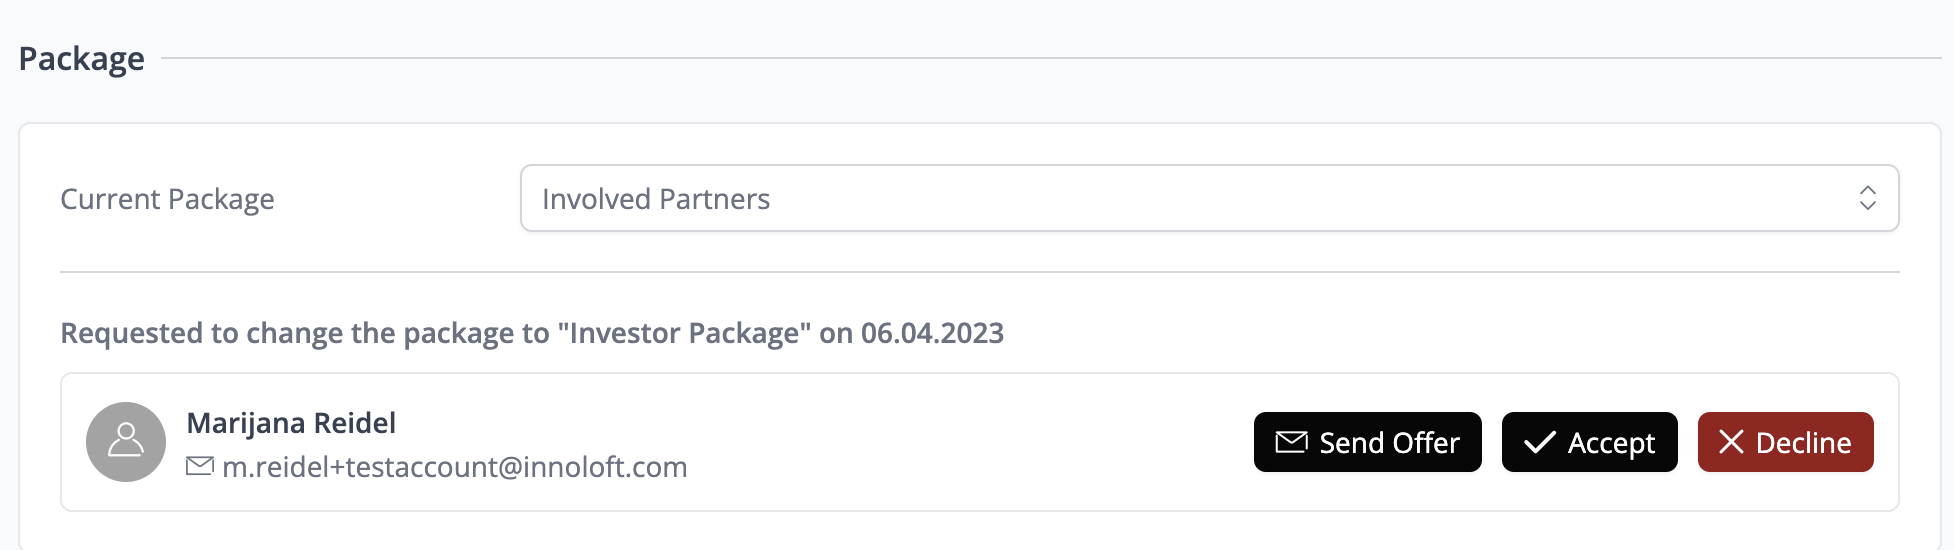
When you click on the notification, you'll be directed to the organization's profile. In the Package section, the platform admin will find the change request and can choose to confirm, reject it, or make an offer. Using the "Make an offer" button, the admin can email the user to discuss payment options. Once terms are agreed upon, the admin can confirm the Package.
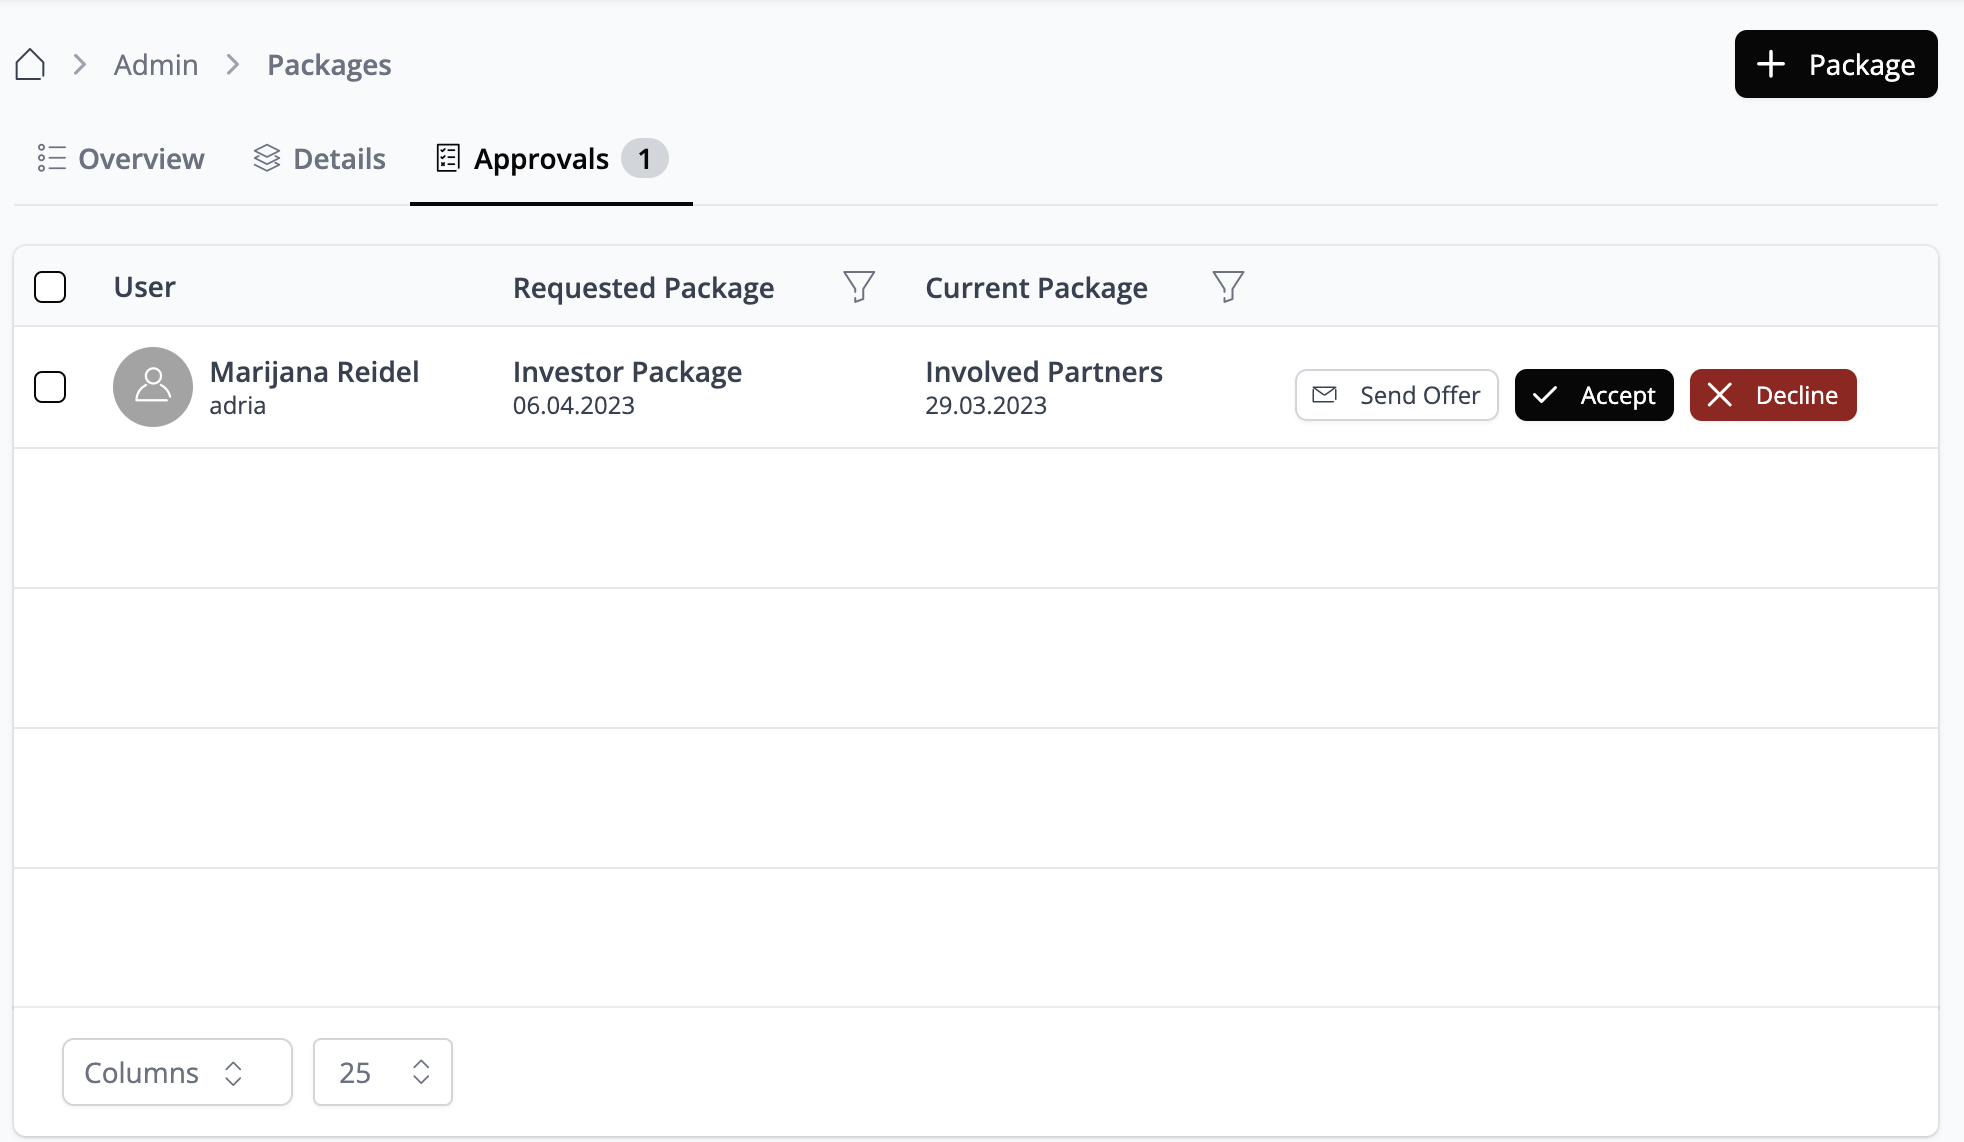
You can simply navigate to the Packages section within the Access Management of the admin area. From there, under the Approval tab, you can choose to confirm, reject, or send an offer to the user.
Payment Options
The Booking Workflow gives you the option to select from three payment methods: Stripe, Manual Invoice, External Link.