🏢 Organizations
💡 Introduction
Comprehensive Organization Database Features
Our network's Organization database offers a detailed overview of ecosystem stakeholders. Organization profiles provide vital details, including contact information, tech categories, products, published requests and offers, team members, and social media links. Startups can showcase funding rounds and revenue figures.
Users can add awards, acceleration programs, and link associated organizations. An upload feature facilitates sharing documents like presentations. Organization profiles are curated by linked users, and verified via e-mail domains, or by a company admin.
Furthermore, users can group Organization types in separate databases for enhanced organization.
👩🏻💻 Usage (User)
View Organizations
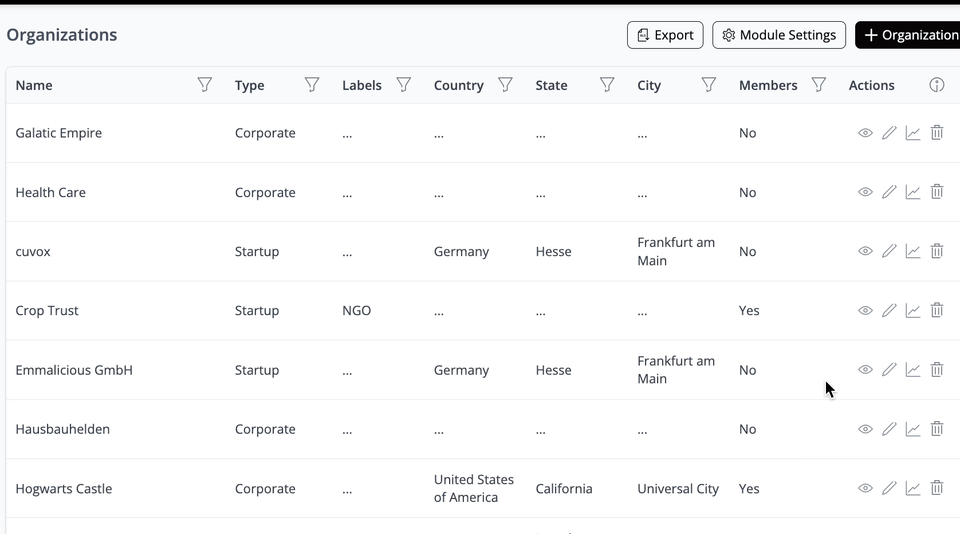
To access the Organizations on the platform, navigate to your profile and click on "Organizations" in the left-hand-side navigation panel. This will display a list of all Organizations available on the platform.
Filter Organizations
At the top of the page, you can find filtering options for Database content. Additionally, on the right-hand side, there are options for Database views.
Database view settings and sorting settings
You have the option to filter the database content using various options such as Countries, Cities, and Organization type.
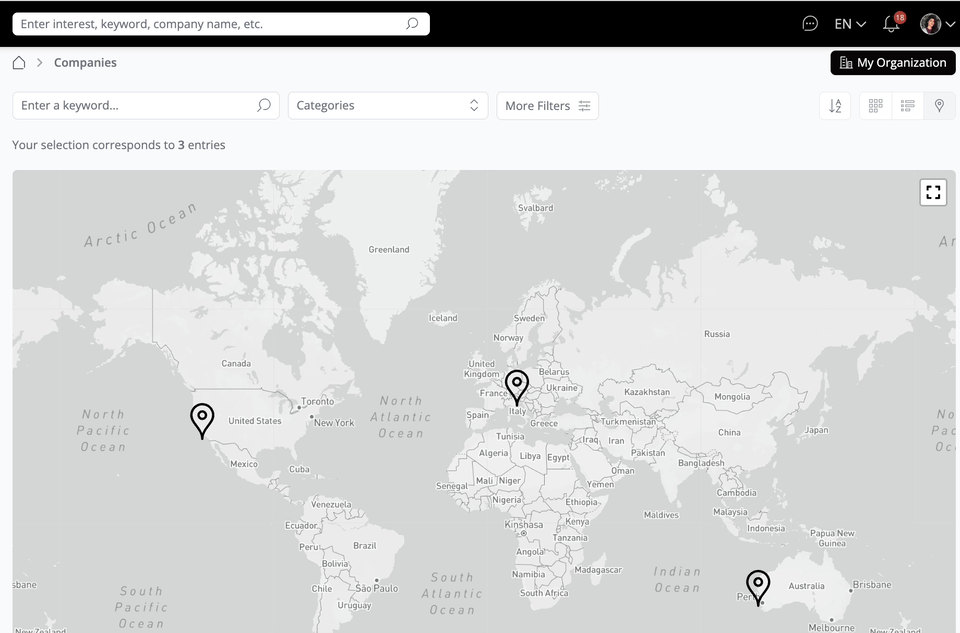
Choose between card view, sorting view, or map view. In the sorting view, you can arrange the Organizations by newest first or by quality. The map view displays Organizations based on their locations, allowing you to zoom in to see markers for each corresponding Organization and access their respective cards.
Information of a selected Organization
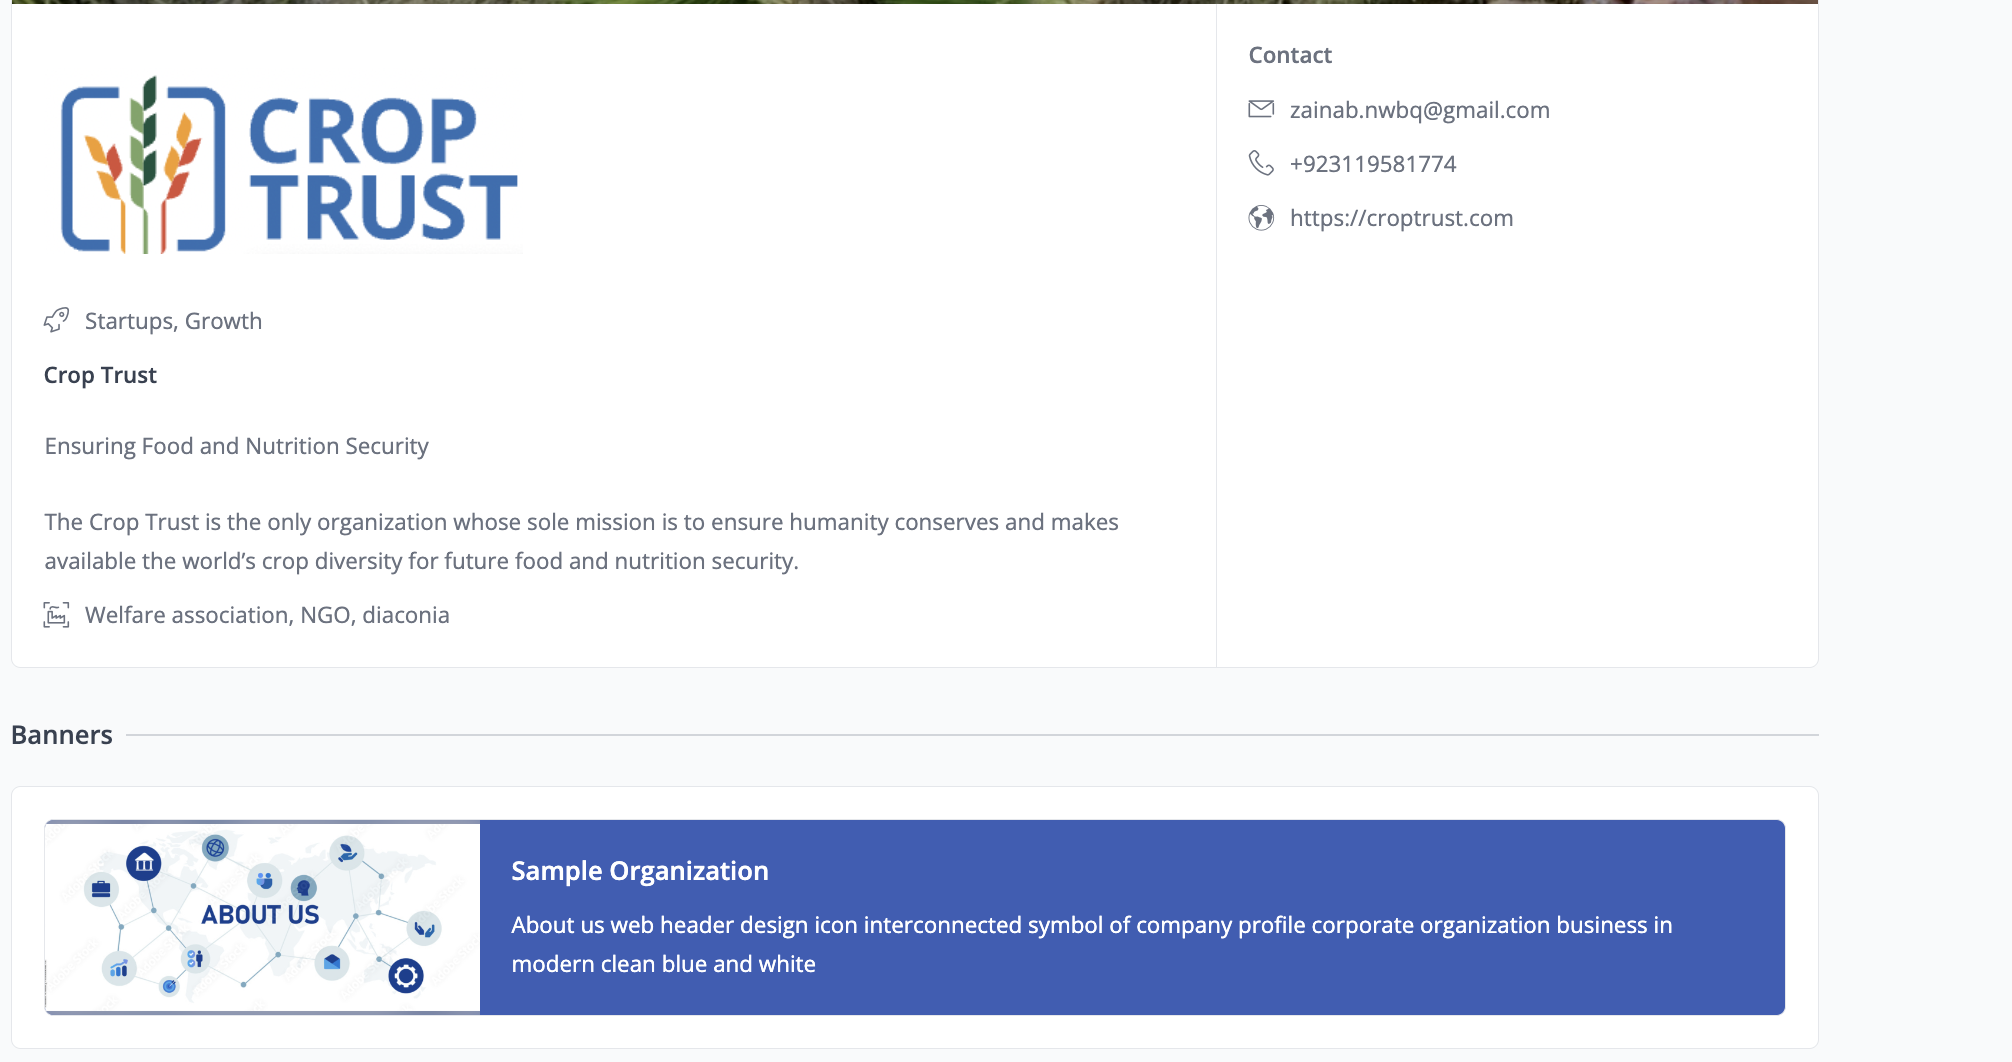
Clicking on a card of a selected Organization will display the detailed profile of the Organization. This includes their name, a brief description, general contact details, offers and requests, registered team members, news, reviews, and documents.
🤝 Content Management
Edit or delete an Organization
To edit or delete Organizations, navigate to the Admin area and click "Organizations".
To edit an Organization click on the pencil icon, to delete an Organization, click on the bin icon and confirm the deletion.
🎨 Individualization Options
Manage Organizations Databases
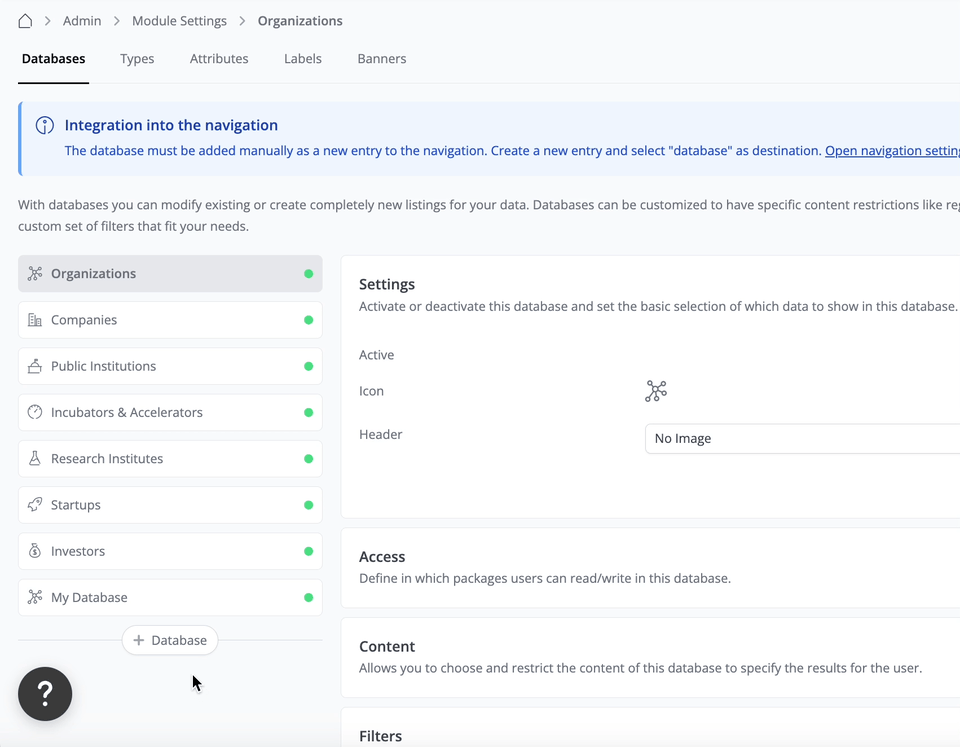
Create a database of Organizations, which can encompass various types. Depending on your requirements, you might consider establishing additional Organization databases. These databases offer the flexibility to modify existing listings or create entirely new ones tailored to your data. They can be customized to include specific content restrictions, such as region, categories, or other attributes, along with a personalized set of filters designed to suit your needs.
To create a database, follow these steps:
Note: Databases that you create are not shared with the ecosystem. They are a particular database for your platform.
Once the database is created, you should be able to see the following sections within the database:
Settings
Activate and customize your Organization's database:
Access
Define in which packages users can read/write in this database.
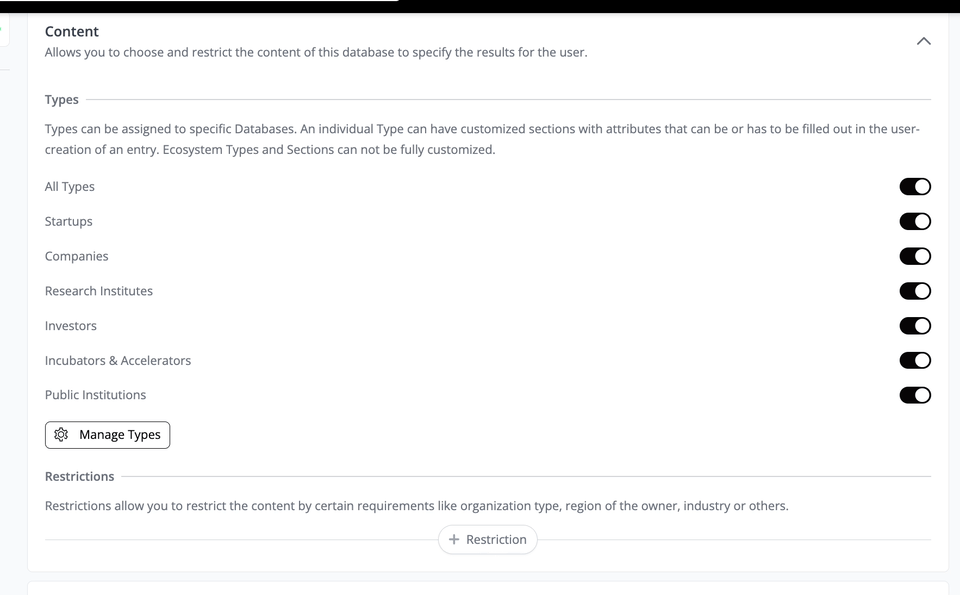
Content
In this section, you can select and regulate the content of your database to tailor the results for users. Choose the types of Organizations you wish to include in this database.
Restrictions
You have the option to restrict the content within these databases based on Label Group, Region, Attributes, and more. For instance, you may wish to display only Organizations from a specific country or within a chosen label group. To set these restrictions, navigate to the Database tab, then select Content, and finally Restriction. Additionally, you can create additional labels by accessing the Labels tab (which will be discussed later in this article).
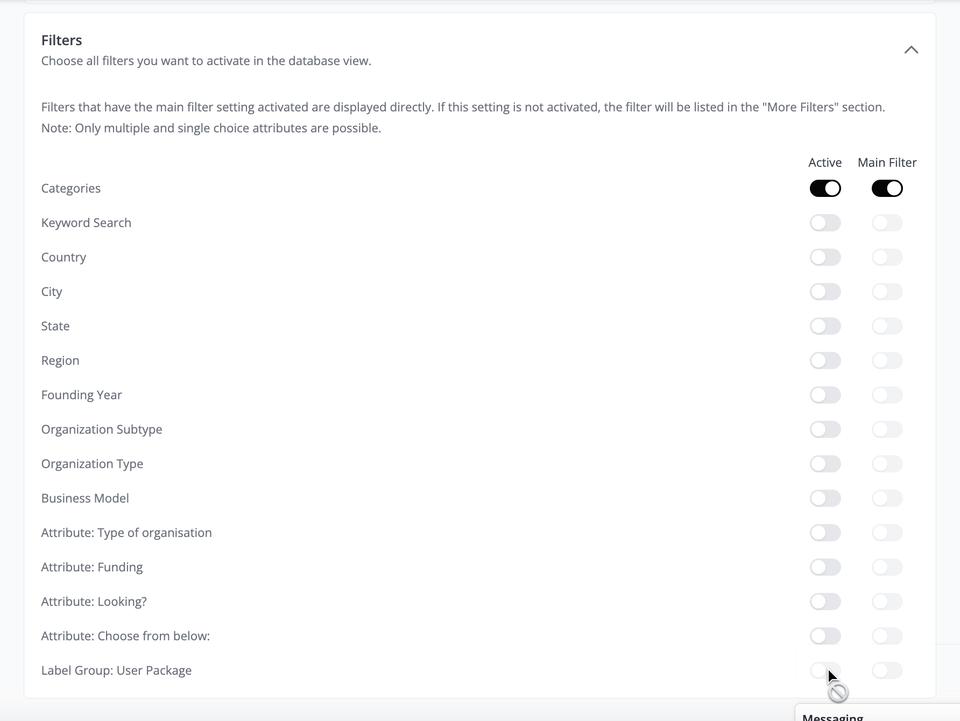
Filters
Choose all filters you want to activate in the database view.
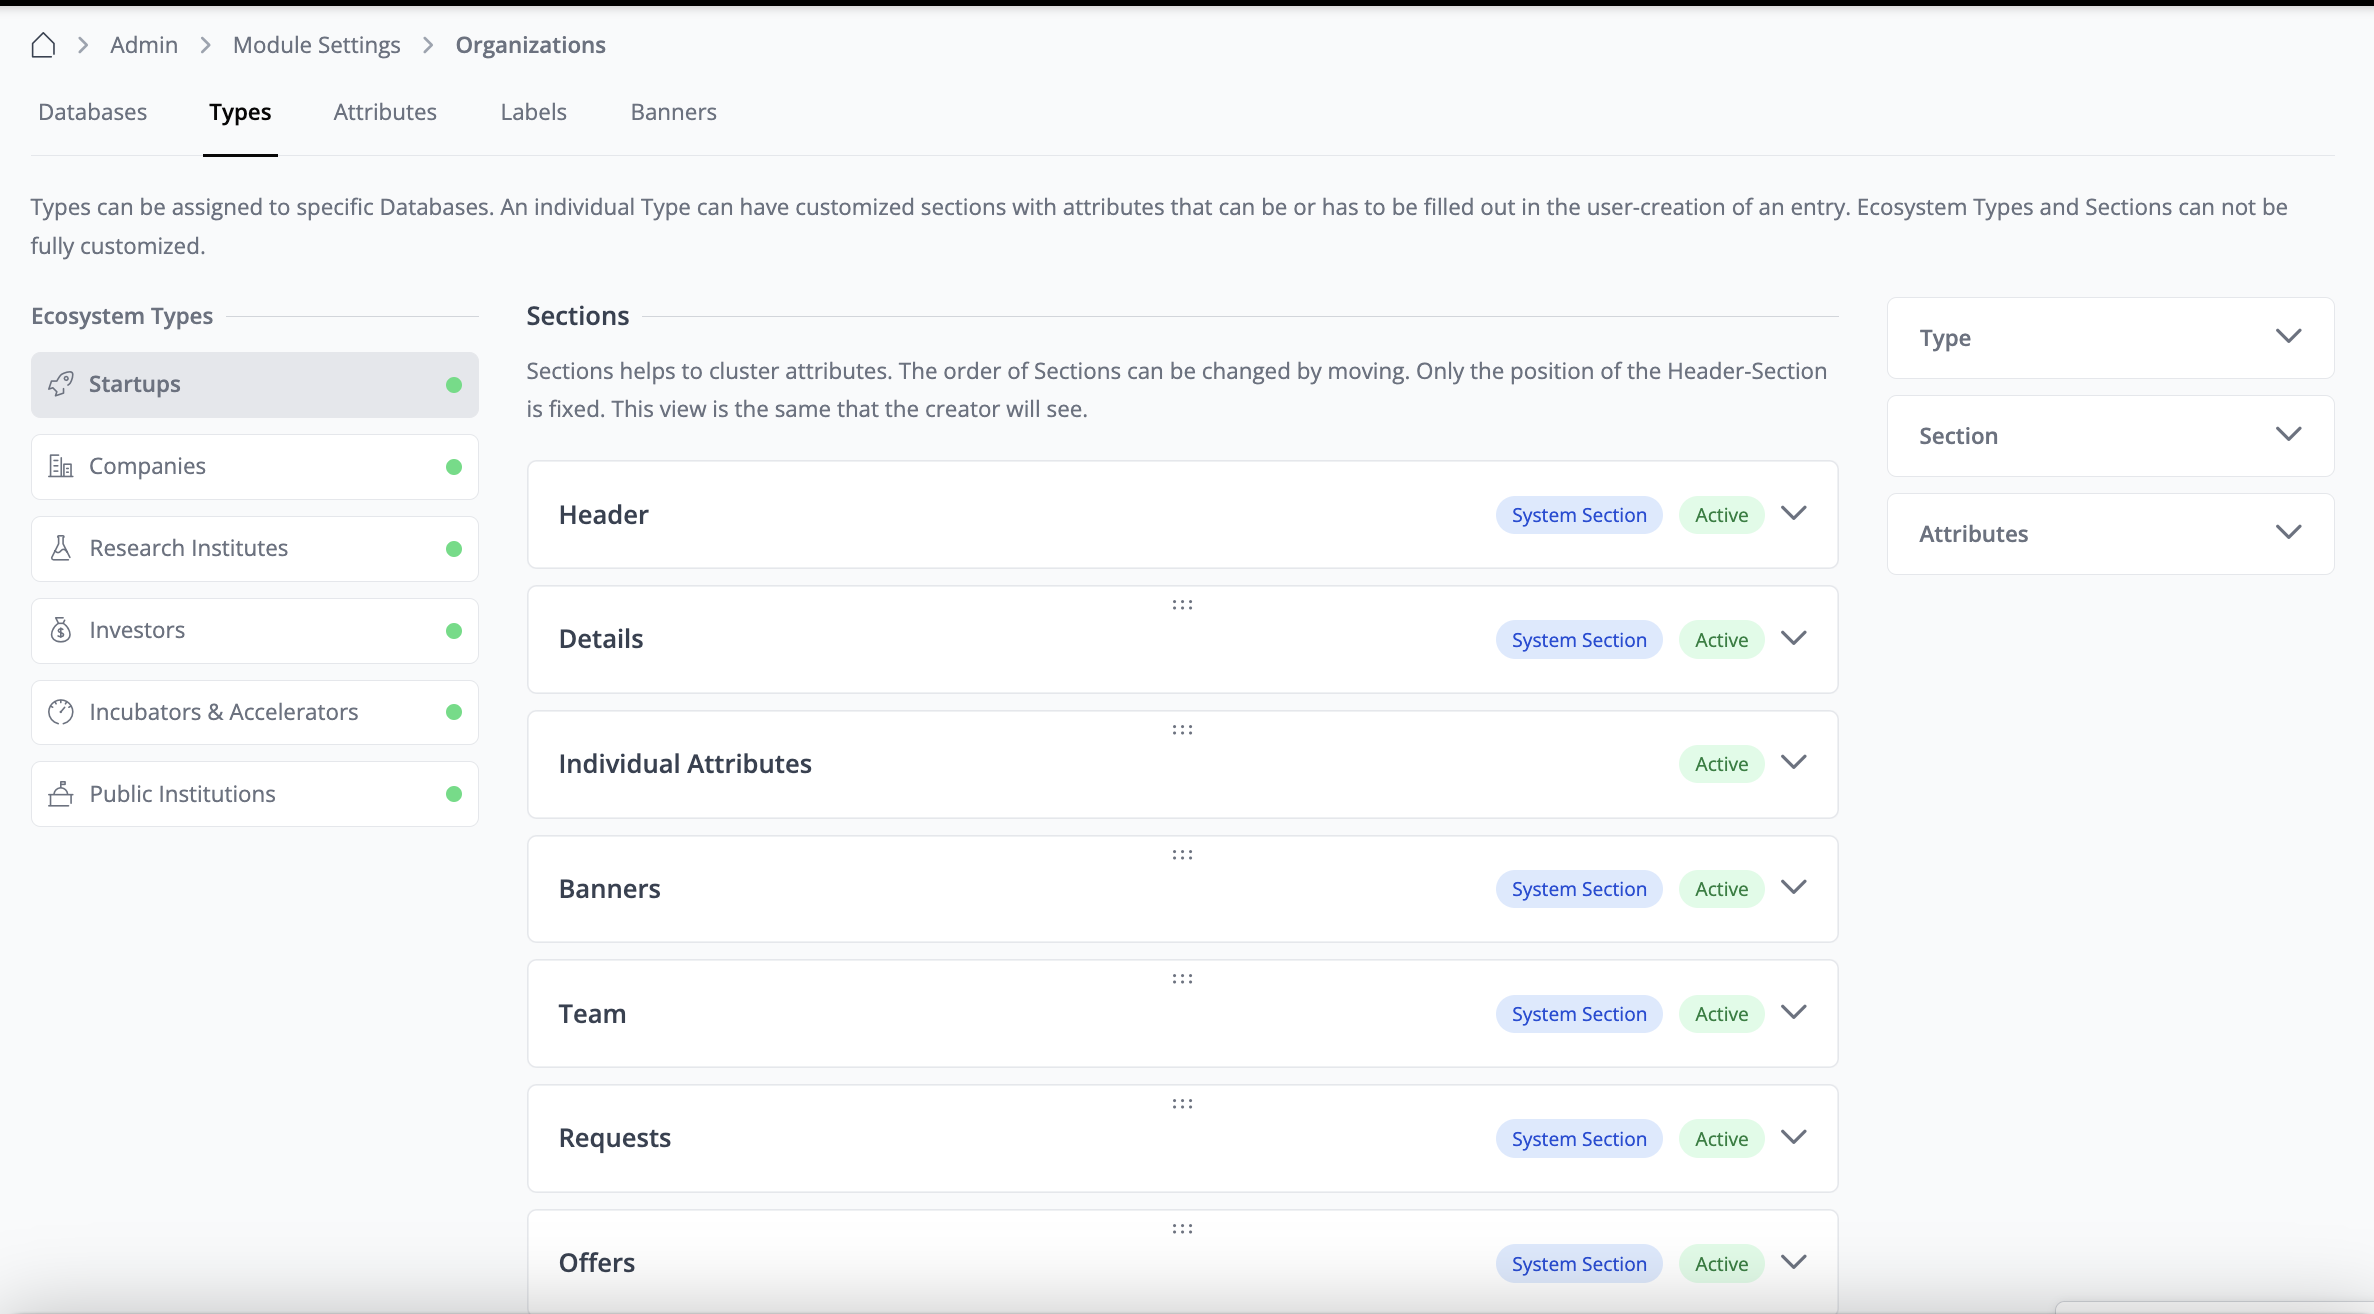
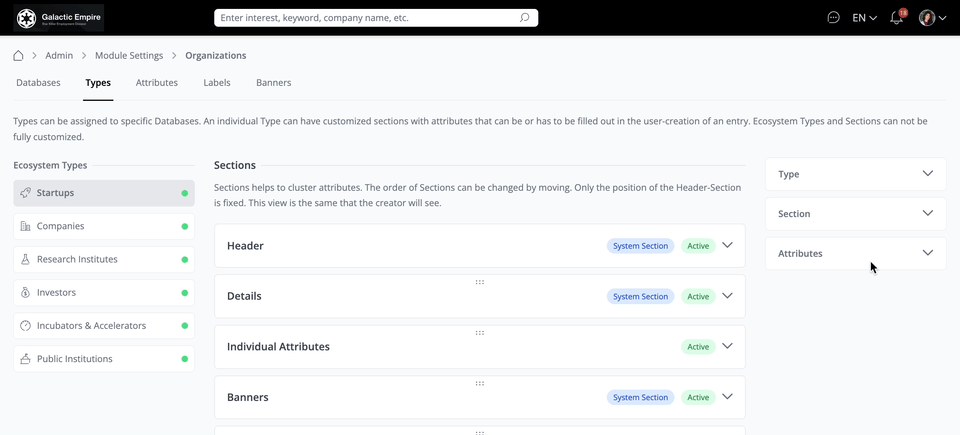
Manage Sections & Attributes
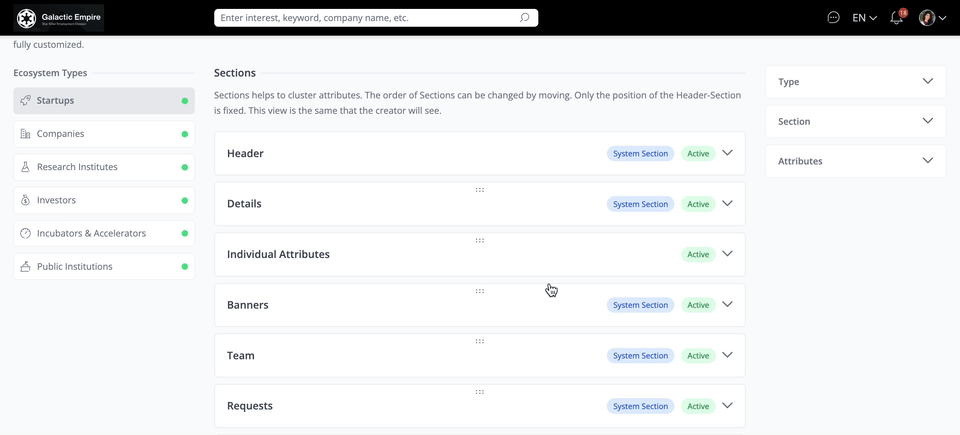
Here, you can manage the type of content displayed in the newly created database to specify the results for the user. While we provide predefined ecosystem types within the Organization database that cannot be edited or deleted, you can now utilize “Sections” to cluster Organization attributes. The order of Sections can be adjusted by moving them, allowing to customize the Organization layout to your preferences. Additionally, you have the flexibility to enable or disable certain sections on the Organization profile based on your specific requirements.
Visibility of sections
You can toggle the visibility for sections in two different ways:
Both limitations are directly connected to the selected packages. You can achieve this by selecting the section of your type that you want to limit and then choosing the related packages.
Type
To customize sections for each ecosystem type, follow these steps:
Section
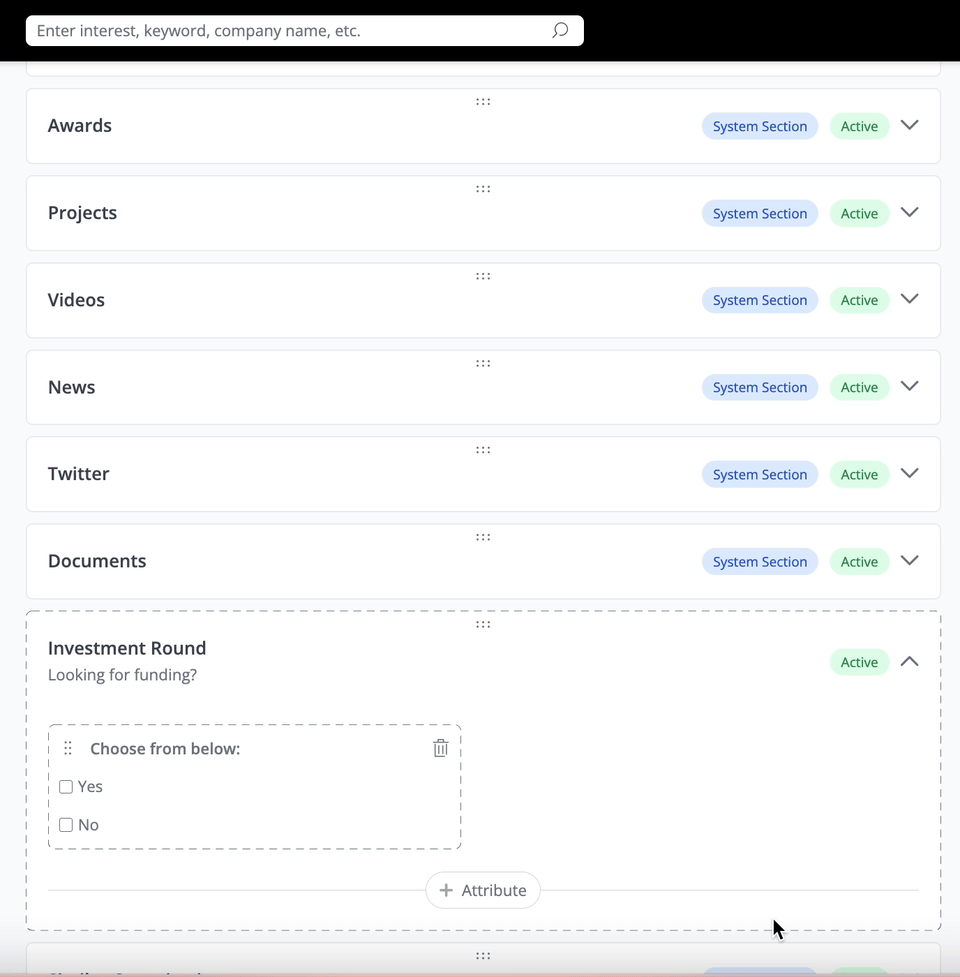
The Section dropdown on the right-hand side of the page displays the details of the section you have selected to edit or customize. You can enable or disable attributes within each section. For example, if we choose the “Details” section of the Organization type - Startup, we can enable the existing attribute - “Customer Problem” because we consider that information important.
You can also create a new Section on your own. Scroll down to the bottom of the page and click “+ Section”. Since we are in the Startup Ecosystem type, let’s use Investment Round as an example to create a new Section.
Attributes
Go to Organization → Types, click “+Section”, select “+Attribute”, and create your Attribute from the extensive Attribute Library. Select from 'Base Attributes’, which are the familiar options, or access 'My Attributes' to add your favorite attributes.
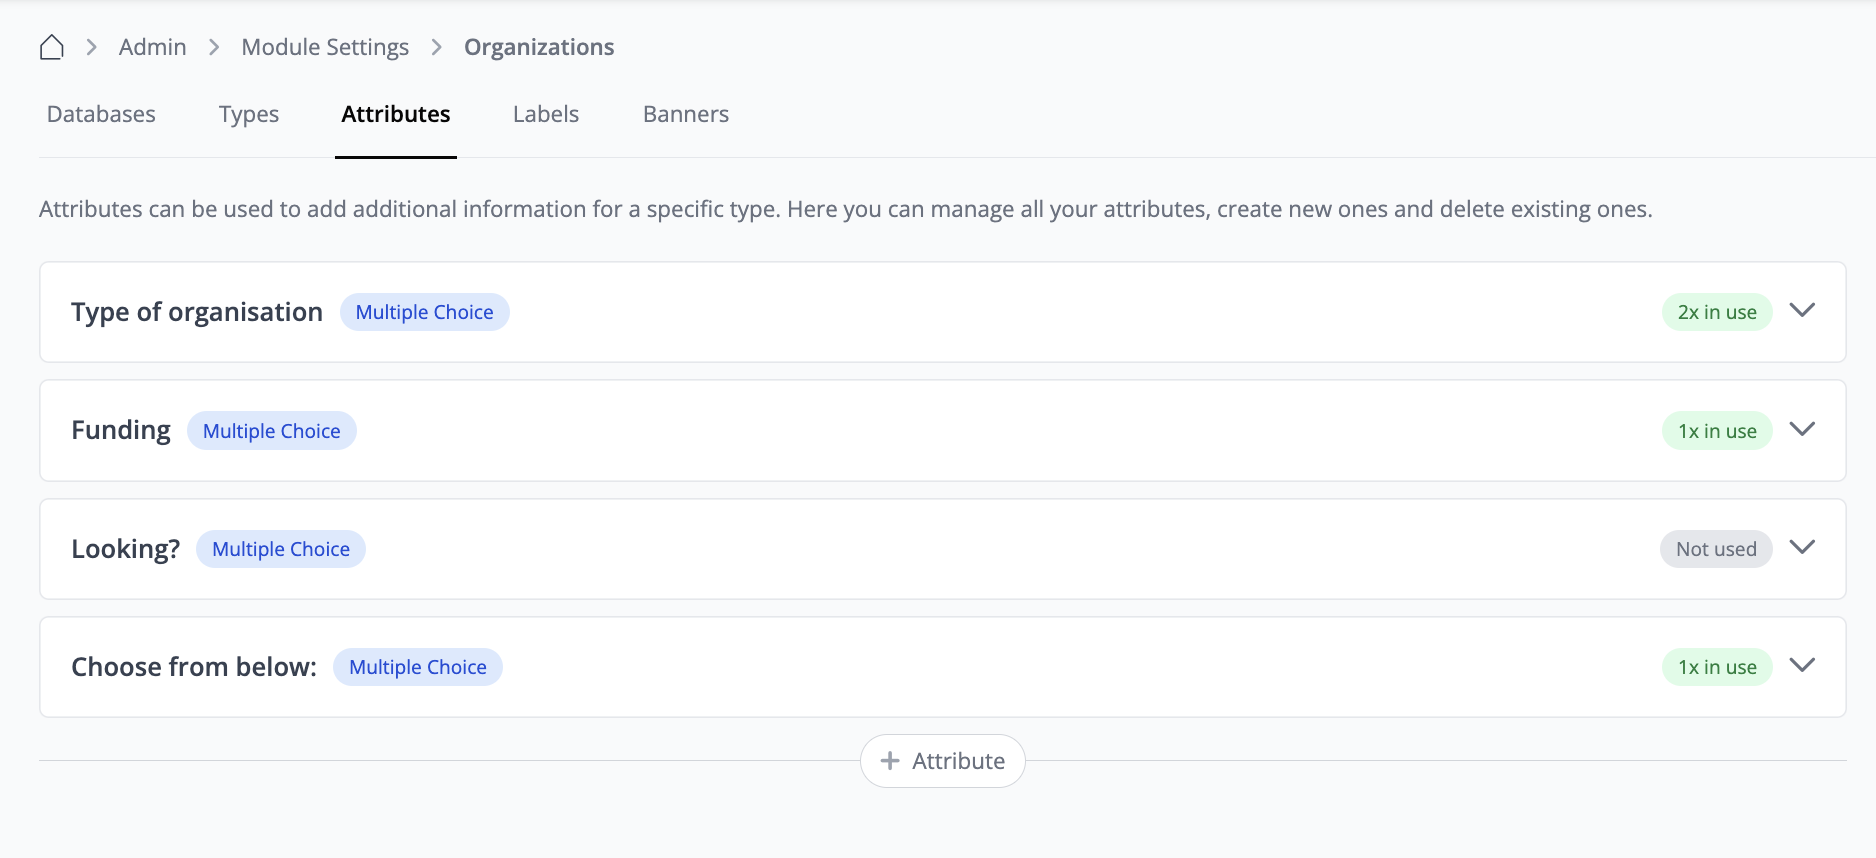
There is no need to create Attributes twice or three times. Custom Modules, Members, Organizations - they all share the same Attribute pool. Create an Attribute once, use it everywhere.
Look for the green "1 x in use" label (or more!) next to the Attributes of your choice. Click to see where else it's being used.
Let’s create a new Attribute and use it in the Section we created above. To create a new Attribute:
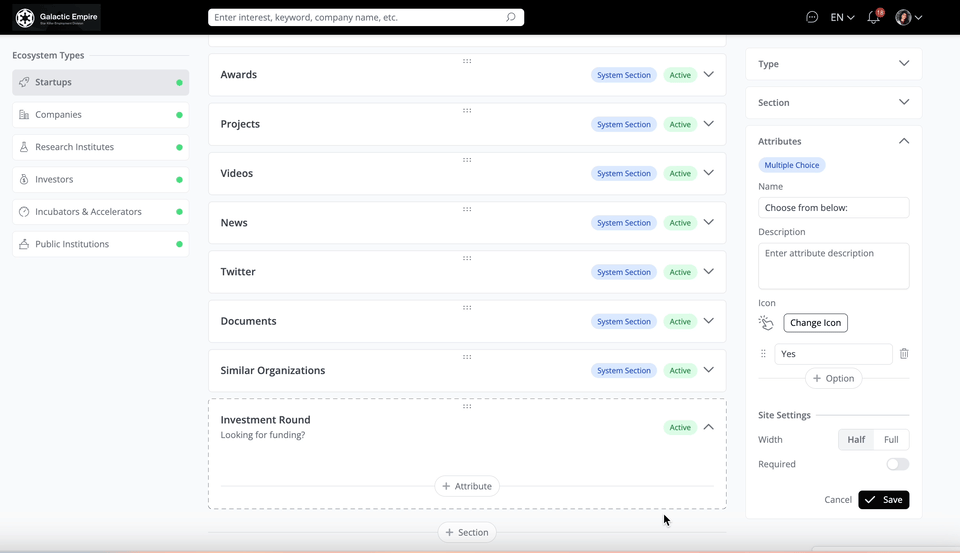
Once saved, your section is ready to be displayed on the Organization profile. You can also adjust the order of this section on the profile by simply dragging and dropping it into your desired position.
Attributes can be created not only from within sections but also via the "Attributes" tab in the Organization’s module settings. From there, you can view existing attributes and see how many times they have been used or are currently in use across the platform.
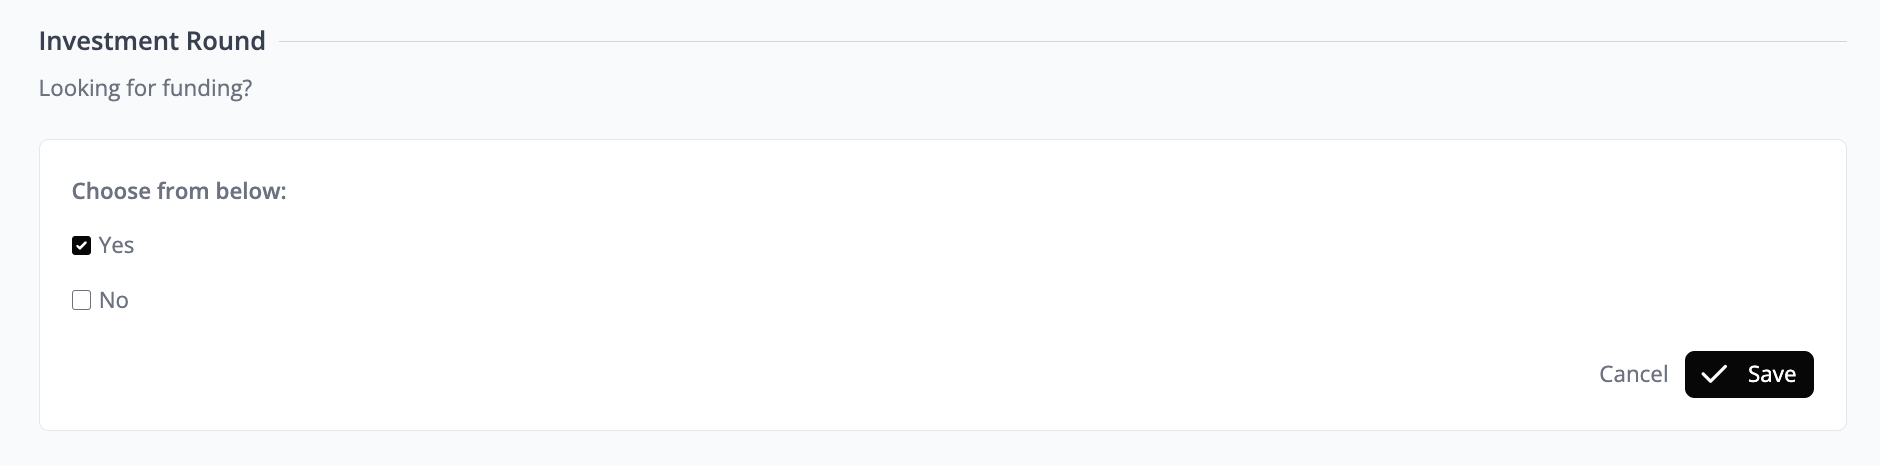
This is how the newly created section and attributes would appear on the Organization profile.
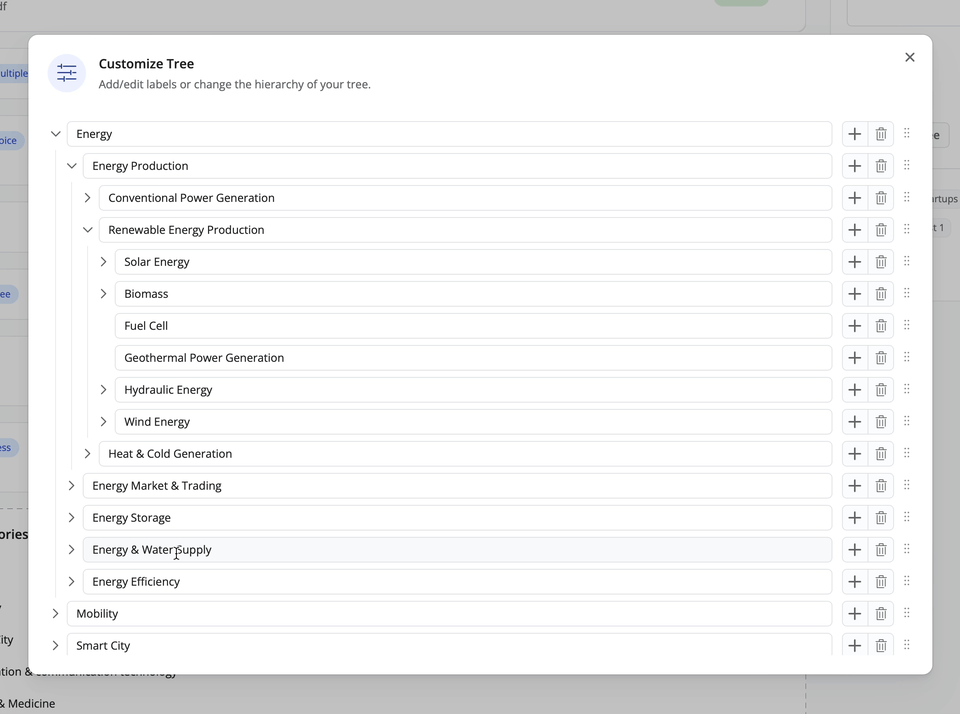
Tree Attribute to build a category tree
Explore the power of hierarchical data organization with the Tree Attribute. Visit the Attribute Library and start building your custom trees.
Select Tree Attribute from the Attributes list to tailor it to the platform's target audience.
Once you created your tree, go to the header section of your editor and deactivate the “Organization Subtype”.
Manage Label
When administrators need to manage data, Labels are utilized for filtering and restriction purposes. You have the option to group Labels into categories for improved organization. To assign a Label to your Organization go to the Organization's profile → edit → Admintab → scroll down to Labels and activate the toggle next to the desired Label.
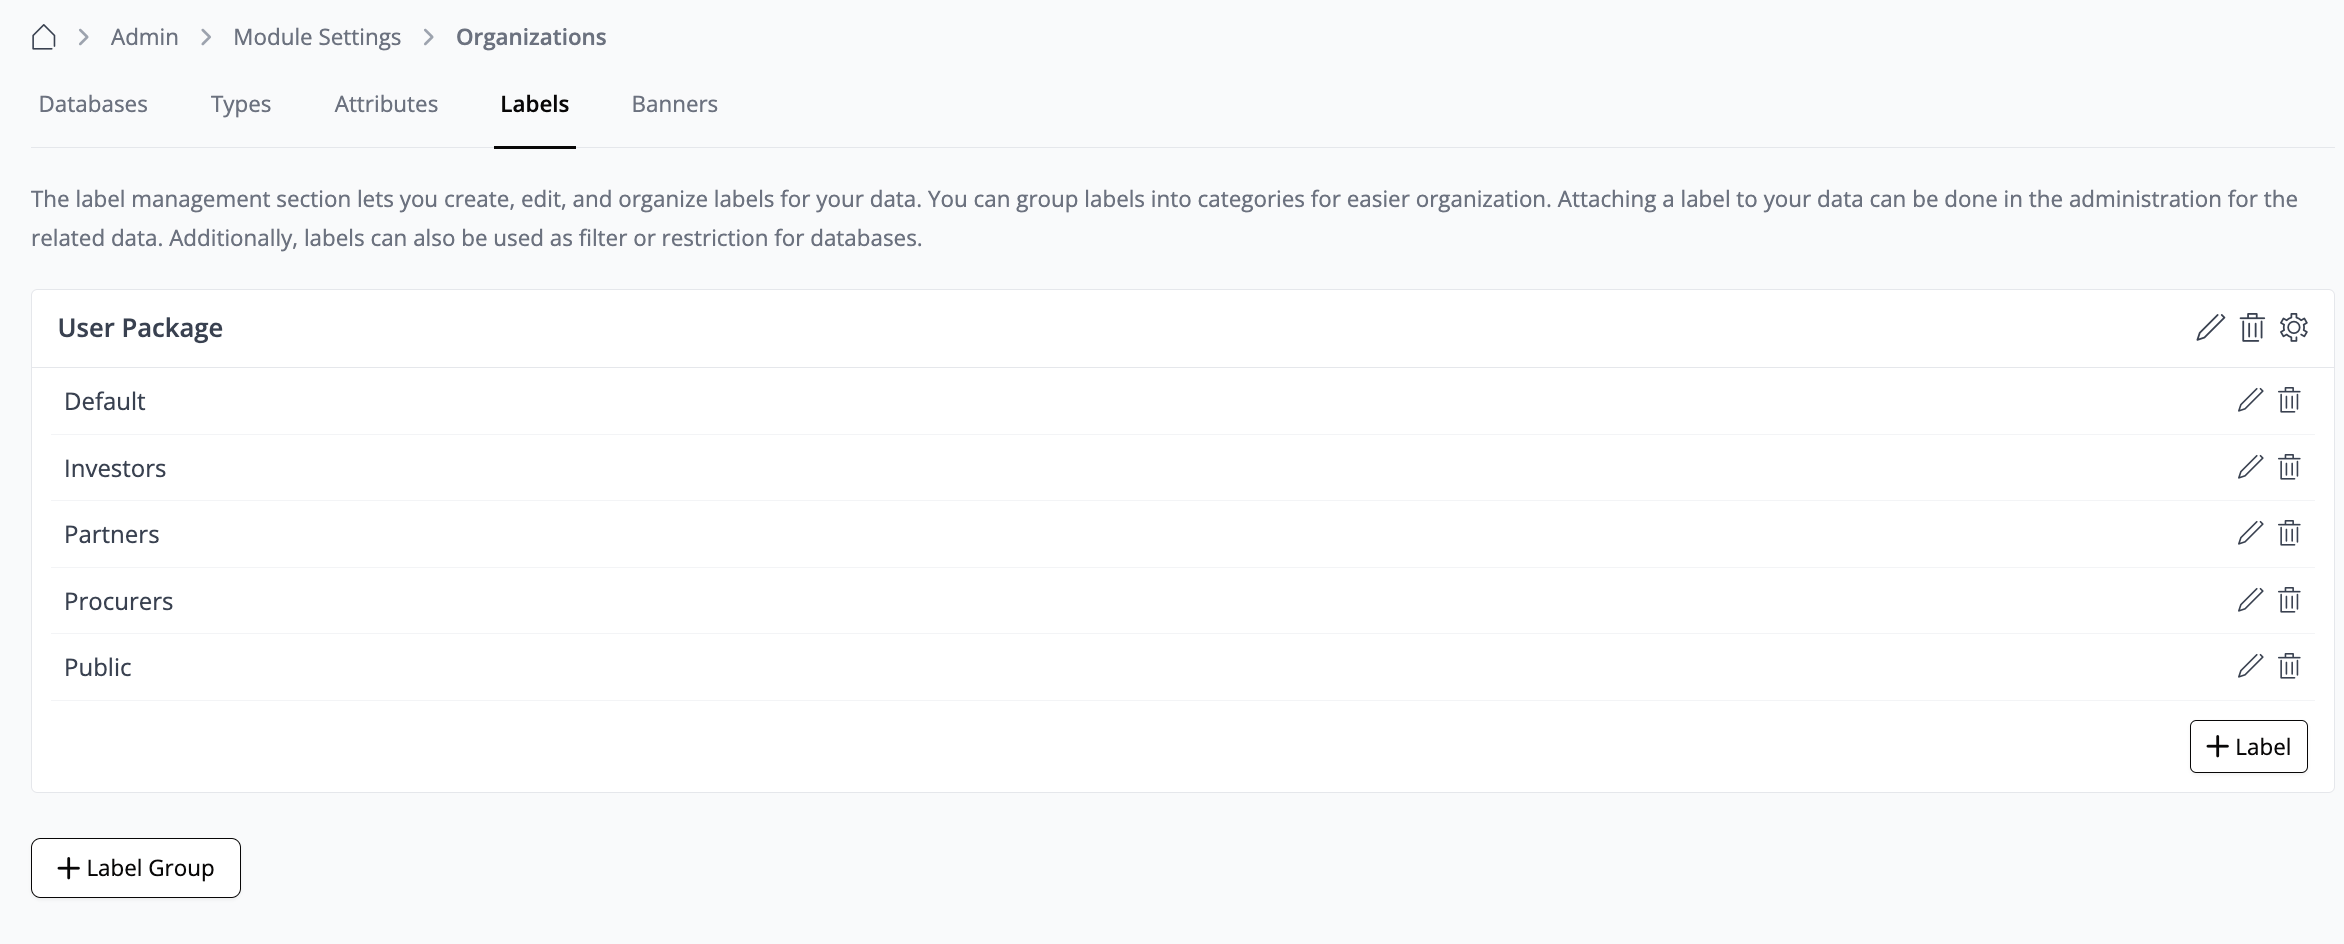
Create a Label Group
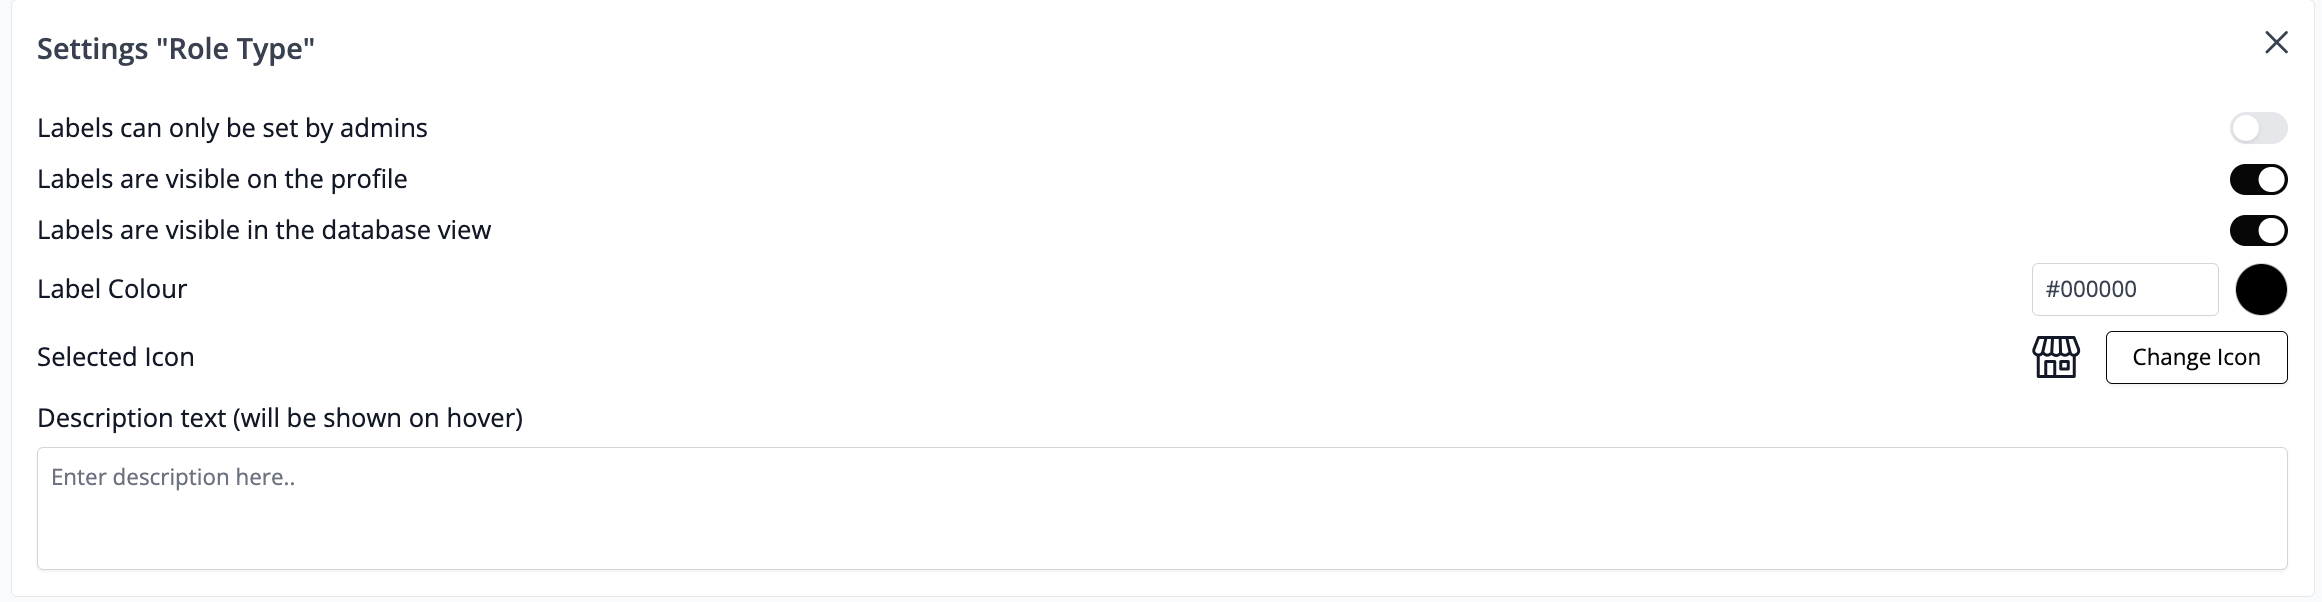
On the Labels page, navigate to the bottom and click “+ Label Group”. Enter the title of the Label Group you want to create. You can adjust the visibility of these Labels by clicking on the small wheel icon located in the top right corner, you will have three options to choose from.
Use Labels to create Filters
To create a Label, follow the steps outlined previously. Once you've created the Label, proceed to the "Filters" section in the Database tab. From there, enable the filter you wish to have in the Offers database by toggling the corresponding option.
Manage Banners
Banners serve as a means to emphasize important information on an Organization's profile. However, it's important to note that activating a banner for each Organization profile must be done by an administrator; Organizations themselves cannot enable banners.
❓ FAQs (User)
My Organization is not listed in the search, how can I add it?
Use the “+ Create Organization” option. Enter the company name and proceed by clicking “Next”. Based on your e-mail address and the entered company name, you'll receive relevant organization suggestions. If none are suitable, you can proceed with “+ Create Organization”.
Select your company's organization type and then the sub-type. You'll be provided with an address suggestion; if it's incorrect, make adjustments by choosing “Change Address” and proceed to the next step.
On the following page, you'll receive a suggested general e-mail address for your company. If it's not accurate, modify it by selecting “Change E-mail” and proceed to the next step.
In the next stage, you'll be presented with a brief description of your company. If it fits, proceed to the next step. Alternatively, make adjustments by selecting “Change Description” and then associate the new organization with your user profile by clicking “Finish”.
What are the "hashtags" in my Organization profile?
The hashtags or keywords visible on your card represent the categories of offers assigned to your Organization. They signify the areas or sectors in which your Organization operates. To modify these categories, please navigate to your Organization profile and adjust them accordingly.
What information must be provided for an Organization profile?
The essential details required for displaying an Organization in the database include the name, URL, e-mail address, and description.
How can I adjust the name of my Organization?
Please navigate to your Organization profile. There you can edit the name of your Organization by clicking on it.
Can more than one person be an Organization admin within an Organization?
Yes, the registered Organization admin can give admin rights to as many colleagues as required or set the default to "Admin by default".
What happens if an Organization admin leaves the Organization?
If an Organization admin leaves the Organization but there is another team member present on the platform, the team member who is active on most Innoloft platforms will assume admin rights for that Organization.
How can I make all my colleagues team admins of the Organization?
Within the platform's team section, you’ll find the option "Admin by default". Enabling this option will automatically assign admin privileges to every colleague in the Organization.
Can more than one employee of an Organization be registered as an admin?
Yes, each user can be made admin by an existing admin of the assigned Organization.
What resolution should the images have?
Header: 16:5 or 2.250px*700px Content Block: 750px*1000px
Where does a video need to be stored or from where does it need to be uploaded to be played in Content Blocks?
Store or upload your video from YouTube, Vimeo, Dailymotion, Twitch, Soundcloud or Facebook videos.
❓ FAQs (Admin)
What happens if the last member deletes his profile?
The Organization profile remains without members.
How can I edit an Organization profile that is already part of the ecosystem and is managed by a user?
If you are attempting to edit an Organization that is already managed by a user within the ecosystem, you will only have editing privileges once a user associated with that Organization joins your platform. For instance, if user A oversees Organization 123 on Platform X, you can edit the organization on your Platform Y only if user A joins Platform Y or if a new user B registers on Platform Y and becomes associated with Organization 123.
Can I add an existing user to an Organization?
Only the user can make changes to switch to a different Organization.
How can I export Organizations?
You can export Organizations through the Organization section in Content Management. Simply navigate to the Organizations tab and locate the "Export" button at the top right corner. Clicking this button will automatically download a CSV file containing the Organization data. If you encounter any formatting issues or broken special characters (Umlaute) upon opening the file, follow these steps:
After following these steps, the file should display correctly in Excel.
Not all Organizations are displayed
Select the Organization type → open the toggle for “Content”. Under “Required” select the Attributes to indicate an entry to be displayed in that particular database. If a profile has not filled out these fields, it will not be displayed to the user.
How can the Organization type be edited (eg. from Start-up to Corporate)?
Click on the “edit” button for the Organization. Now click on the type-tag in the upper left corner. You will now find the menu to choose a new Organization type.