Connect a webhook with Zapier (Example: Send a welcome e-mail to a user)
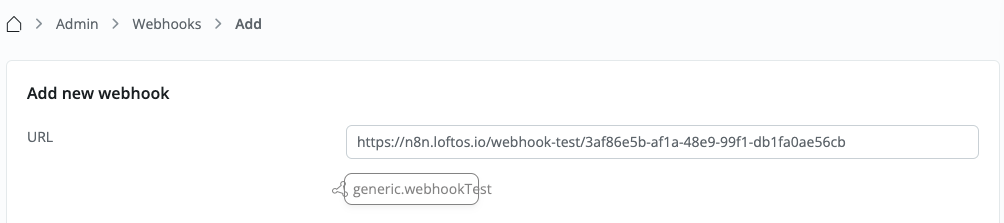
Go to Admin → Other → Webhooks.
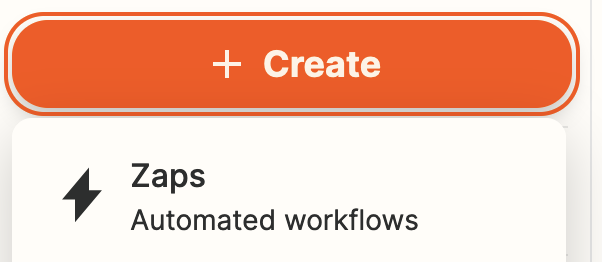
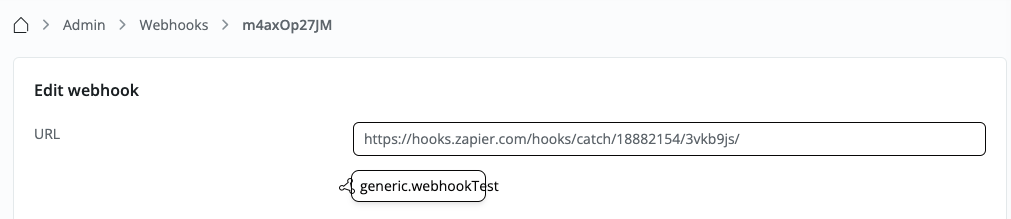
Start by selecting “+Webhook”.
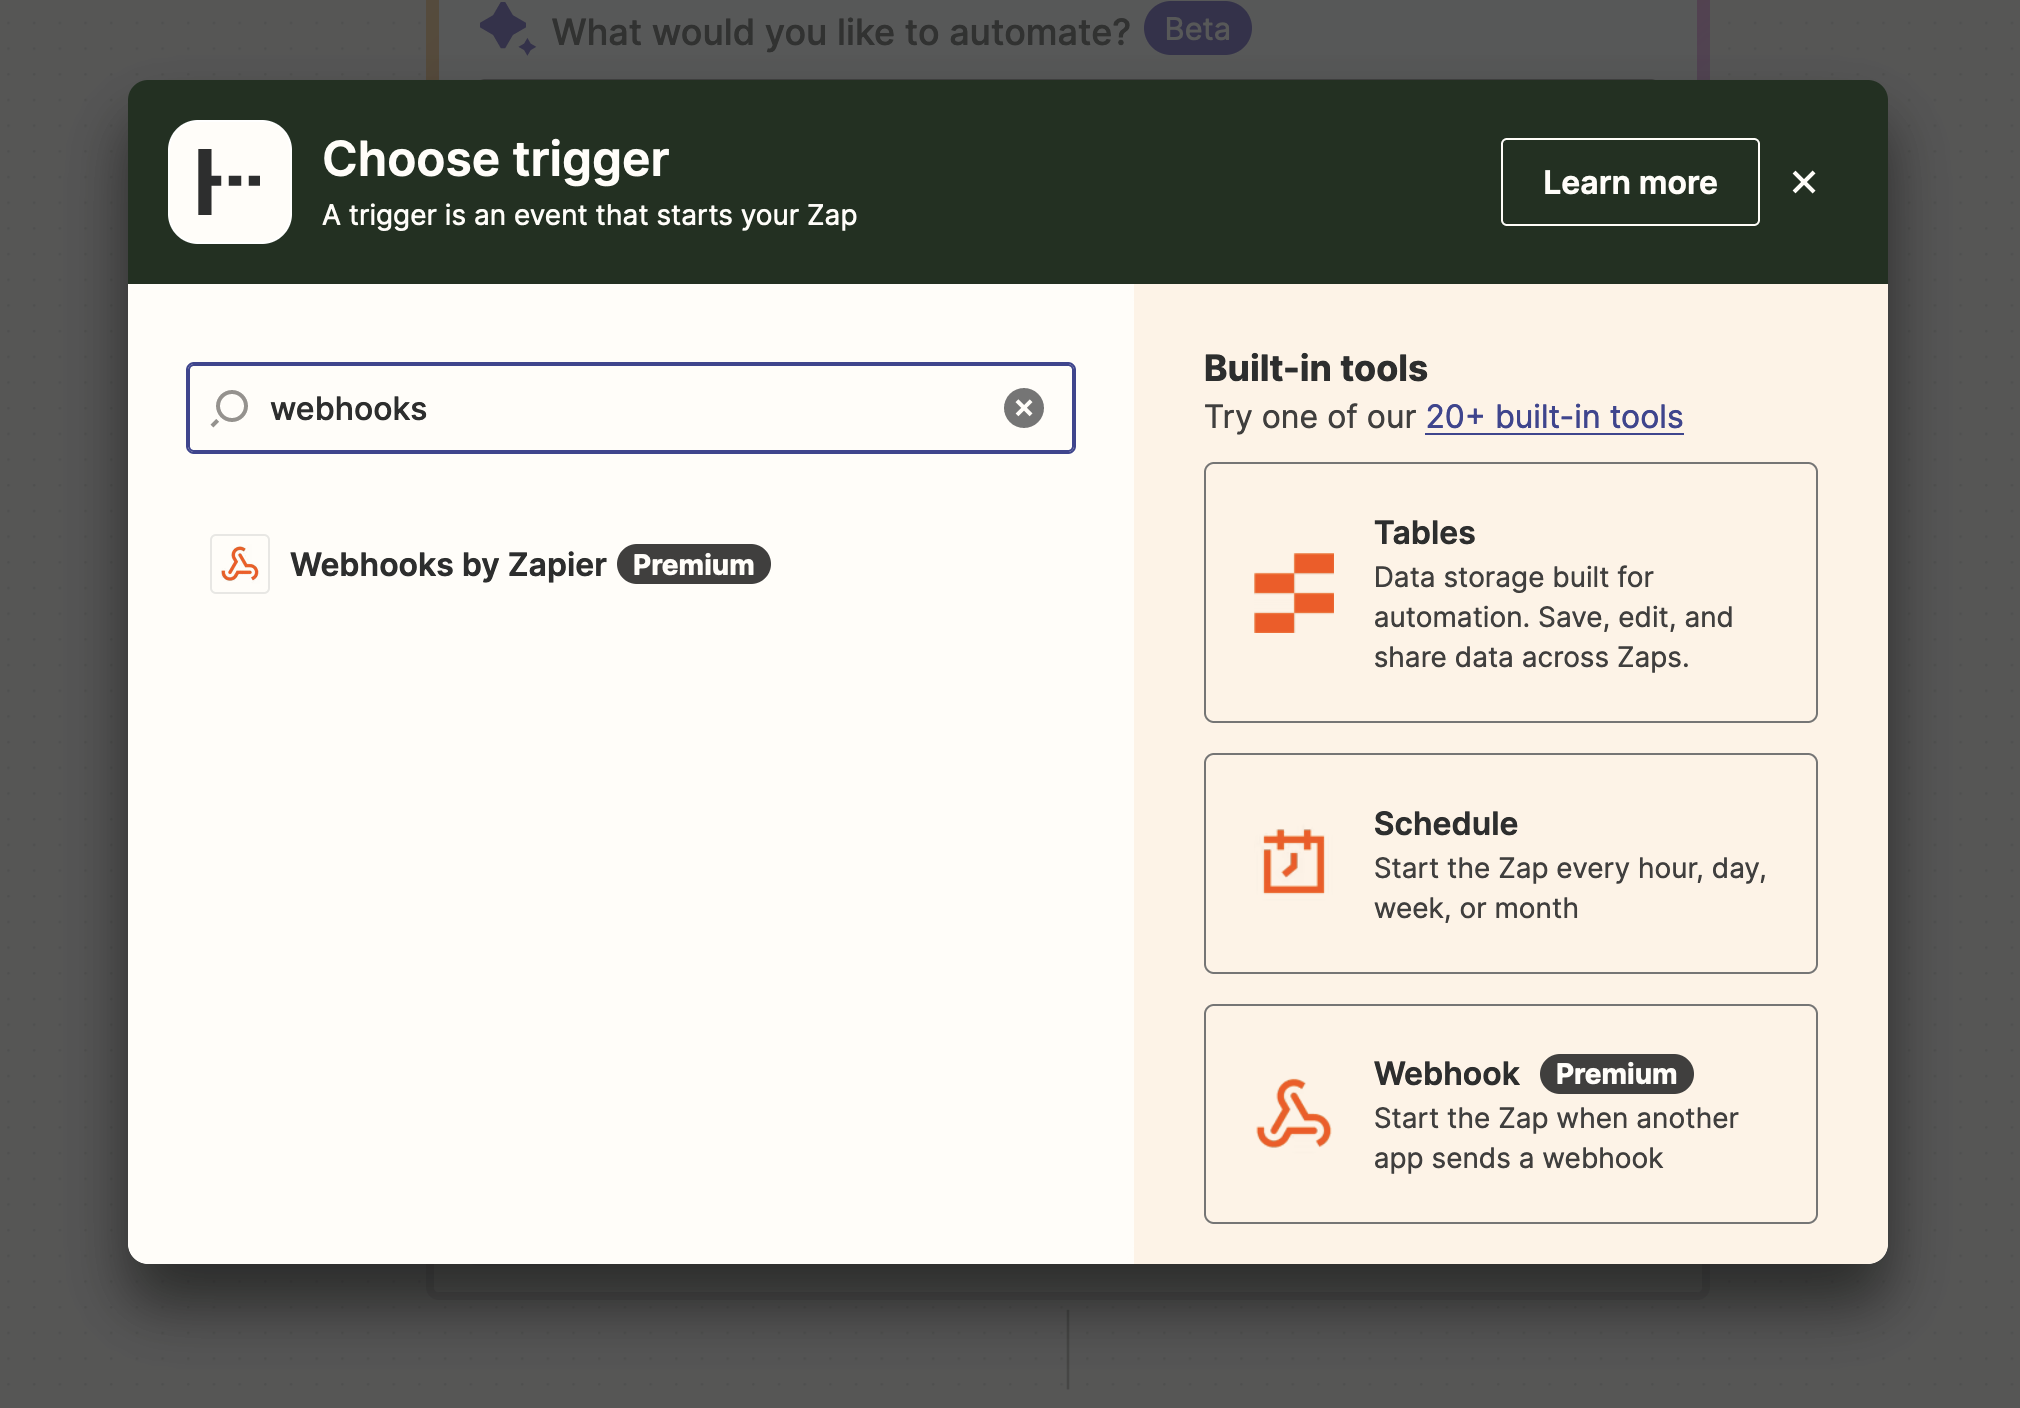
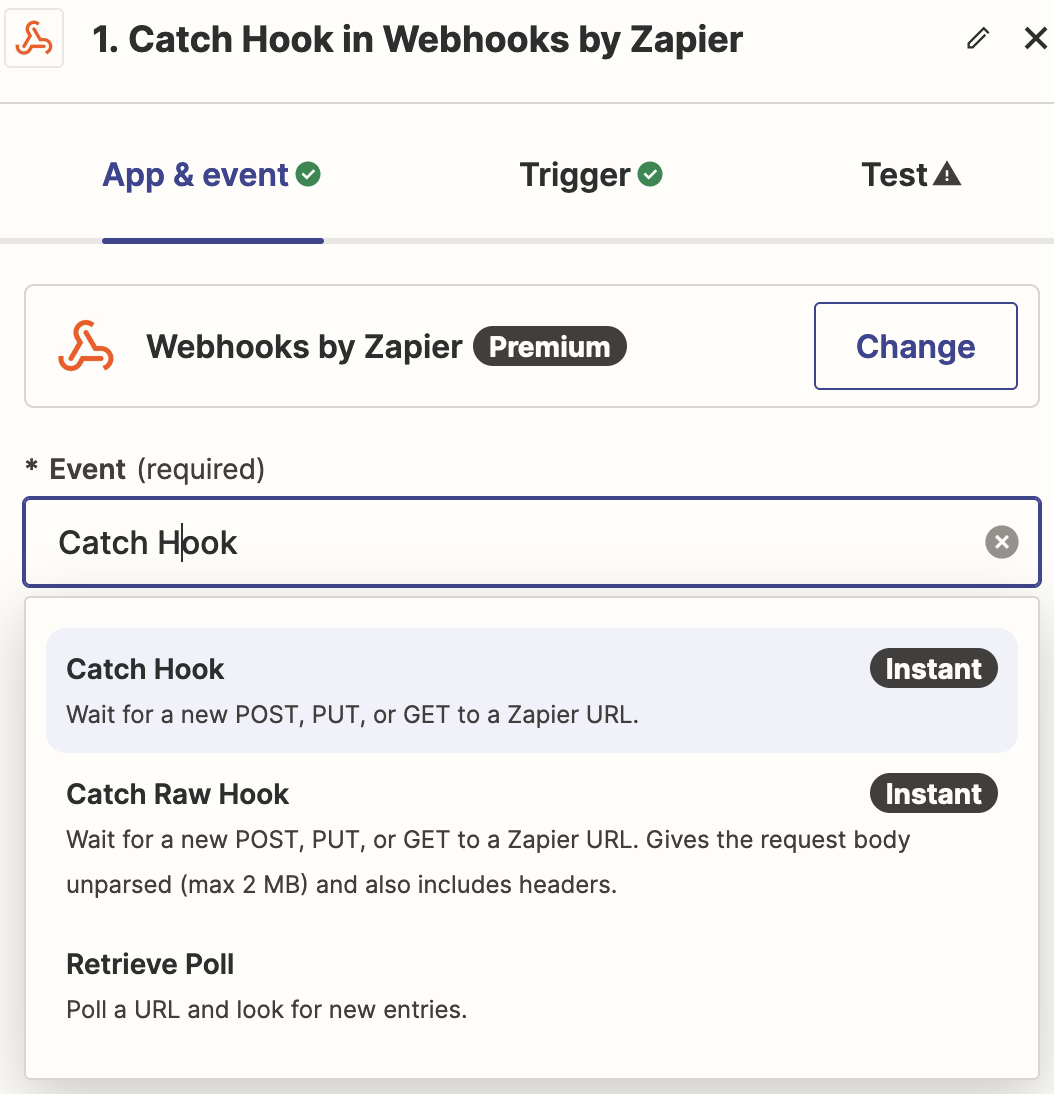
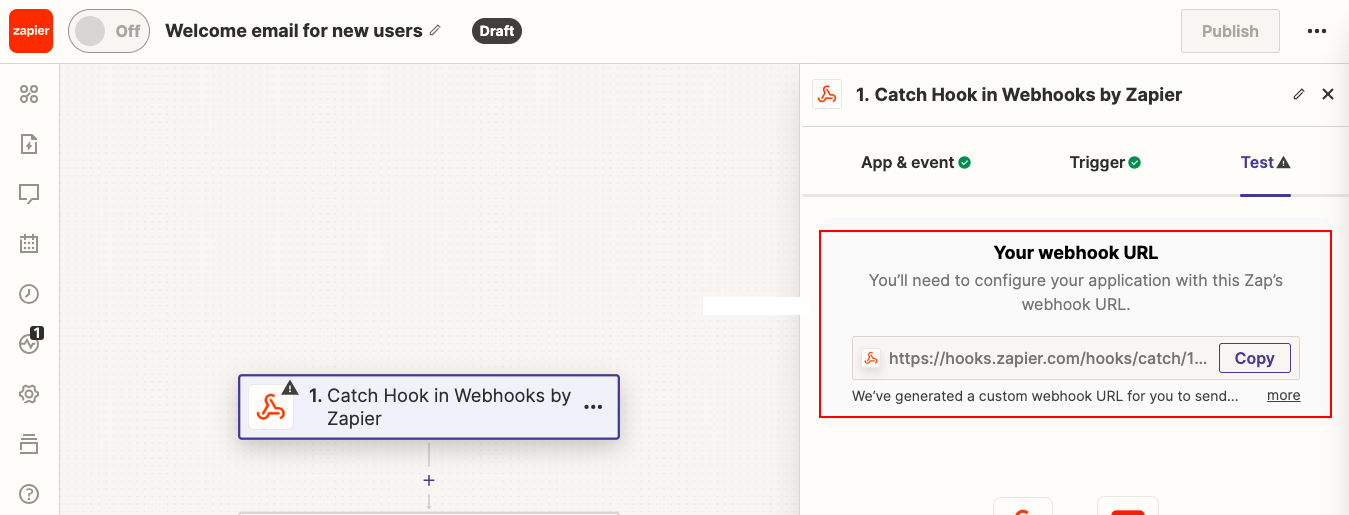
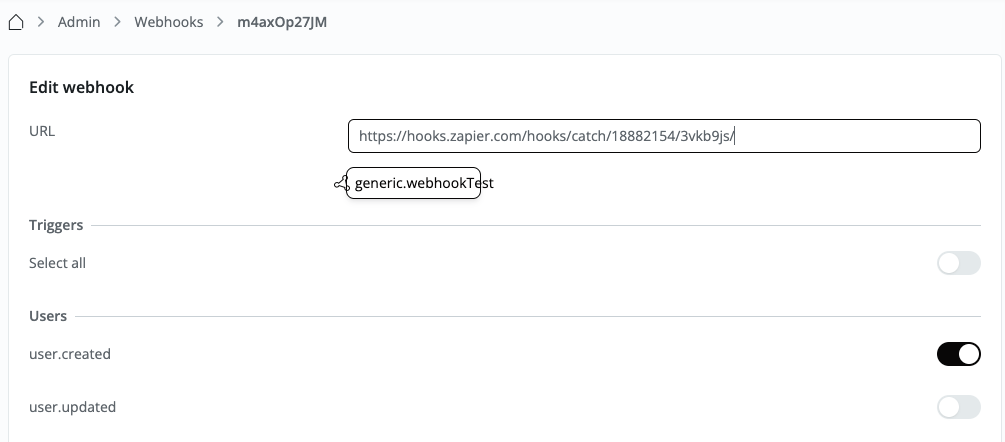
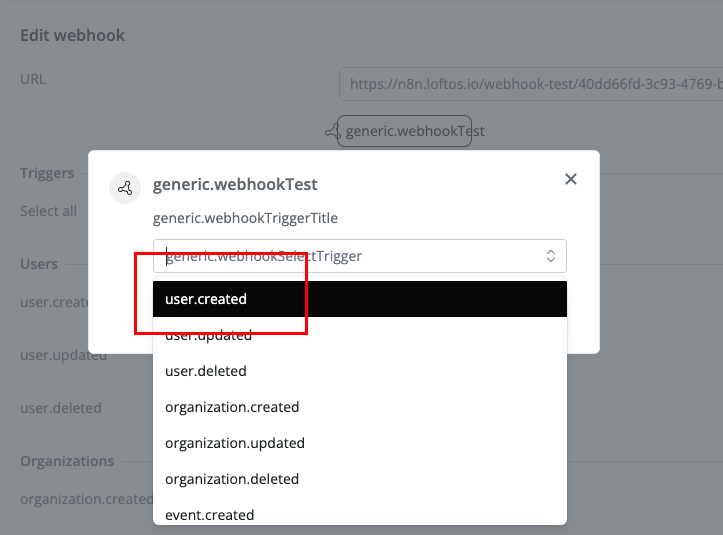
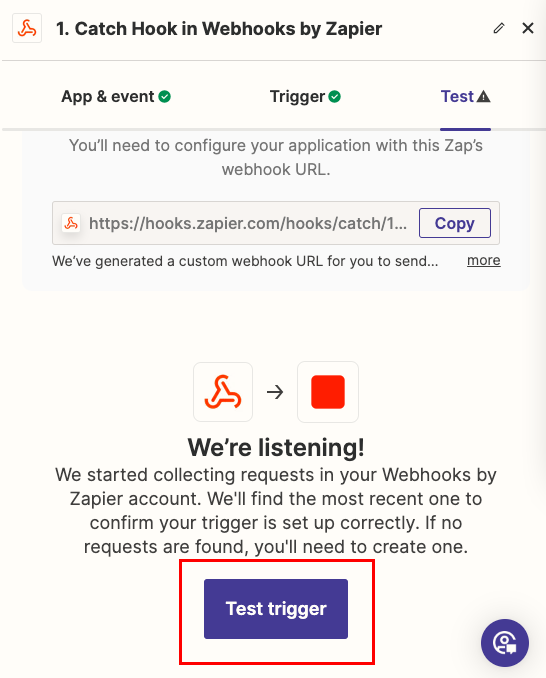
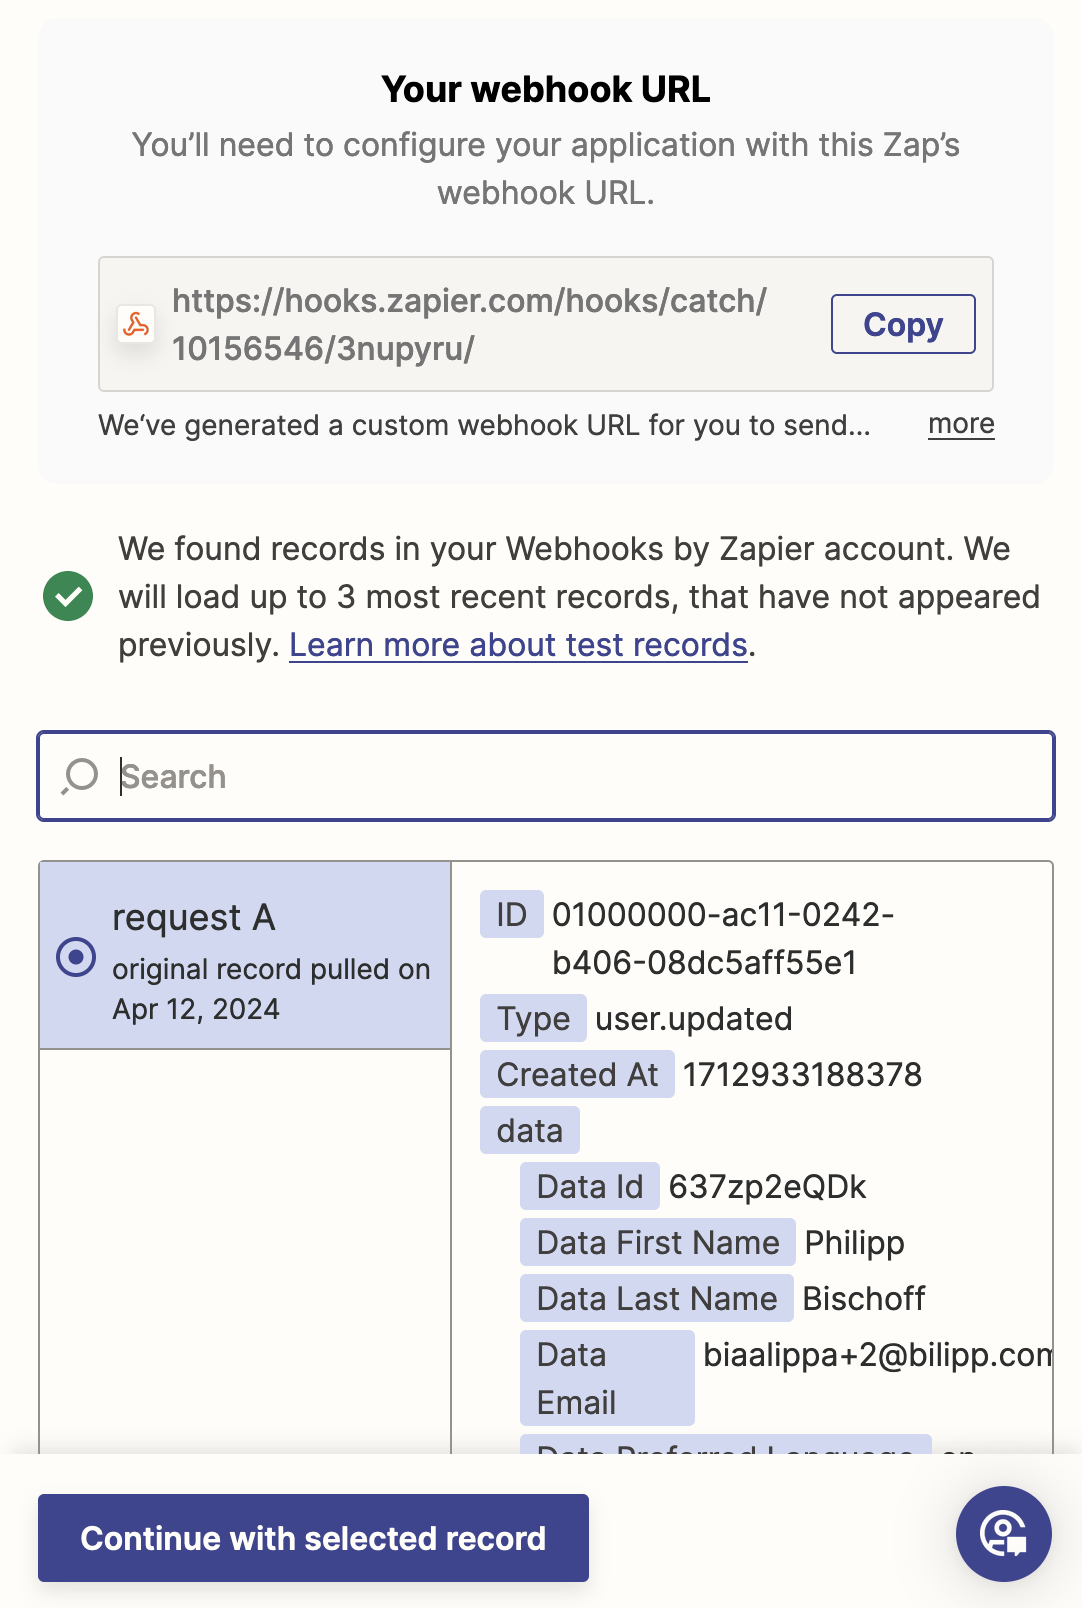
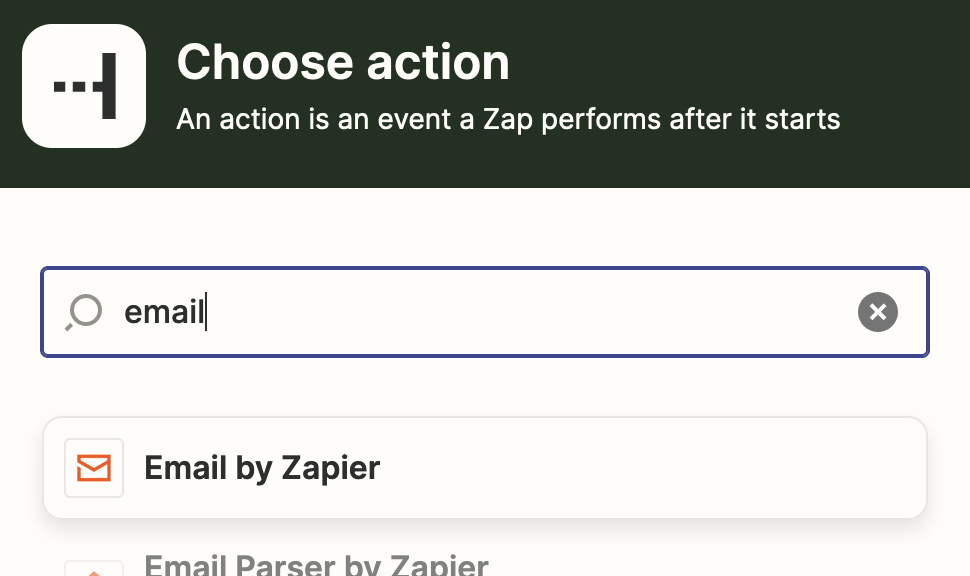
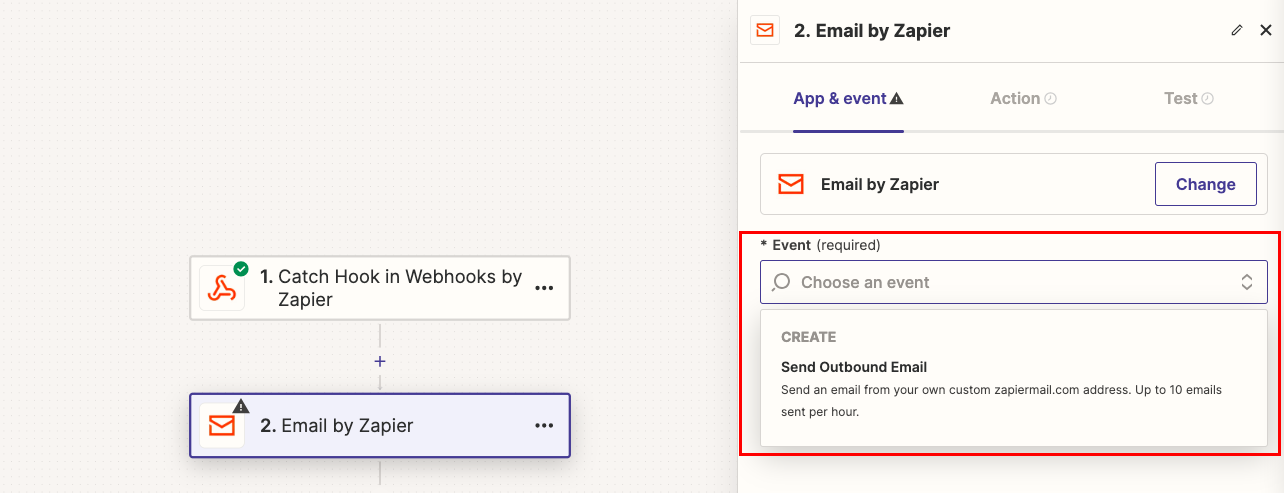
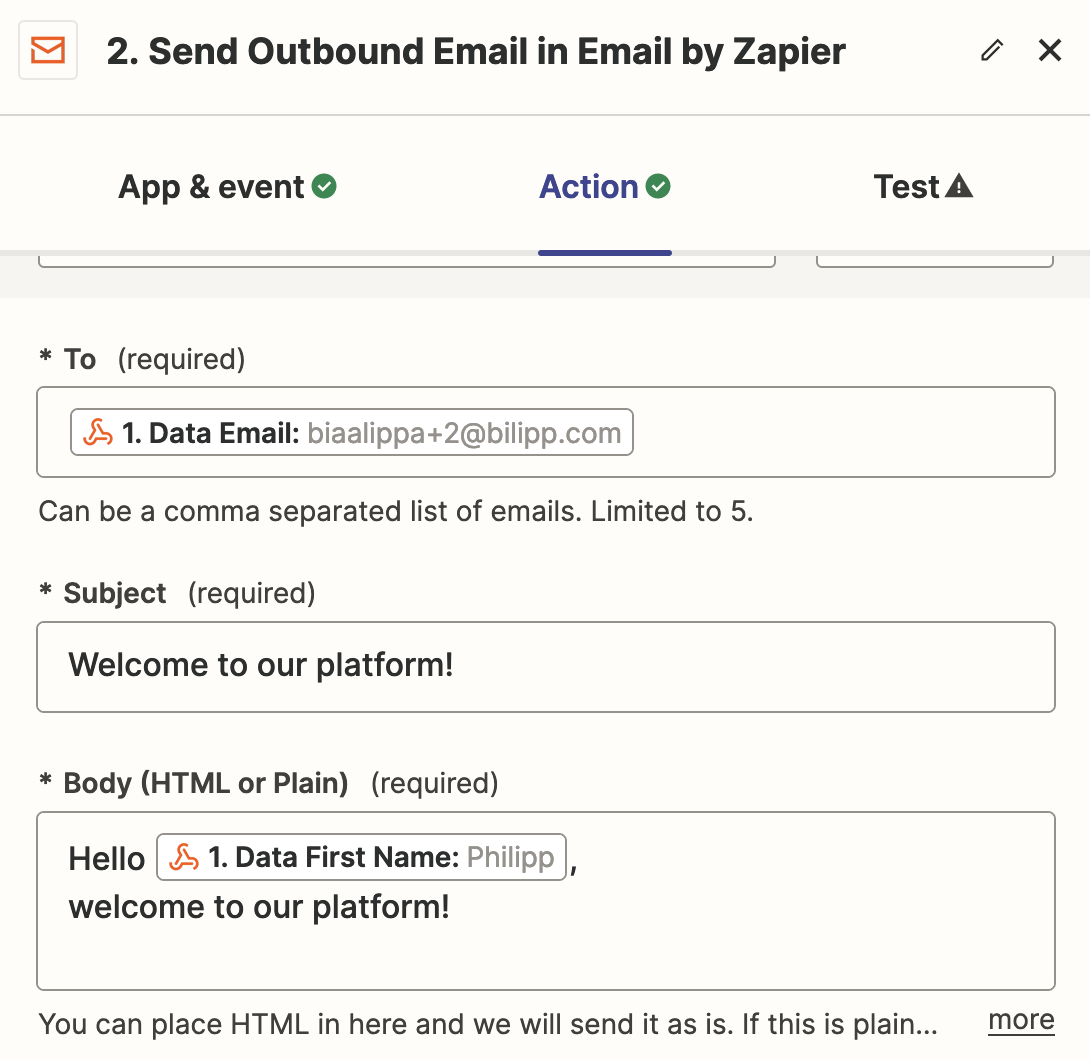
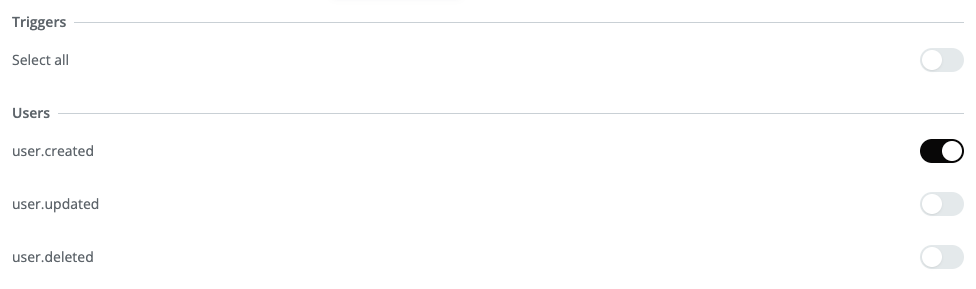
Choose the “Webhooks by Zapier” trigger. Select the added integration, use “Catch Hook” option as the event, and click “Continue”. On the next screen (”Trigger”) click “Continue”. A webhook URL has been generated. “Copy the URL”.Go back to your LoftOS application. “Paste the webhook URL” in the required field.Choose the specific event for which you want to trigger your webhook. For instance, if you wish to send a welcome e-mail to new users, select “user created” as the event, scroll to the bottom of the page, and “Save”.Click on “Test Webhook” to trigger the test.Select the event “User created”, this will trigger Zapier to create the event.Next, go back to your created webhook in Zapier and use “Test Trigger” , select the trigger you want to use and click “Test trigger”. This will make an example request, so Zapier knows the data it can work with.Now you should see a list with data like this: Select “Continue with selected record”.Next, we choose the action where we want to use our data. This can be any possible integration that Zapier offers. Like Salesforce, Pipedrive, Google Sheet or others. In this example we want to use the “Email by Zapier” action as we want to send a welcome e-mail to our new user. The sender will be Zapier. If you prefer to use your organization’s e-mail address to appear, please choose your e-mail provider. Select “Send Outbound Email” as event and click “Continue”.In the next screen you can configure your e-mail. You can make use of the data that is used in the webhook. You will see the example values from the test webhook. This will be replaced with real data once the integration is activated. Click “Continue” when you are done. In the last step, you can test your integration. In case you require assistance with Zapier, please take a look at their Help Center.
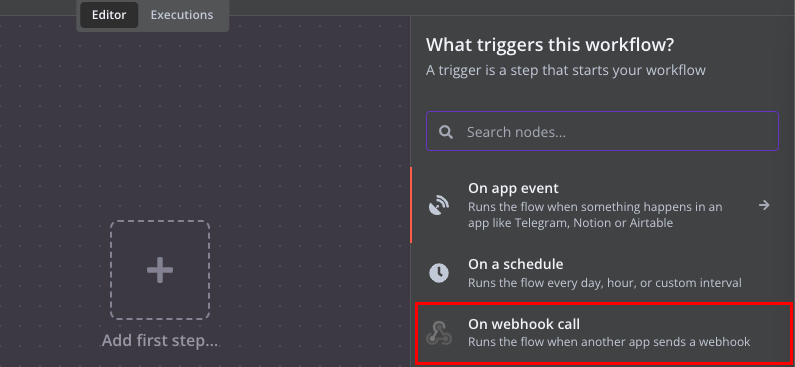
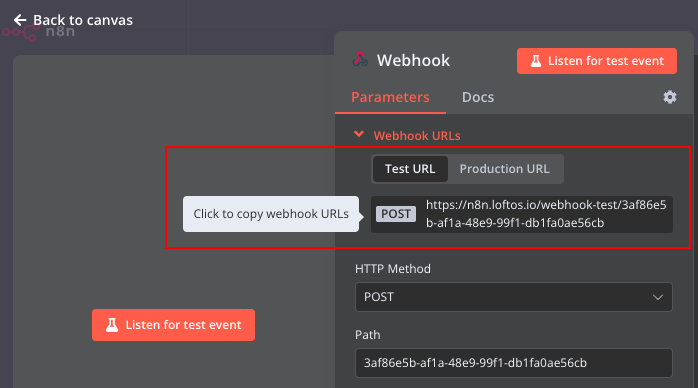
Connect a webhook with n8n (Example: Send a welcome e-mail to a User)
Go to Admin → Other → Webhooks.
Start by selecting “+Webhook”.
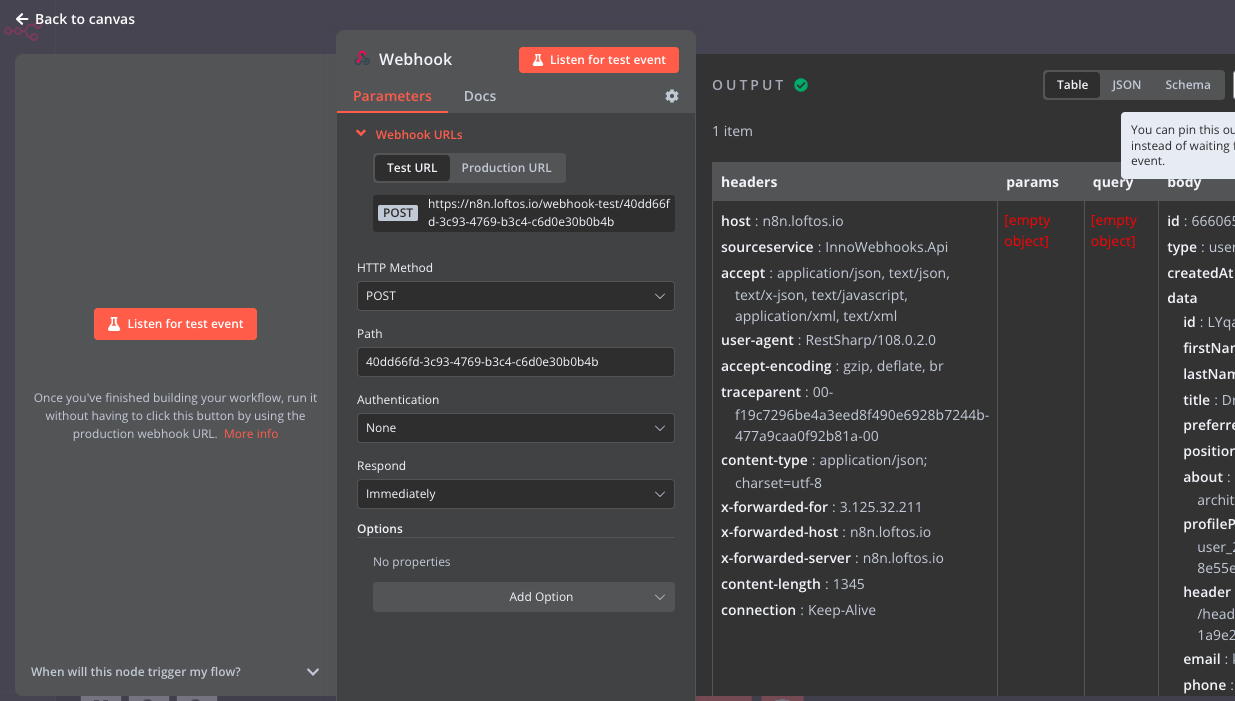
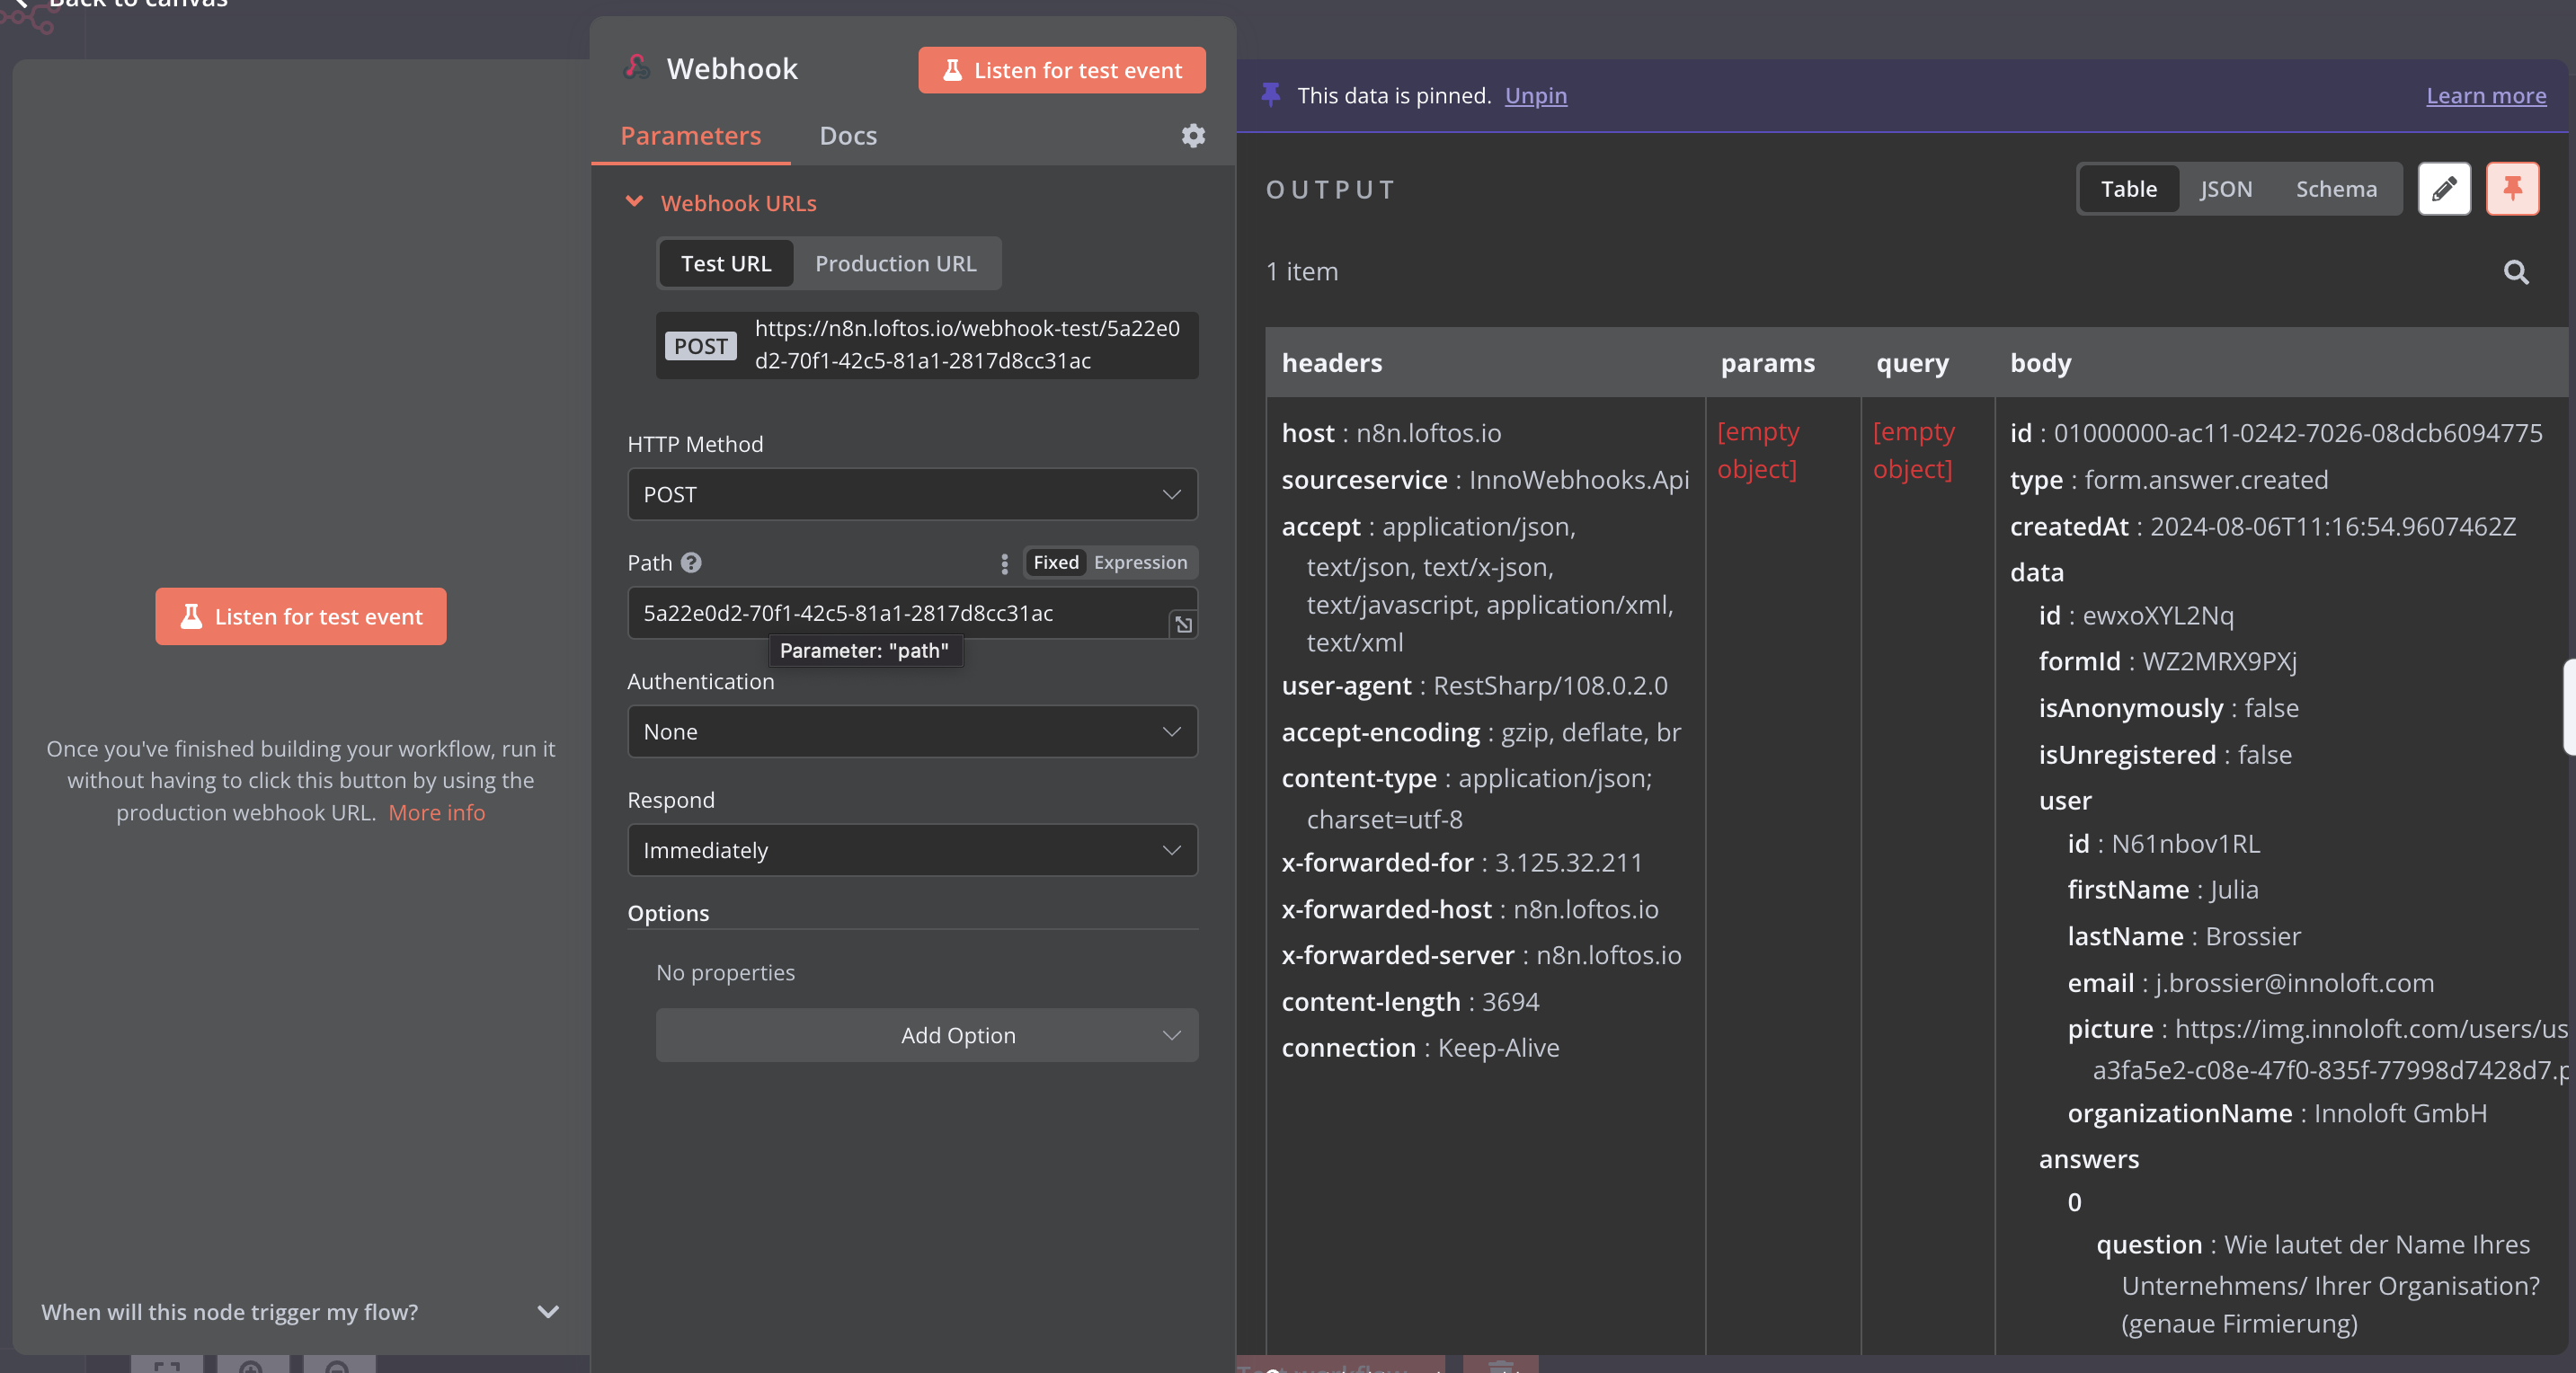
Select the “On webhook call” trigger. A webhook URL has been generated. Put the HTTP Method on “POST”. “Copy the URL”. Go back to your LoftOS application. “Paste the webhook URL”.Choose the specific event for which you want to trigger your webhook. For instance, if you wish to send a welcome e-mail to new users, select “user created” as the event and “Save” at the bottom of the page. Go back to your created webhook in n8n and select “Listen for test event”. Go back to your created webhook on your platform Initiate the “Test Webhook”. This will trigger n8n to create the event.Select the event “User created” and click on “Test”. You should now have data in your n8n board. Click now on Production URL and paste this URL in the webhook field on your platform. To work with real data: Create a second webhook on your platform with the test url, linking the action you want to track. Click on listen, then take the action: register a user, register to an event, fill out a form, etc. You should now have the real data in the board on the right. Click on the pin button on the upper right. Next; go “Back to canvas”. Click on + and select the IF function On the left-hand side, look for the field “formID” and drop it in the field “value 1” of the conditions. Copy the value of your form, event, or custom module in the field “value 2”. Make sure that the condition is set to “equal to”. click on “test step”. If you get the output “branche item TRUE”, then everything is ok. Next, go “Back to canvas”. Click on + and select the automation you want to set up, eg. send out an email Connect your email account (you need to get these parameters from your email admin)Put the email addresses in the “To” field (if you have several addresses, you need to separate them with a “,”Type in the message you want to sendTest the step. Go back to your canvas flow. Save your flow and activate it. In case you require assistance with n8n, please take a look at their Help Center.
Connect a webhook with Make.com
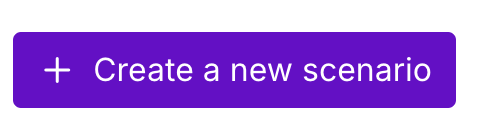
You need to create an account on make.com
Receive an email when a new user registers
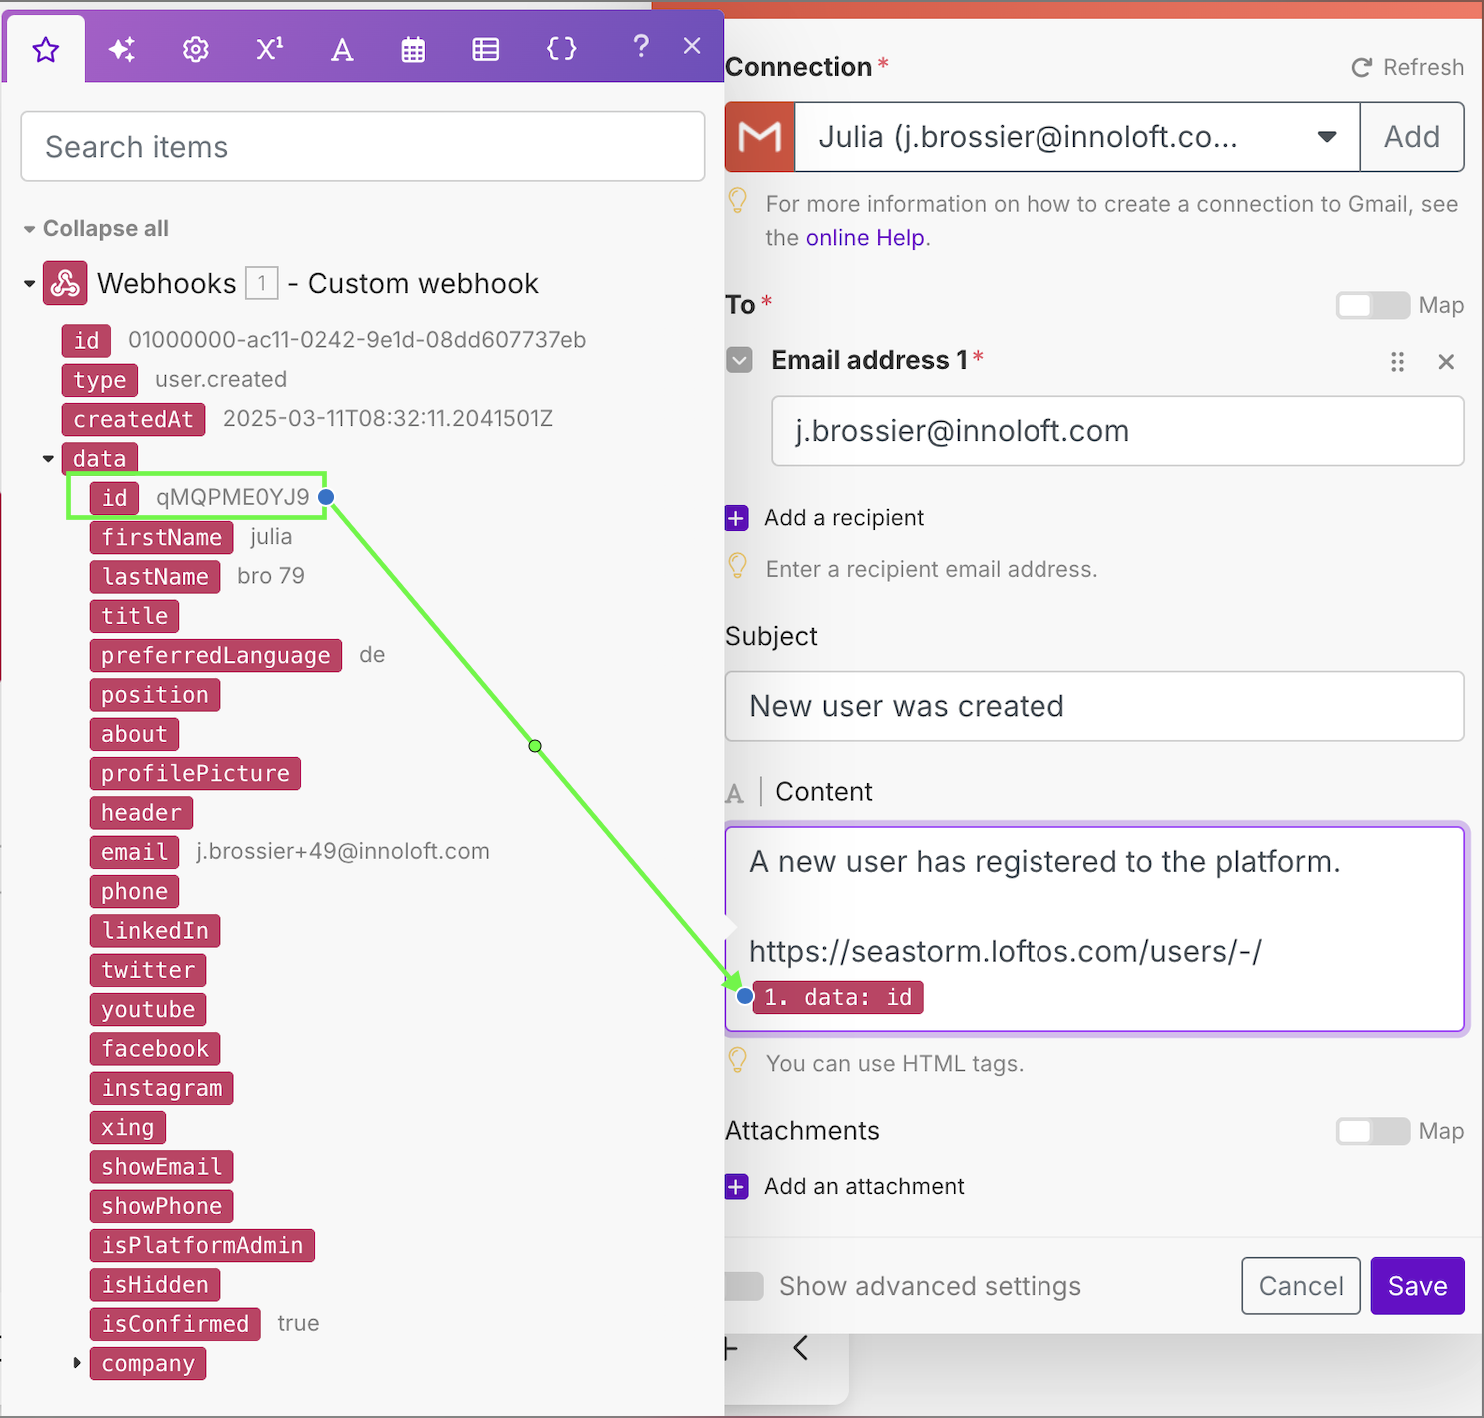
Download the file here below. Then, on the bottom bar click on the three points and click on “Import blueprint”. Click on the webhook icon - Add - Type in the name “New user created” - Save. Click on “copy address to clipboard”Go to your platform - admin - other - webhooks. Add a new webhook and paste the url from make in the field “URL”. Activate the toggle “user created” and save your webhook. Open your webhook and click on “test webhook”. In the dropdown list, select “user created” and click on test. Now, go back to your scenario within make and click on the Gmail iconIf you are not using Gmail, delete this icon (right click - delete), then click on +add a module and search for your email provider in the list. Connect your email account. Add the email address to which the email should be sent and a subject. Within the content field, add your text and link the user profile by using: platformurl/users/-/”id field”. You need to drag and drop the id-field from the list of fields that pops up when you click within the content field. Click on save, then right click on the email icon and choose “run this module only”. Type in an id - you should now receive a test email if the setup works. Save your scenario on the bottom bar and activate the toggle next to “Immediately as data arrives”. Your scenario is now active. Click on scenarios on the left: you see here an overview of all your scenarios. To test your scenario, create a test user on your platform: you should receive an email with the link to the new user’s profile.Receive an email when a user profile is updated
Download the file below. Then, on the bottom bar click on the three points and click on “Import blueprint” Click on the webhook icon - Add - Type in the name “ user updated” - Save. Click on “copy address to clipboard”Go to your platform - admin - other - webhooks. Add a new webhook and paste the url from make in the field “URL”. Activate the toggle “user updated” and save your webhook. Open your webhook and click on “test webhook”. In the dropdown list, select “user updated” and click on test. Now, go back to your scenario within make and click on the Gmail iconIf you are not using Gmail, delete this icon (right click - delete), then click on +add a module and search for your email provider in the list. Connect your email account. Add the email address to which the email should be sent and a subject. Within the content field, add your text and link the user profile by using: platformurl/users/-/”id field”. You need to drag and drop the id-field from the list of fields that pops up when you click within the content field. Click on save, then right click on the email icon and choose “run this module only”. Type in an id - you should now receive a test email if the setup works. Save your scenario on the bottom bar and activate the toggle next to “Immediately as data arrives”. Your scenario is now active. Click on scenarios on the left: you see here an overview of all your scenarios. To test your scenario, update a test user on your platform: you should receive an email with the link to the updated user’s profile.