📢 Requests
💡 Introduction
The Requests module serves as a platform for users seeking various types of business partnerships, including suppliers, technologies, startups, investments, project collaborations, and more.
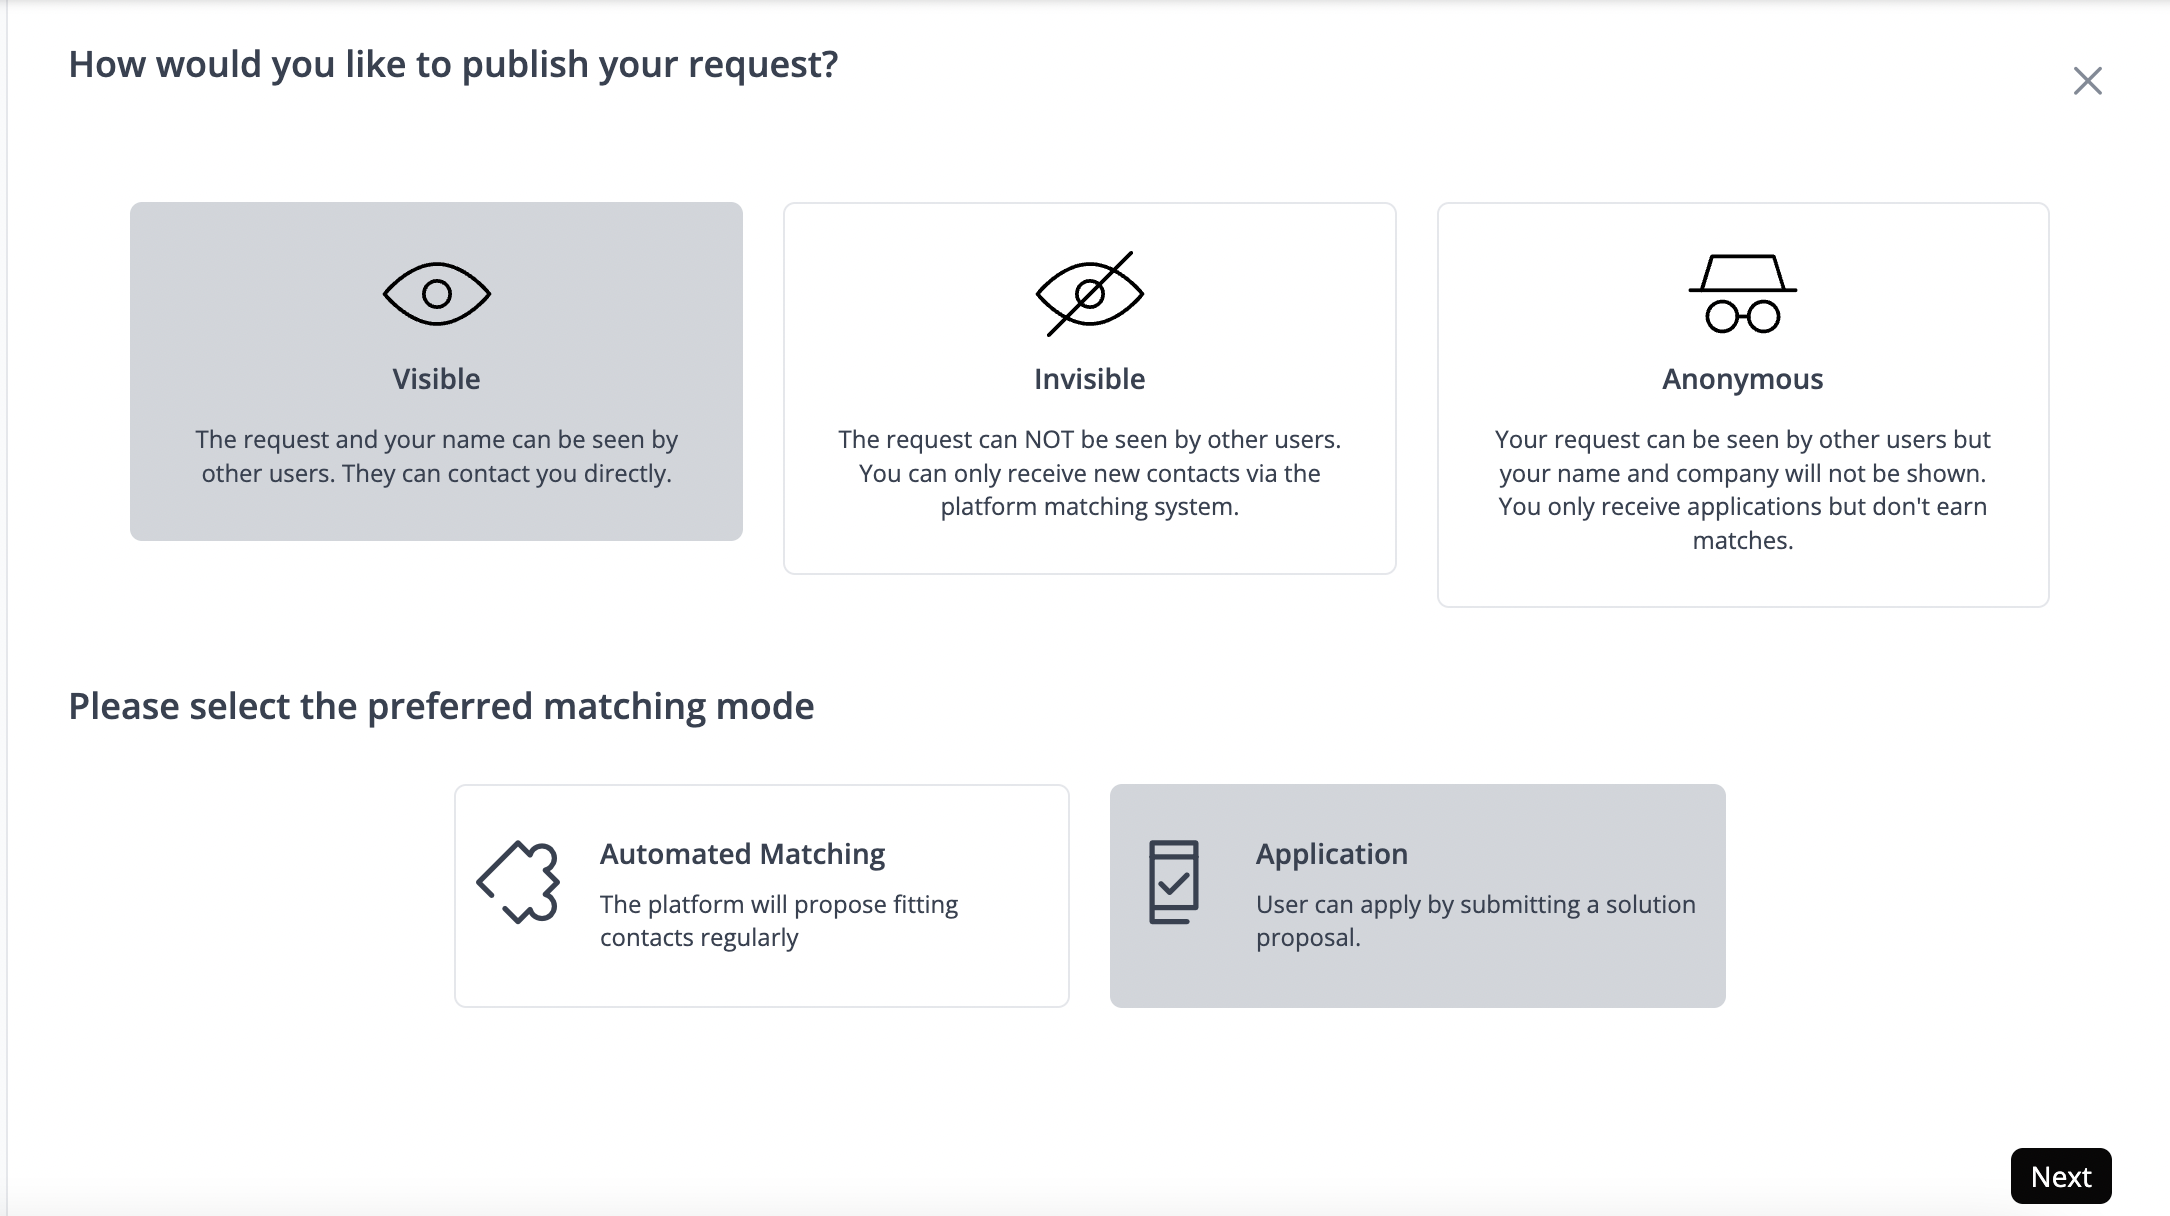
Users have the flexibility to customize the visibility of their Requests. They can opt to make their Request visible to all users, keep it invisible, or create an anonymous Request.
For visible Requests, users can choose between automatic matching suggestions or receiving applications via a custom form. However, for exclusively invisible Requests, automated matching, and anonymous Requests, the application process is routed through the Forms module.
👩🏻💻 Usage
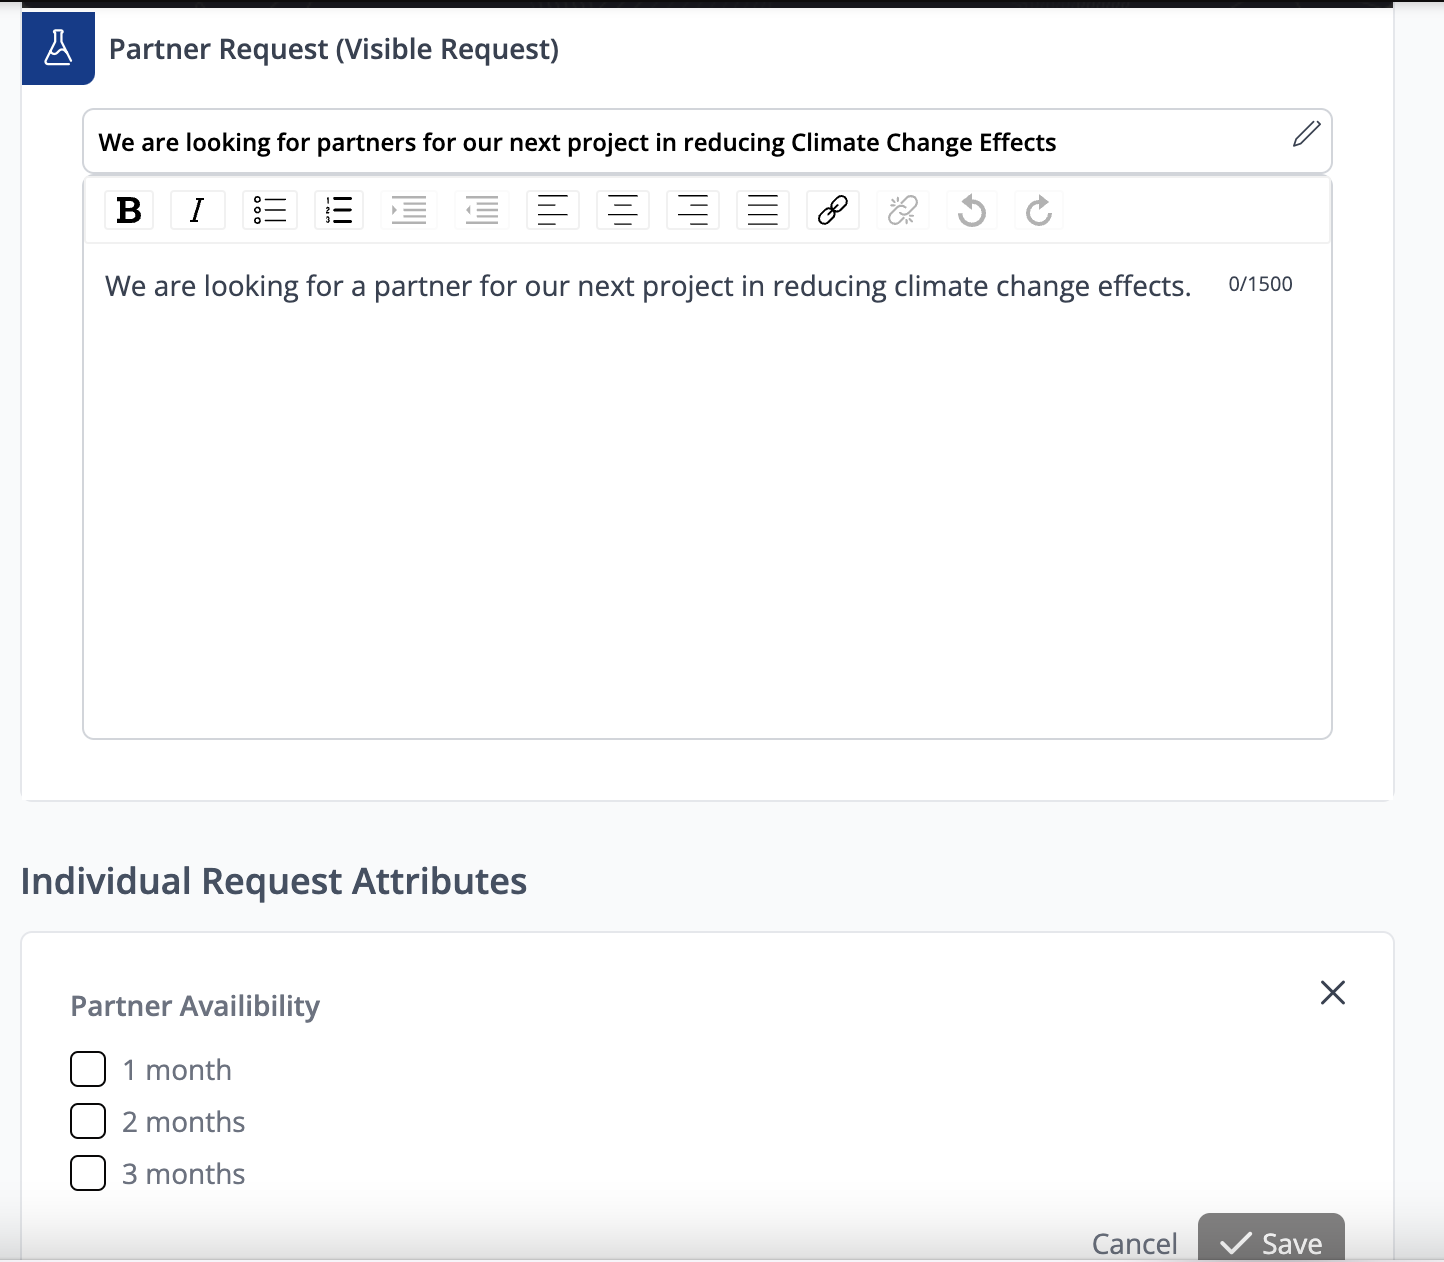
Create a Request
Matching mode

Edit or Delete a Request
Click on ”My Requests” at the top right-hand-side corner. From here you can edit or delete your Request.
Matching for Requests
When opting for Automated Matching, the system utilizes the information provided in your Request to identify suitable matches within your network or across the ecosystem. By analyzing the data you put in, it seeks out individuals or offers that align closely with your requirements, facilitating efficient and relevant connections.

If you select the Application mode, users within the ecosystem can submit applications directly in response to your Request. Upon accepting an application, you gain the ability to contact the applicant directly, enabling streamlined communication and collaboration.
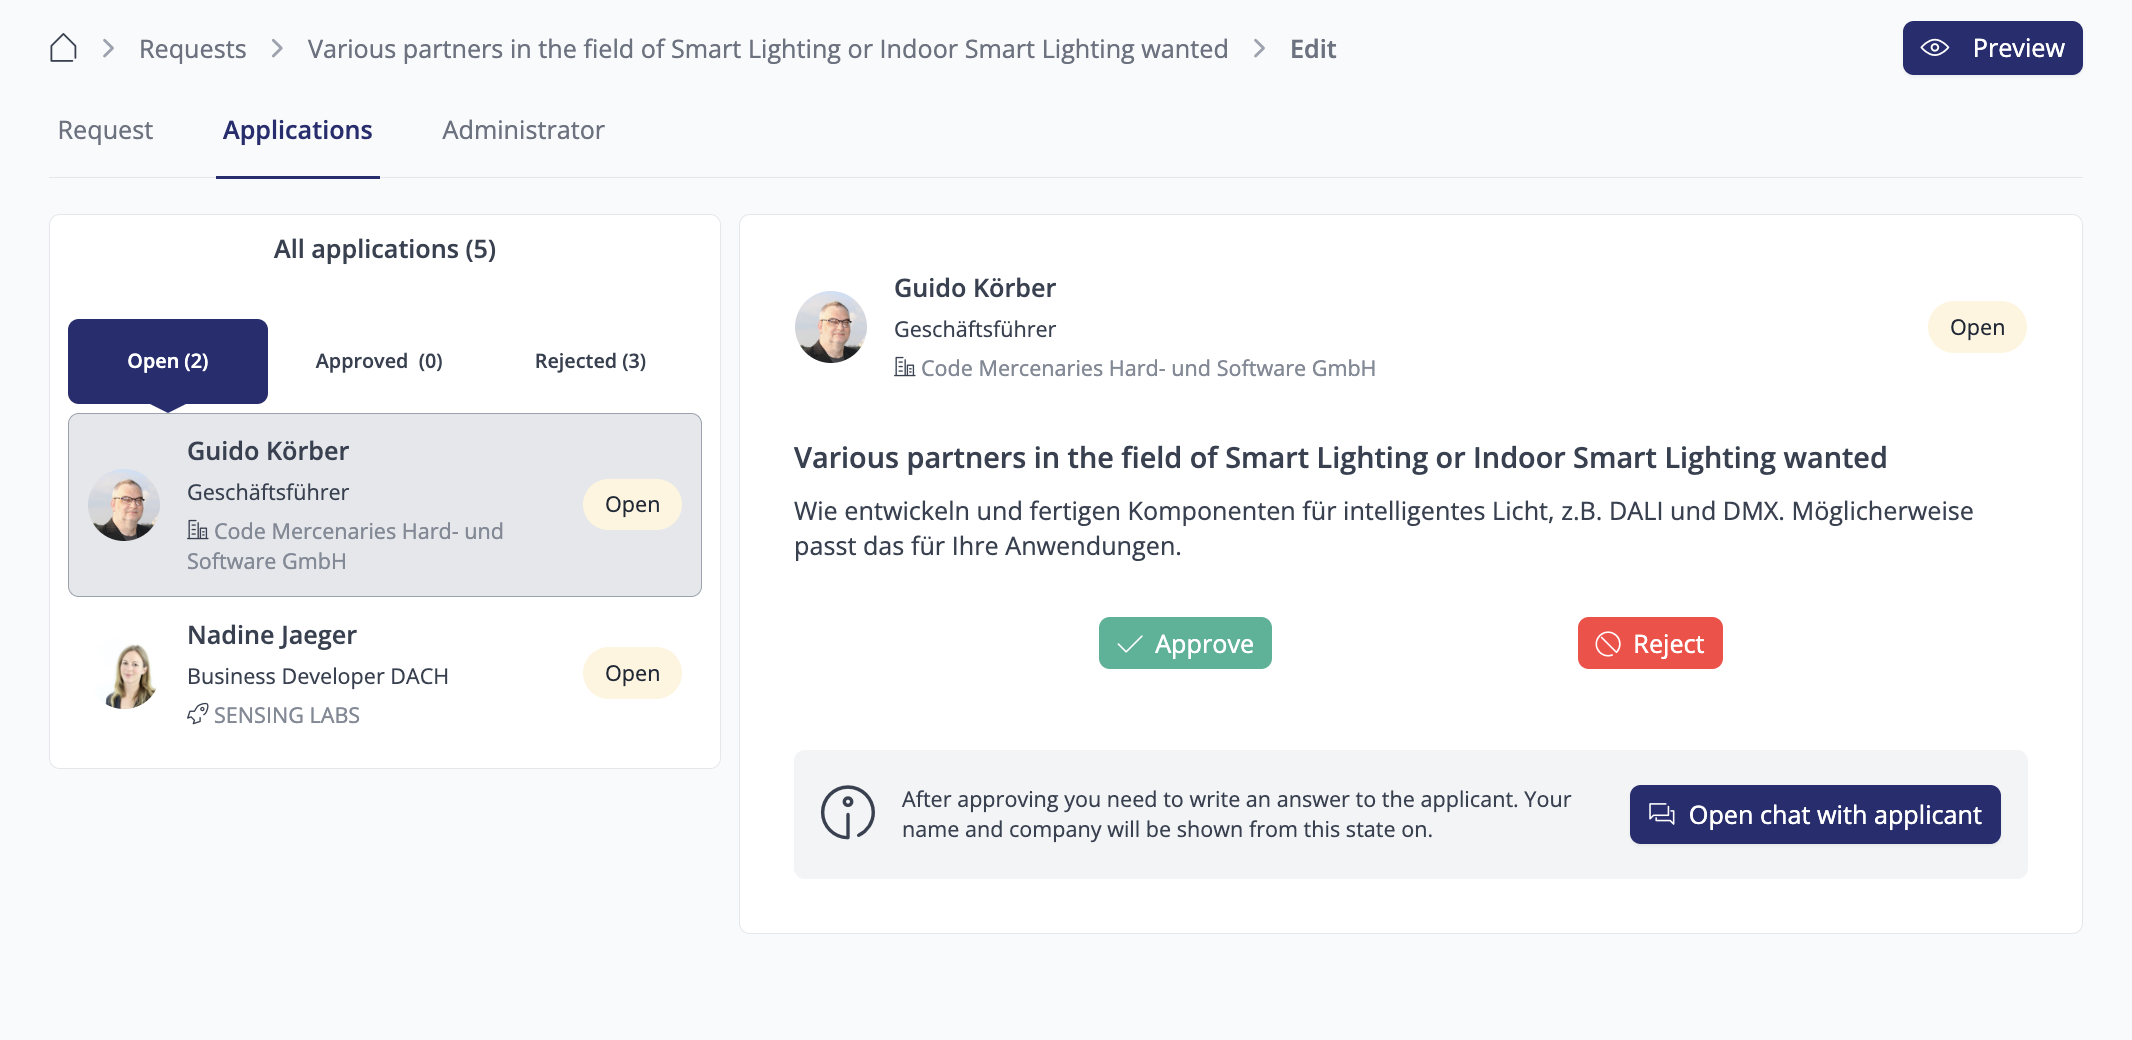
Where to find Matches
Navigate to "My Requests" to view all matches your Request has received thus far.
Depending on your community platform, you may encounter one or two columns:
Clicking on a match opens a side menu detailing how the match was calculated, along with the matching attributes and respective percentage scores. Utilize the message button to directly contact your match via the chat system.
The matching system continually suggests matches every week, so regularly review your Requests for potential contacts, solutions, or applicants.
🎨 Individualization Options
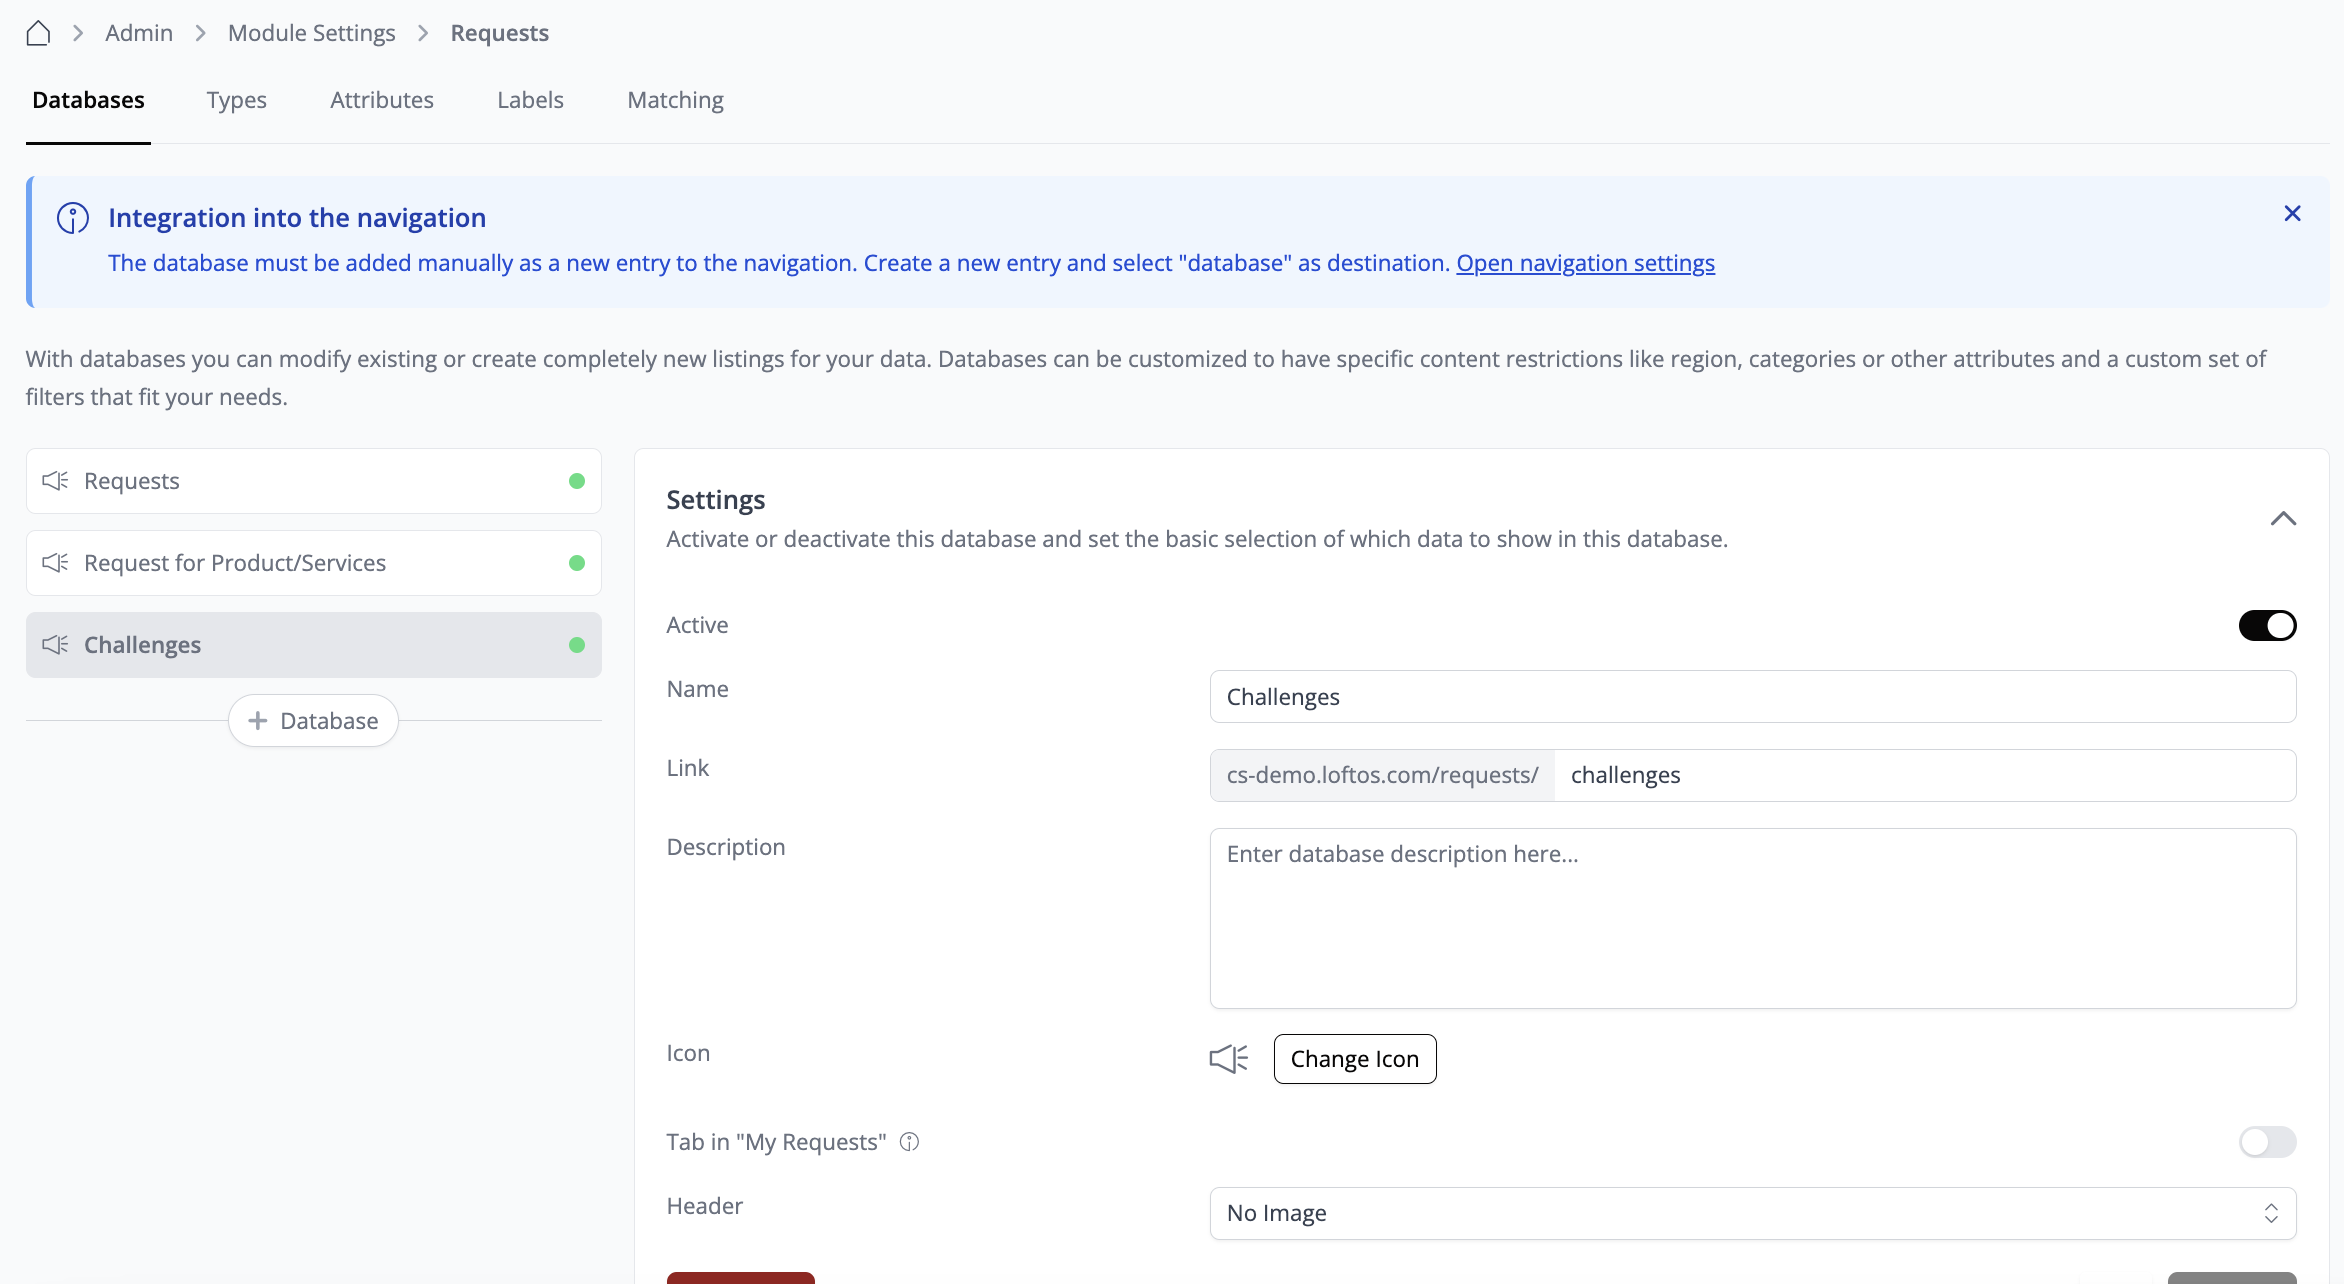
Creating & Editing a Database
The process for creating a database for Requests is similar to that of Offers, News, or Projects.
Your choice of database creation depends on the type of Requests you plan to broadcast on your platform. If the default ecosystem database is insufficient, you can create a separate one and customize the content to align with user needs.
To create a new database for Requests, follow these steps:
Once created, the database should include the following sections:
Settings
In this section, you can activate your database and personalize its name. Although the link is automatically generated, you have the flexibility to edit it to suit your preferences. Additionally, you can include a description, adjust the icon, and upload a header image. Be sure to click “Save” to apply these changes. As an example, we've established a database titled "Challenges" within the Requests module.
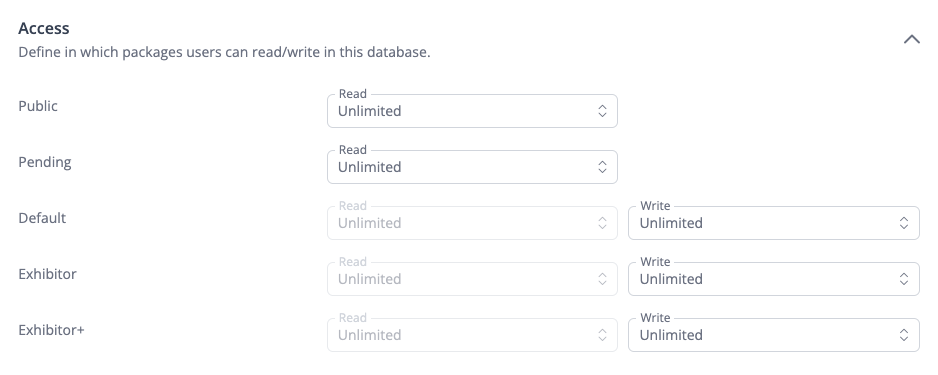
Access
In the access section, you can define the permissions for viewing or contributing content to the database based on the users' package levels.
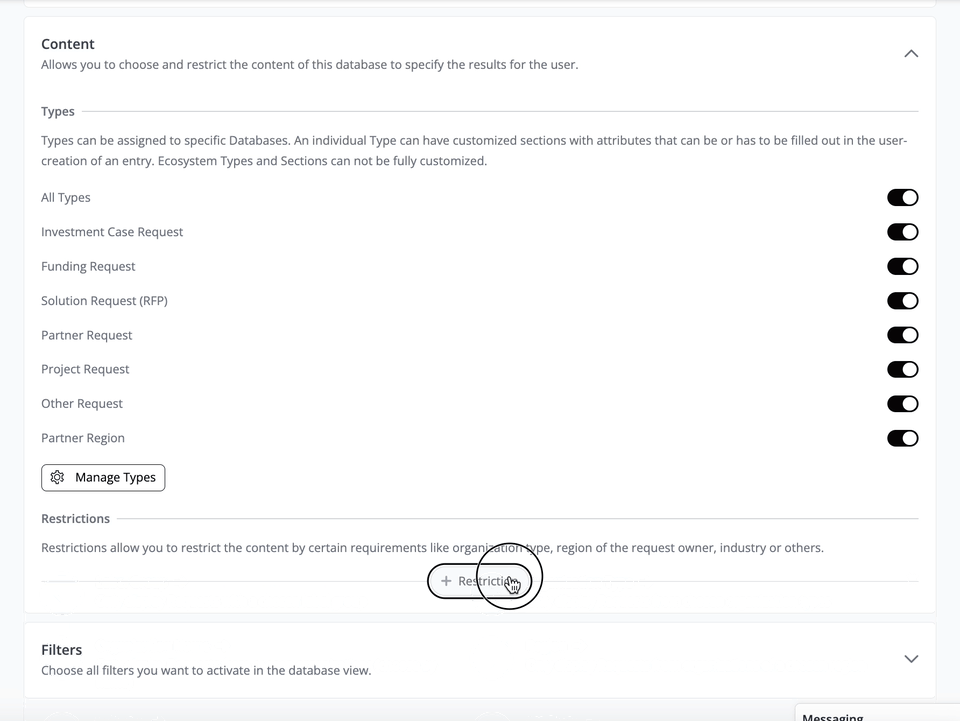
Content
The Content section allows you to choose and control the types of content displayed within these databases. You can select from existing ecosystem types or create custom ones, as detailed in the upcoming section: Types.
Restrictions
You can manage the content within these databases by implementing restrictions based on Label Group, Region, Attributes, and more. For example, you may wish to display only Requests associated with a specific label. To achieve this, you can create labels within the Labels tab, as we'll cover later in this article. For instance, you could configure the database to exhibit only Requests originating from a particular Organization type, such as Startups.
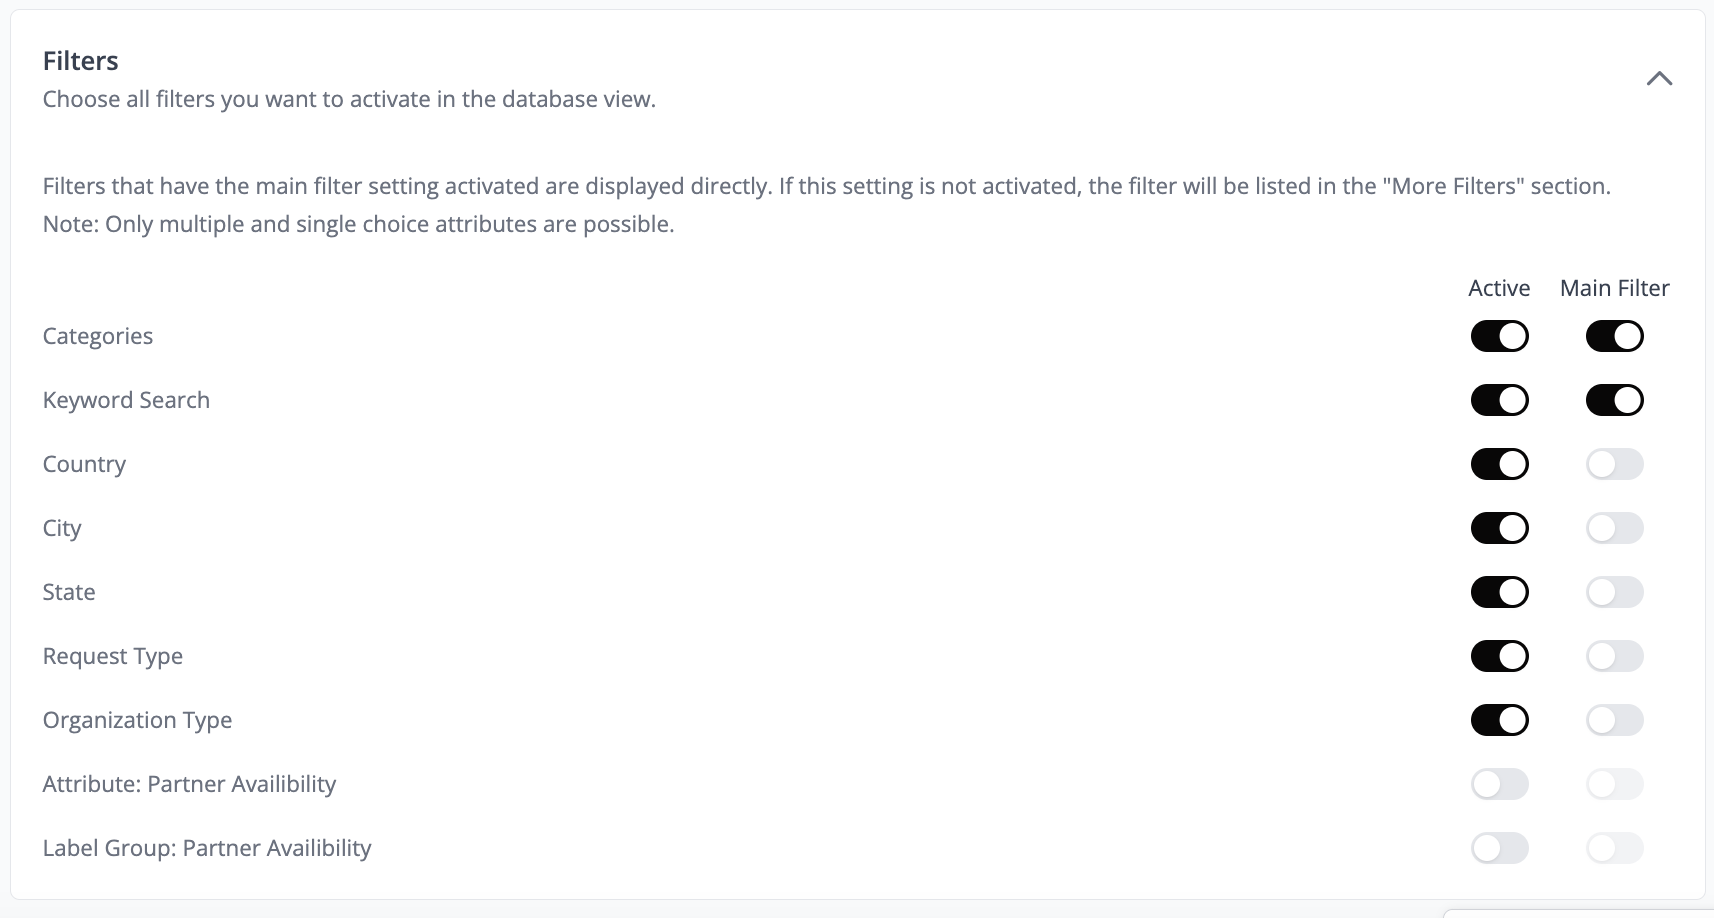
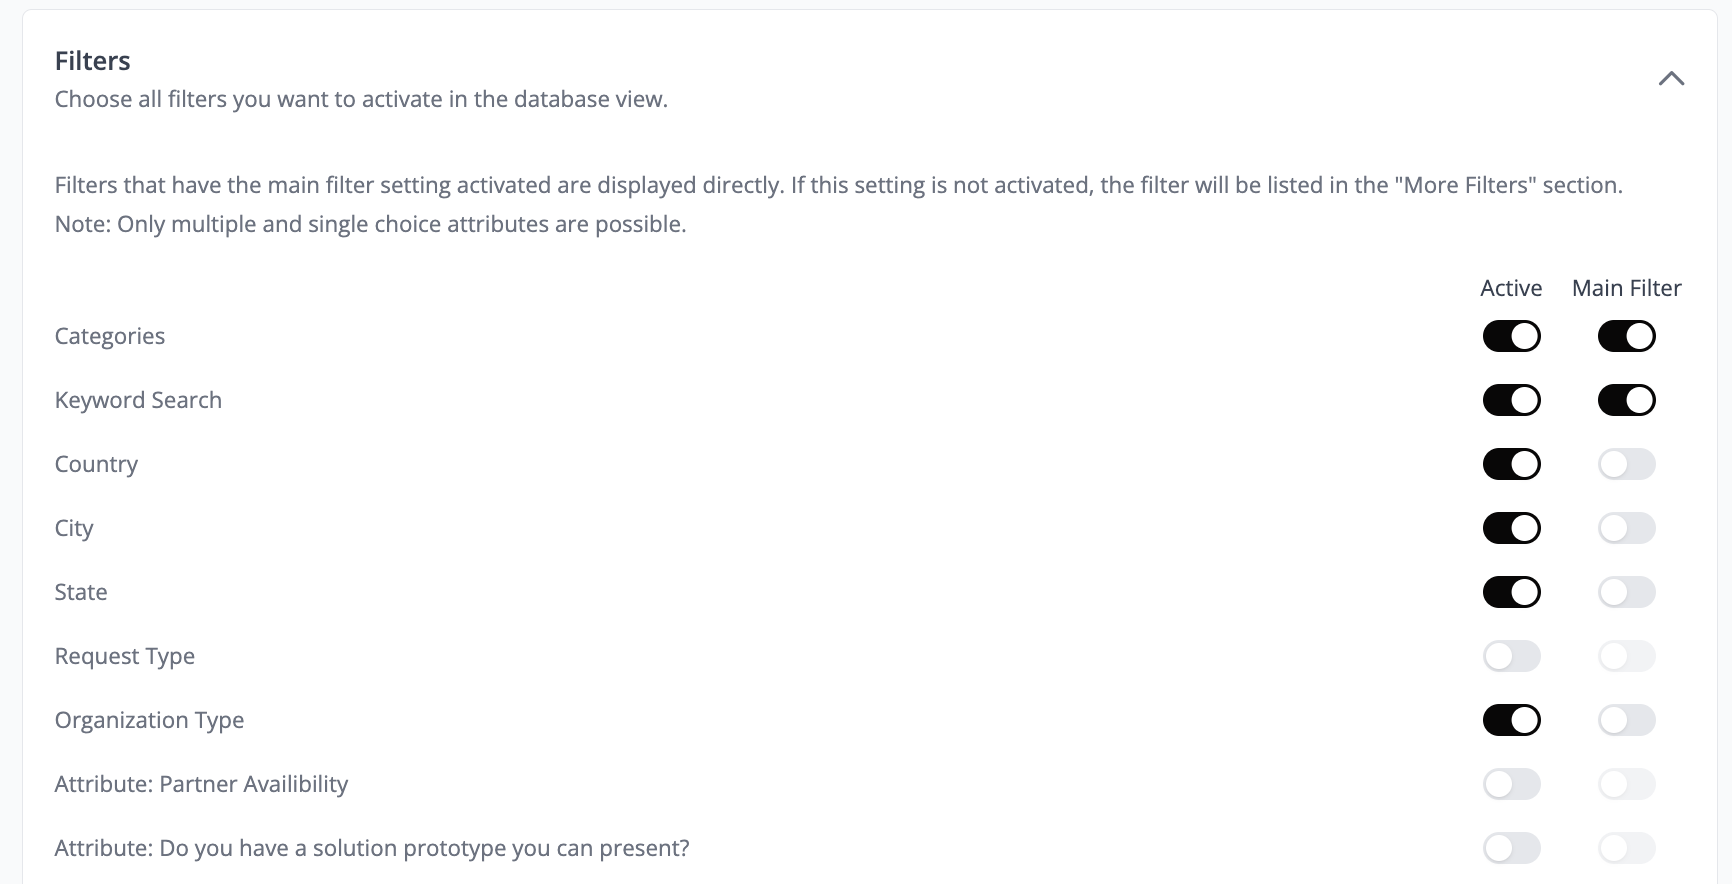
Filters
In the filter section, you can establish the active filters for the database. Enabling the toggle for the "Main Filter" ensures that the filter is directly visible in the database interface. Otherwise, it will appear in the "More Filters" section. Once activated, these filters will be prominently displayed on your Requests database, allowing users to efficiently filter through requests based on their preferences.
Types
If you can't find the desired Request types in the Types tab, you have the flexibility to create your own individual types, which users can then select when creating Requests.
Creating an individual type
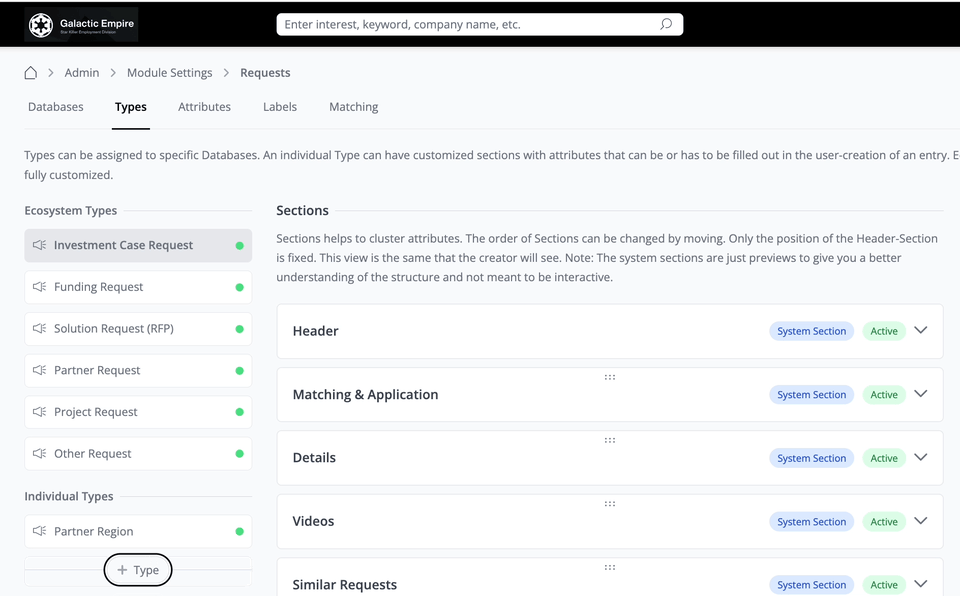

Manage Sections and Attributes
After creating an individual type and selecting it, you'll encounter various sections that you can tailor to your specific requirements. Click "+ Section" to generate a new section and choose from existing attributes or create new ones. You can rearrange the order of sections by simply dragging and dropping them using the six-dot control located on each section. Additionally, you have the option to enable or disable specific sections as needed, ensuring they are either displayed or hidden on the Request form.
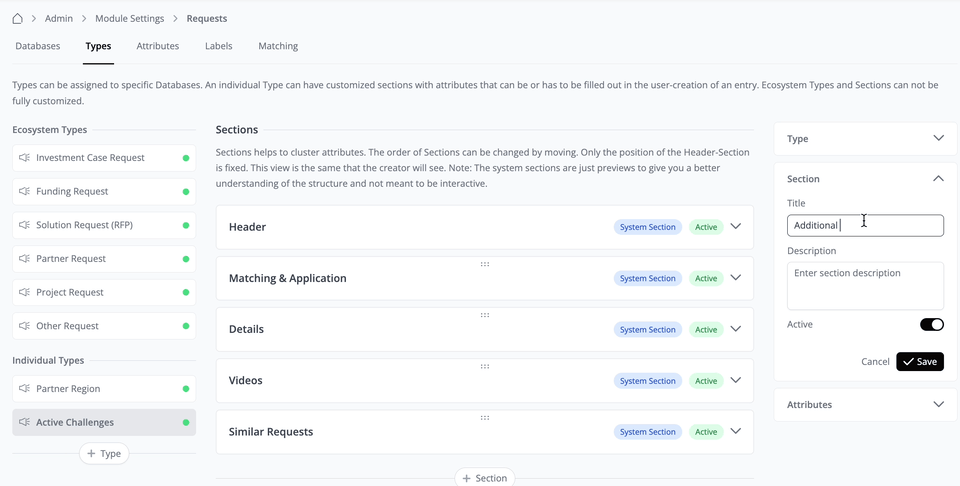
Attributes offer supplementary details about the Request, enhancing the information provided by you or other users. To create a new attribute, follow these steps:
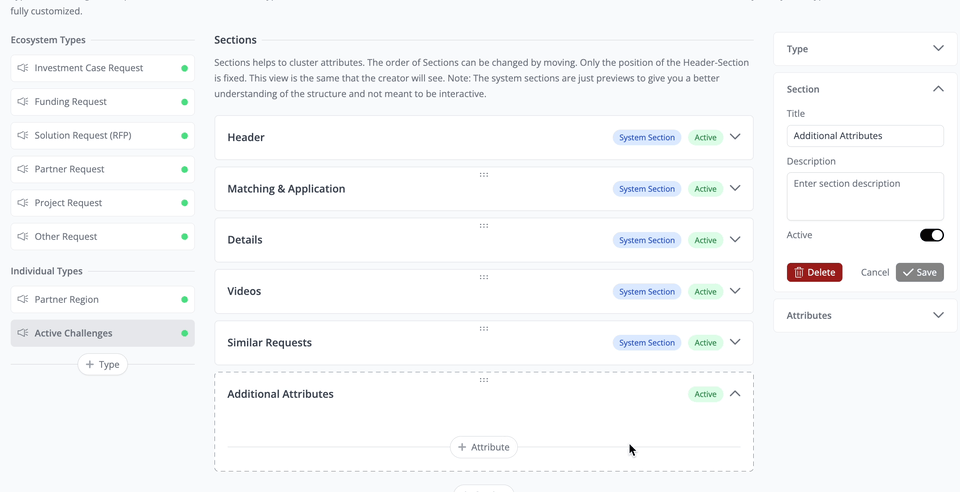
For each section, you can define which packages can be viewed or created.
Your newly created attributes will be visible when users create a new Request.
Labels
Labels serve multiple purposes within the platform. One such function is to utilize them as filters, allowing users to refine their search criteria. Additionally, labels can be employed to restrict databases, ensuring that only content associated with specific labels is displayed. To implement this restriction, navigate to the Database tab “Content Restriction”.
Creating Labels
On the Labels page, scroll down to the bottom and locate the "+ Label Group" button. Click on it, and then enter the desired title for the label group you wish to create.
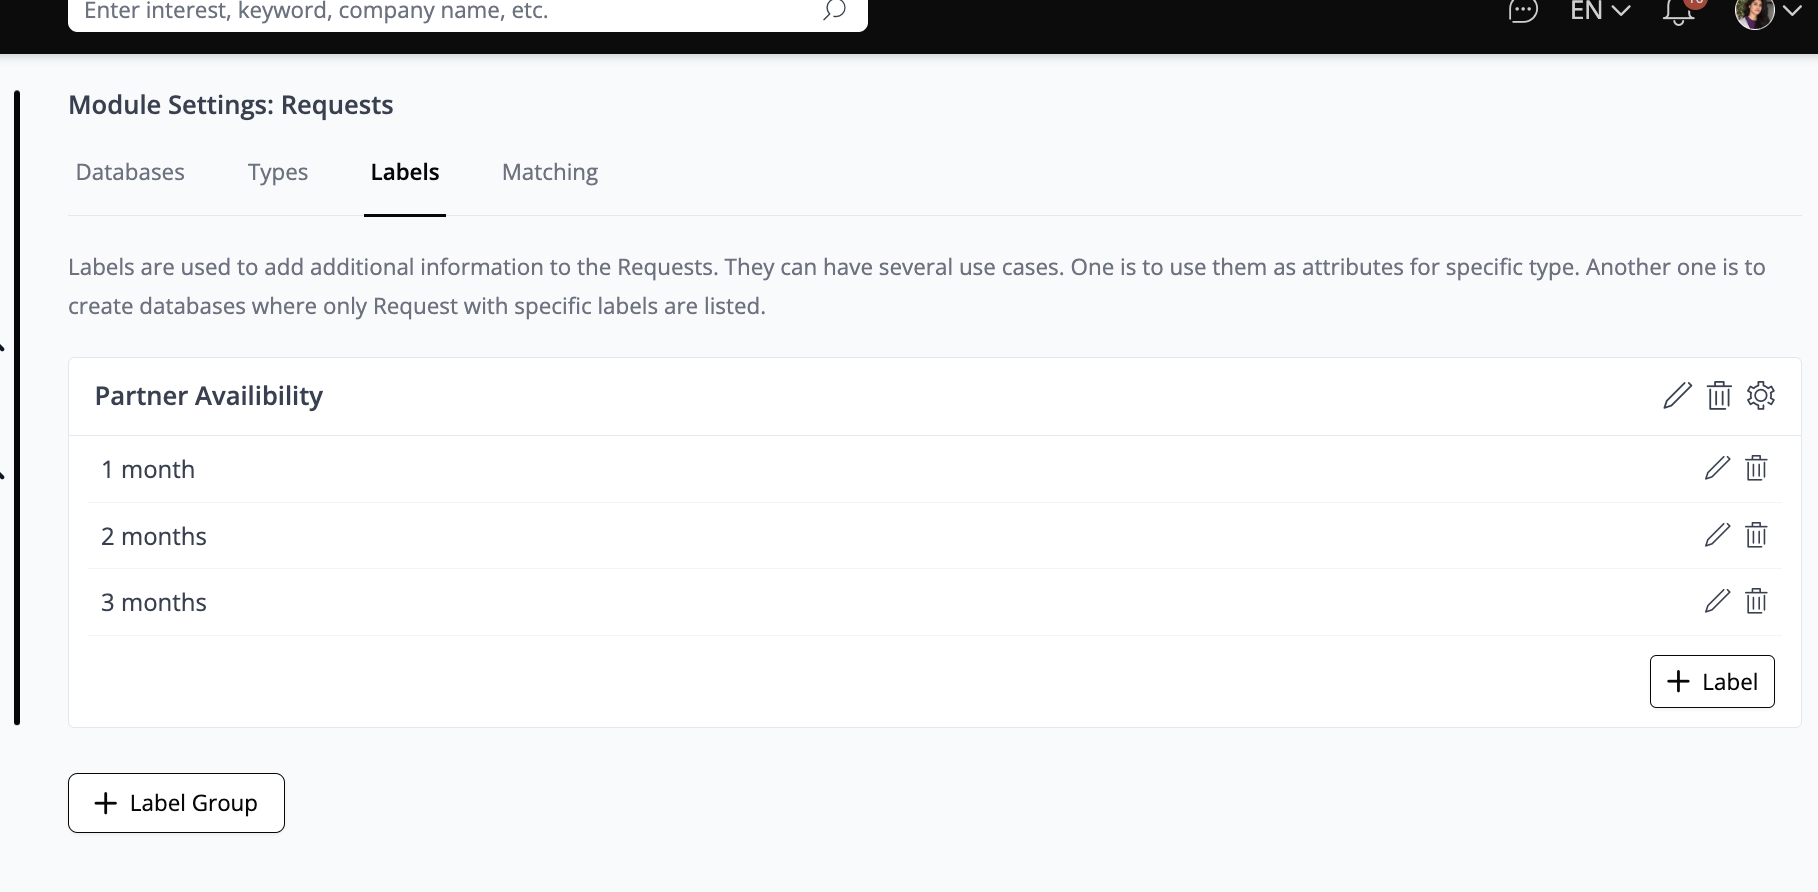
You can adjust the visibility settings of these labels by clicking on the small "wheel" icon located at the top right corner. Upon clicking, you will be presented with three options:

Use Labels to create Filters
Create the label following the steps outlined above, and then proceed to the “Filters” section within the Database tab. Activate the filter you desire to incorporate into the Requests database.
Matching Requests
In the "Matching" tab, you have the option to enable automated matching on your platform and to extend matchmaking capabilities across other LoftOS platforms.
Enabling cross-platform matching allows users to discover matches not only within your platform but also across other LoftOS platforms. This broadens their potential connections and significantly enhances their networking opportunities.
❓FAQs
General
There are various types of requests available, including Investment cases, Funding requests, Solutions, Partnerships, Projects, and Cooperation requests. You can choose the type that best aligns with your needs in the "My Requests" section.
A visible Request is displayed in the Request database with your name and company visible to other users. Users can directly contact you through the chat system if they find your Request relevant to them.
An invisible Request is not visible to other users in the database. However, the platform's matching system still pairs you with relevant contacts based on your Request's attributes and criteria.
Automated matching matches your Offer or Request with suitable users based on specified attributes and criteria. Matches for each Offer or Request can be found under the "My Offers" / "My Requests" pages.
Header images should ideally have a resolution of 16:5 or 2250px700px, while content block images should be sized at 750px1000px.
Uploaded files should not exceed 5MB in size.