👥 Groups
💡 Introduction
The Groups module enables the creation of "sub-networks" within a platform, facilitating collaboration among users. It offers features such as document sharing, group chats, specific events, marketplaces, and news tailored to each group's interests. Users can either manage consortia or join specialized interest groups. This fosters increased interaction on the platform, adding significant value for users by enhancing engagement and facilitating meaningful connections.
💼 Usage (Group Admin)
Create a Group
Invite Members to a Group

Communication within Groups
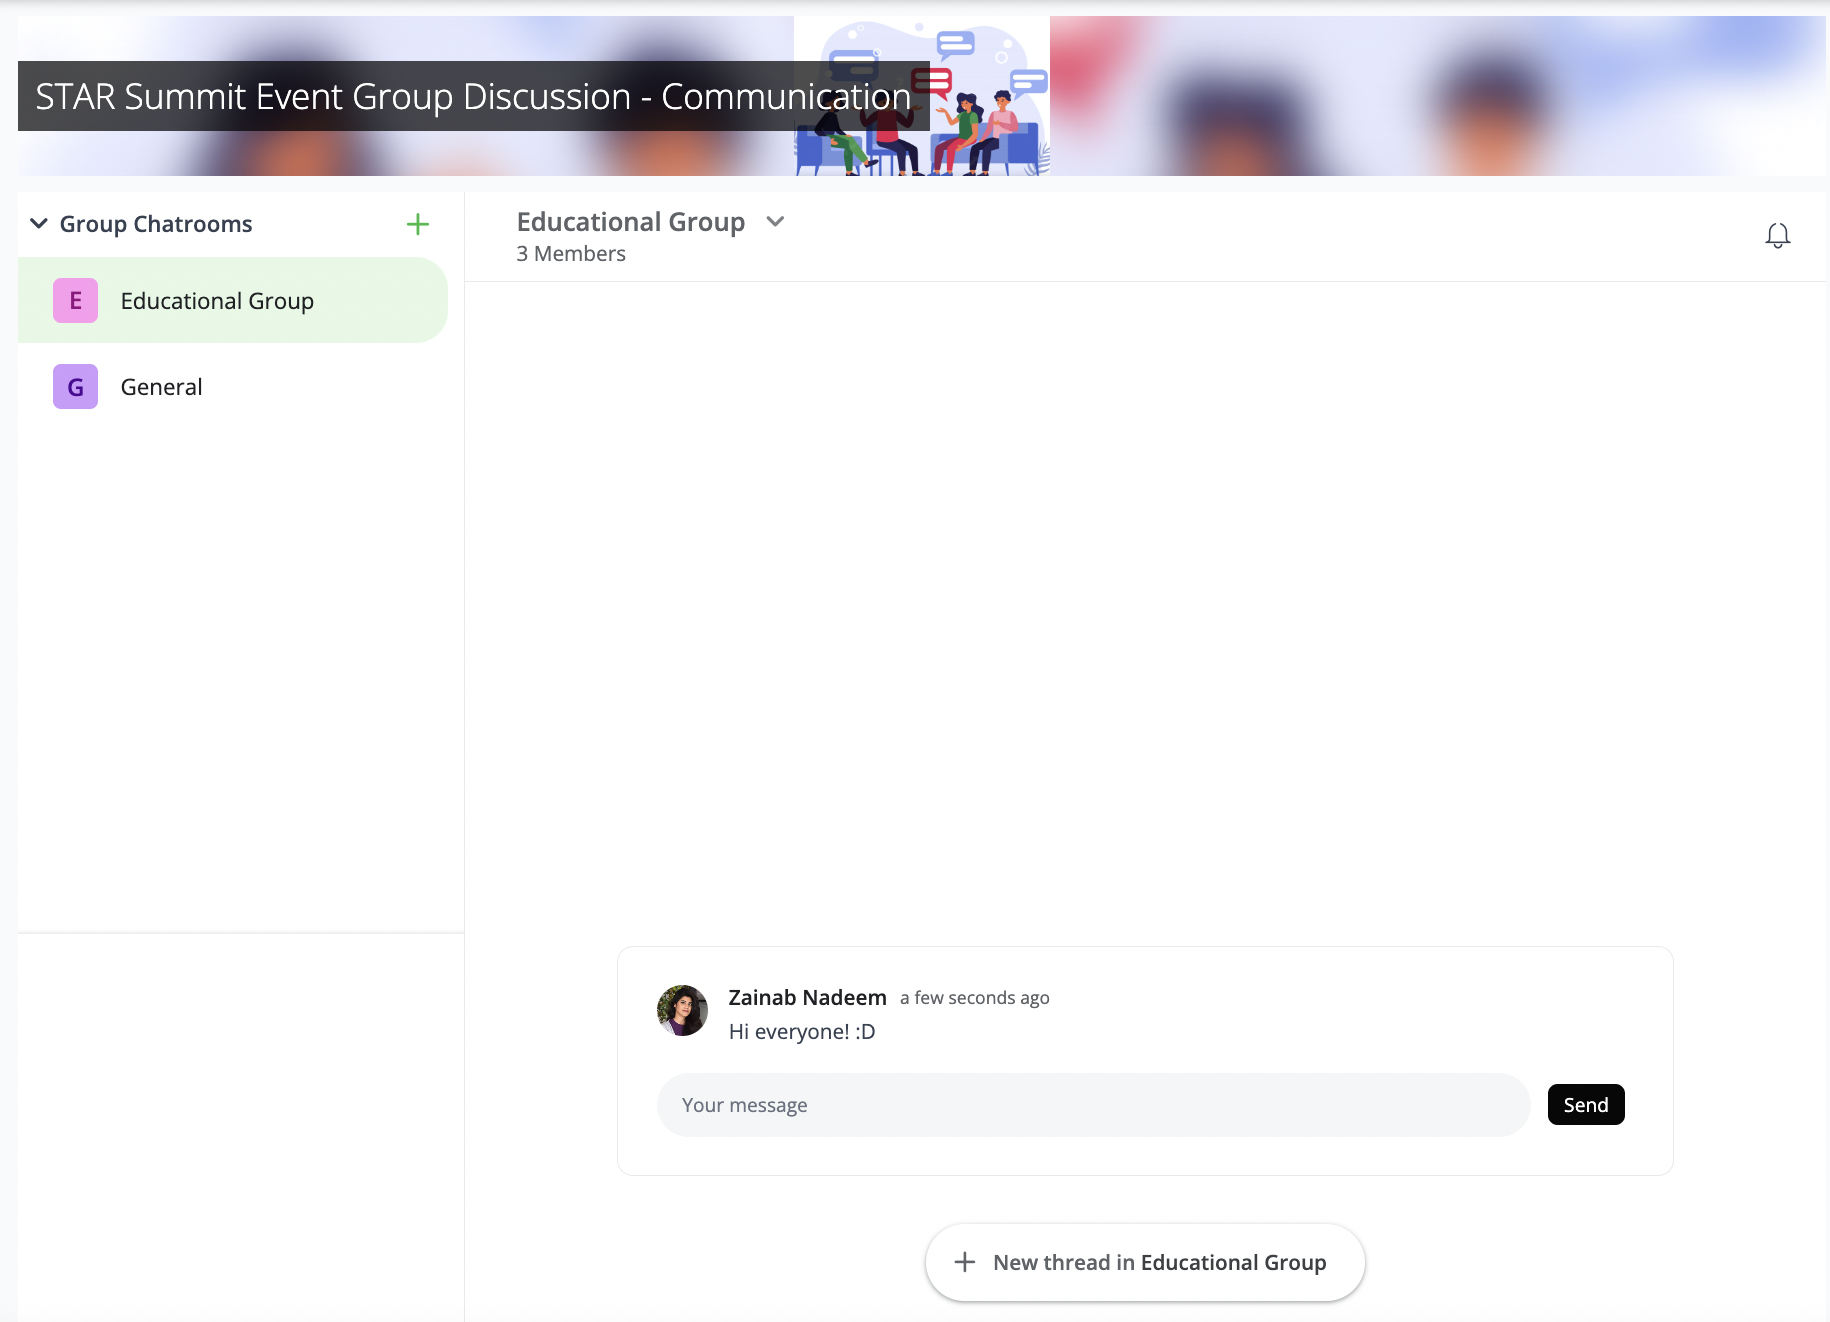
Under the communication section of the Group, you can create Group chatrooms to have general discussions or discuss topics related to the Group. To create a chatroom:
Organizations, News, and Events within Groups
The Organizations section displays all organizations to which the Group members belong. Additionally, News and Events associated with the Group are showcased in their respective sections if they were selected and linked to the Group during the creation process.
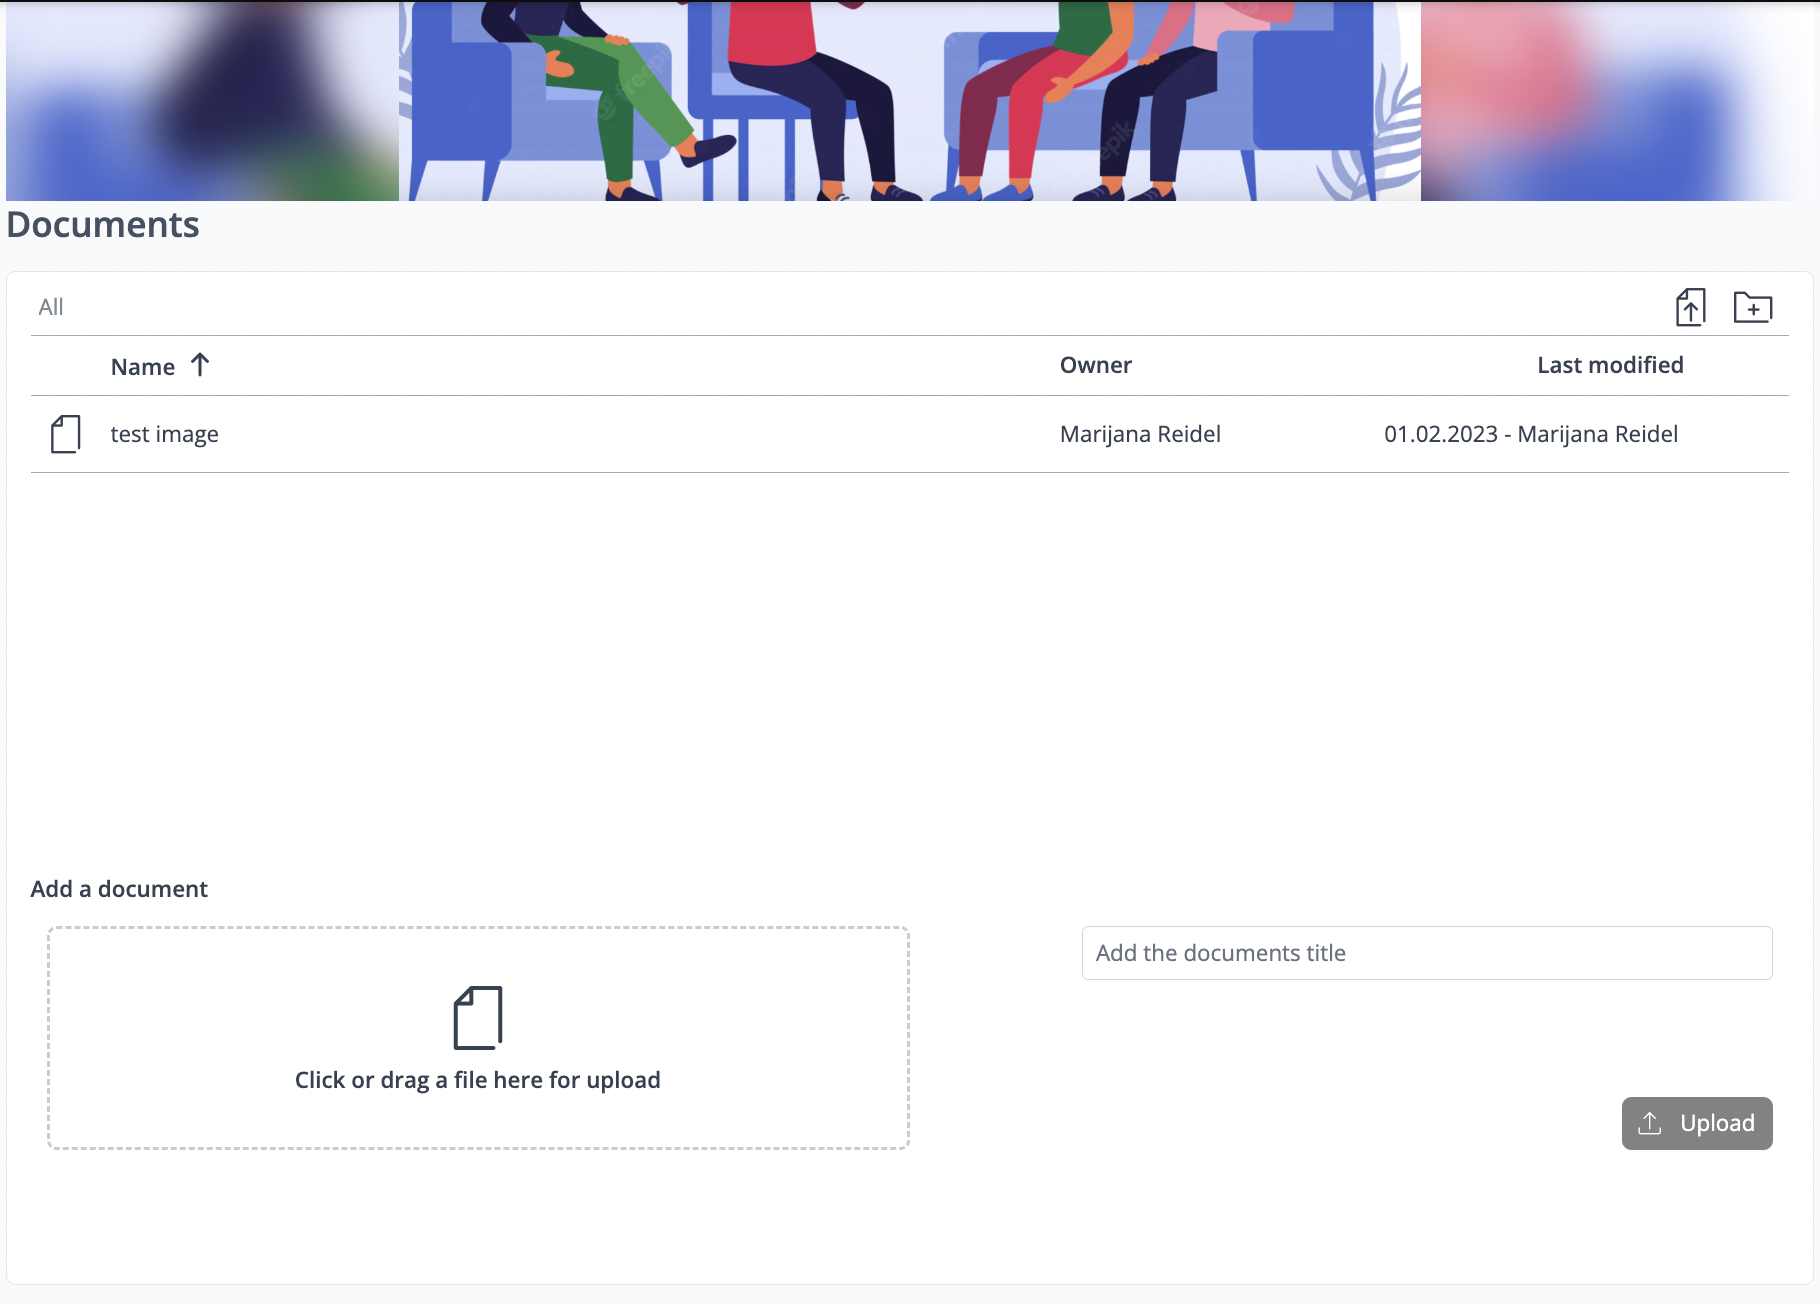
Upload of Documents in a Group
In this section, you can upload documents and files. Additionally, you can create one or multiple folders to categorize and organize your documents efficiently.
Add Organizers to a Group
After creating the Group, navigate to Admin Settings > Members Management and click on "Members Overview". Here, you'll see a list of all individuals who have joined your Group. Click the "star" button next to the person you wish to appoint as a Group admin. This action will designate both of you as admins of the Group. If you need to remove yourself as an admin, request the other admin to deselect the star next to your name.
Marketplace in a Group
The marketplace serves as a centralized platform where Group members can view a list of Offers and Requests shared by other members. This streamlined approach enables users to easily explore available Offers and Requests, facilitating seamless interaction and collaboration within the Group.
Admin Settings
Edit Group Information
You can edit the Group information at any time after it has been saved. This includes adding new content blocks or modifying existing Group details to keep the information up-to-date and relevant.
General Settings
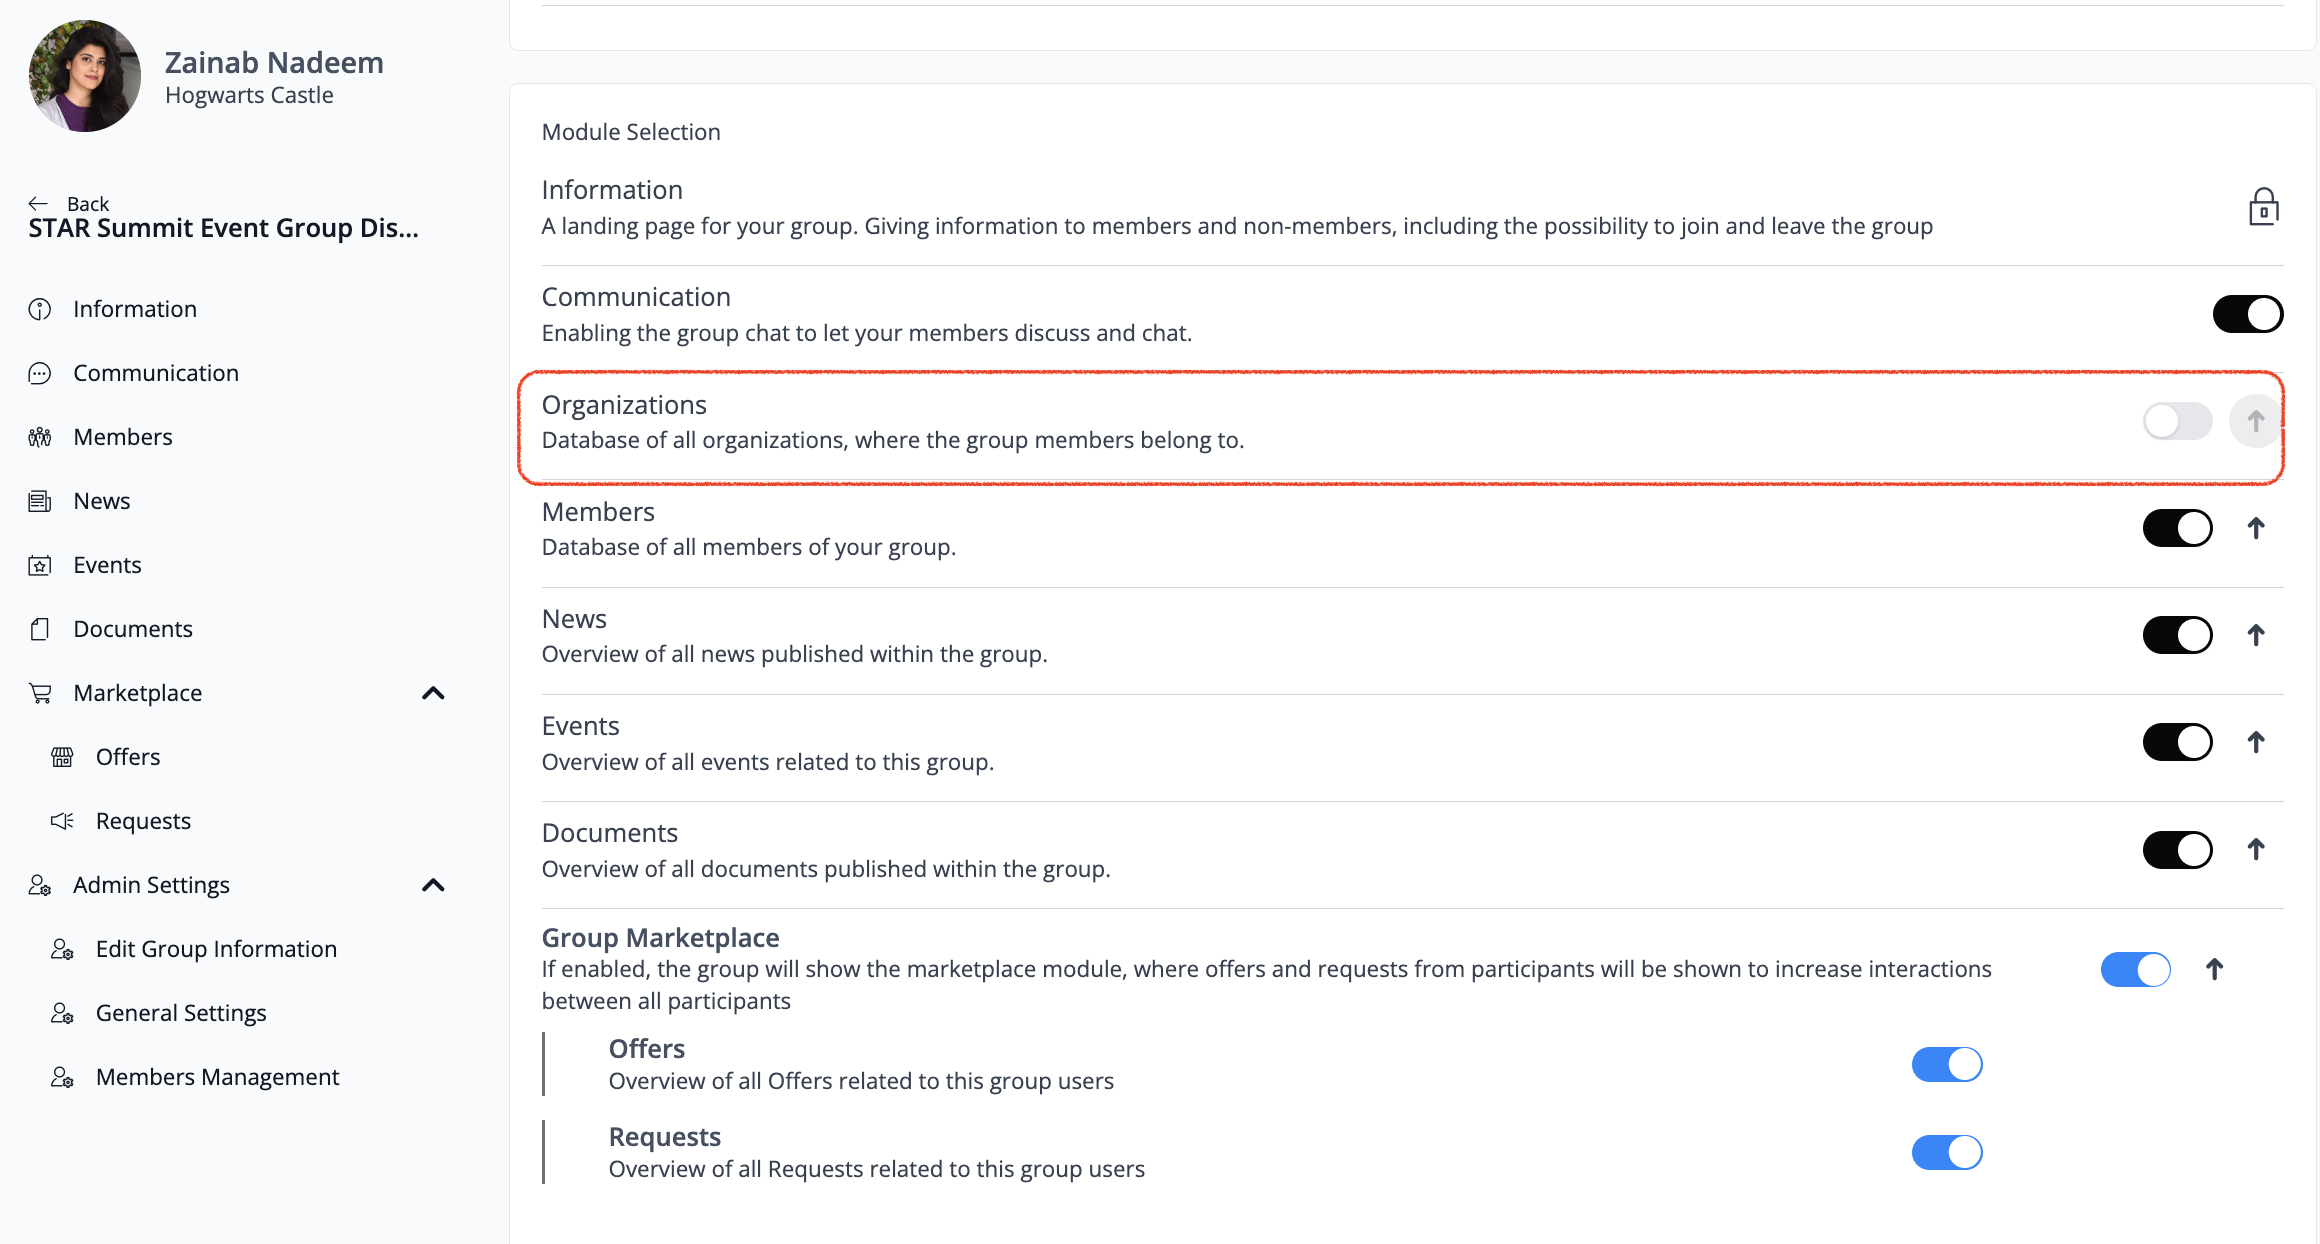
In the General Settings, you can configure various accessibility and module selection settings for the Group. Some of these settings include:


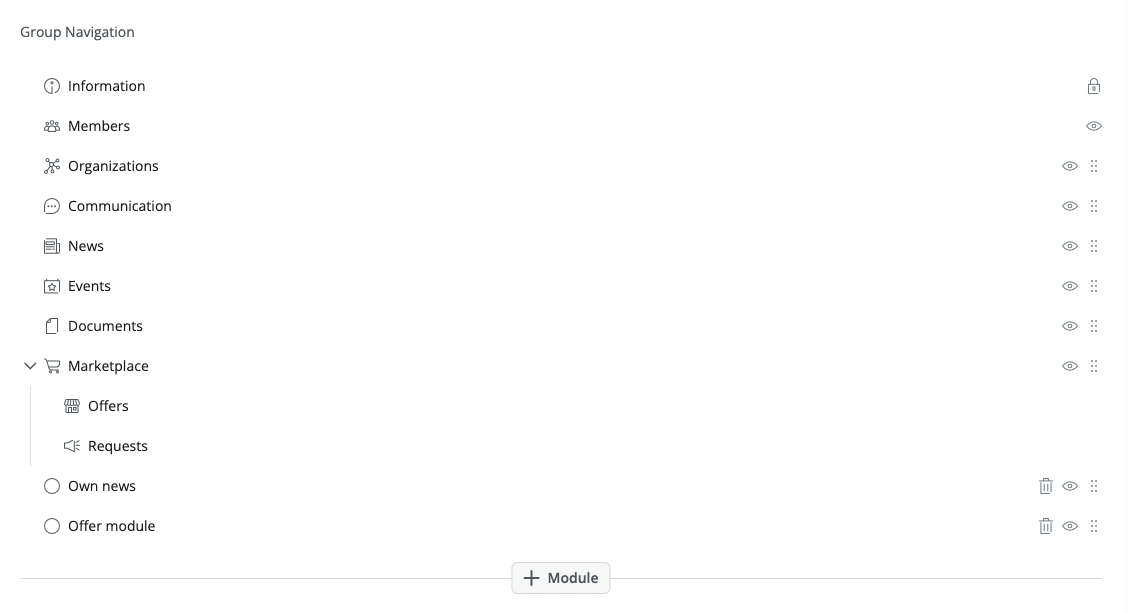
Additionally, the Module Selection section enables you to modify the order of modules within the Group and disable modules according to your preference. Once a module is disabled, it will no longer appear in the view.
Members Management
Members Overview:
In this section, you can efficiently manage your Group members, membership requests, and invitations.
The Members Overview section provides a comprehensive view of current members, showcasing their respective organizations and the duration of their membership within the Group.
Membership Requests:
Here, you'll find a list of all membership applications, encompassing open, approved, and rejected requests.
If desired, you can implement an application form for prospective members to complete before gaining Group access. Upon reviewing their submissions, you have the authority to approve or reject their membership applications. To activate this feature, ensure that both the "Access after approval" and "Enable Application Form" options are enabled in the Admin settings.

Once users apply for membership, the subsequent step involves filling out the membership form. After submitting their application, you'll receive an e-mail notification prompting you to review and either approve or reject their membership request.
The form filled out by users will be accessible in the Forms section of the navigation menu. From there, you can review their responses and make an informed decision regarding their membership request by either approving or rejecting it.
Delete a Group
Login as Admin → select “Group” from the navigation. Select the Group you want to delete, and click the bin symbol.
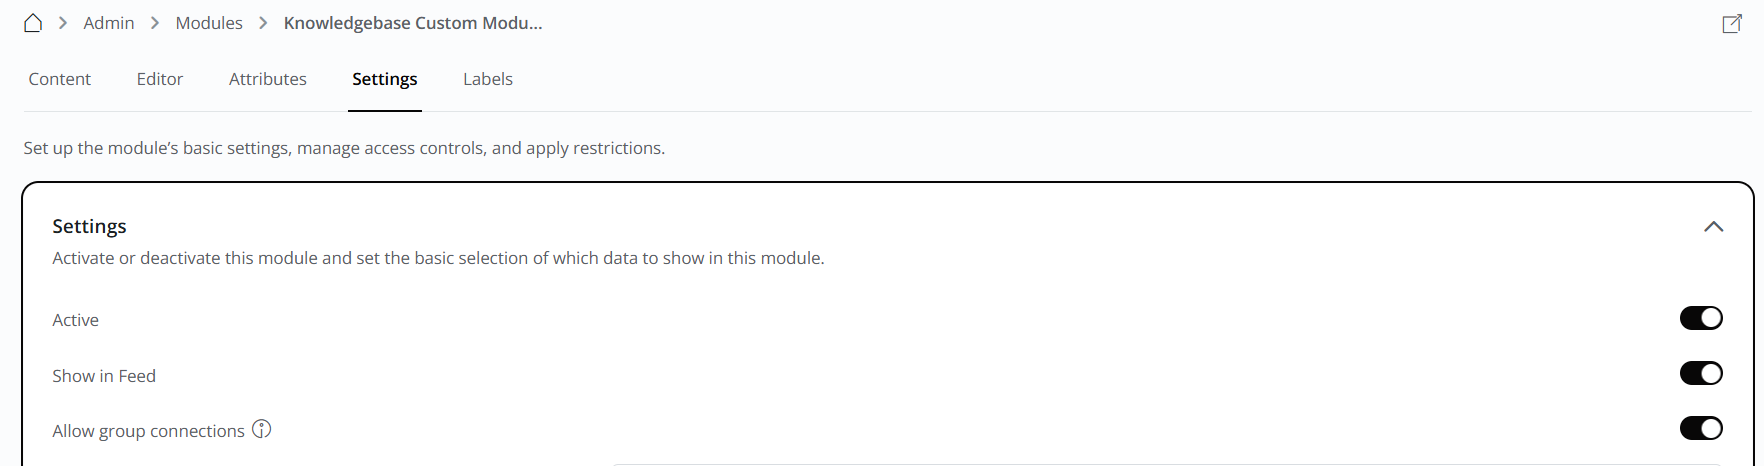
Add a Custom Module to a Group
Enable Group Organizers to link a Custom Module to their Group. Choose the desired Custom Module, go to “Settings” in the header menu, and activate the toggle for “Allow Group Connections”.
Navigate to your Group, open General Settings, and select “Group Navigation”. Click on “+Module” and add the desired module to your Group navigation.
👋 Usage (Users)
How can I join a group?
If you've received a group invitation via e-mail, simply follow the instructions provided in the e-mail to accept it. Alternatively, you can accept the invitation by visiting the Invitation and Verification Center. To do so, open the navigation menu located in the top right corner and click on "Invitation Center". Then, navigate to "Groups" and approve the relevant invitation.
If you wish to join a Group without receiving an invitation, you can do so by accessing the Groups overview. Search for the desired Group, and if it's a Group with open access, you can join directly. For Groups with restricted access, such as those requiring approval from the Group administrator, you'll need to apply for membership.
Keep in mind that some Groups may be hidden and won't appear in the Groups overview.
❓ FAQs (User)
I can’t add any News or Events to my Groups, why?
Currently, only Group administrators have the privilege to add News and Events to a Group.
What size and format should the Group cover image be?
The image should be in PNG or JPG format, 1130 x 400 px not exceeding 5MB in size.
❓ FAQs (Group Admin)
Can I have Group-specific Events?
Yes, this is possible when you create an Event. You cannot add this setting after the creation of an Event.
For integrating external Event providers like Eventbrite, choose the "External Event" option during Event creation and paste the link of your external Event.
Can I have Group-specific News?
News can be assigned to one specific Group. To do so, click “News” in the respective Group's navigation. Click "My News" and either select an already published News article or add a new one. Scroll down to "Groups News", select the box on the right, and click “save” at the bottom of the page.
Can I have Group-specific Offers?
No, Offers displayed within a Group are all Offers published by the Group's users.
How can group members with permission to write in the "Group Events" database set up an Event exclusively for their Group?
To create a Group-specific Event, members must have administrative privileges for the Group. Follow these steps: