📅 Events
💡 Introduction
The Event module offers a seamless platform for creating and managing a diverse range of live and virtual events, such as webinars, conferences, workshops, and pitches. There are two options: Integrated Events and External Events.
Users can choose from different live streaming options, web sessions, and networking opportunities. They can also select speakers from the platform, and participants are listed next to the video stream with a built-in chat feature.
A standout feature is the networking format, where participants can have brief 1-on-1 video meetings during networking sessions, facilitating valuable connections. This feature combines easy networking with automatic matching, optimizing participants' event experience.
Once an Event is published, users can easily access it and register using the registration button on the Event page. Organizers can invite participants to ensure maximum attendance and engagement.
💼 Usage (Organizer)
Create an Event
Navigate to the Events overview and click "+Entry" to add a new Event. In the first step, choose the Event platform: Internal Event for using the platform's Integrated Event Tool or External Event if you have your Event tool or want to link an external Event page.
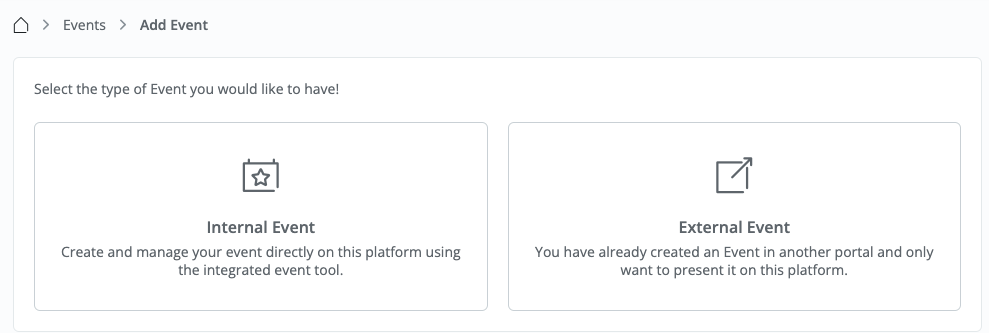
If you select “Internal Event”, proceed with the following steps after clicking “Next”:
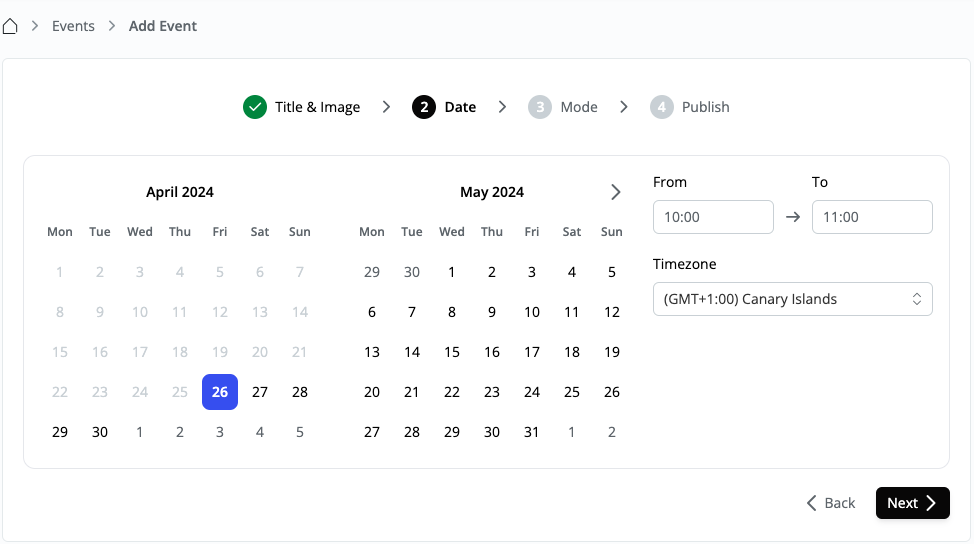

Edit Event Information
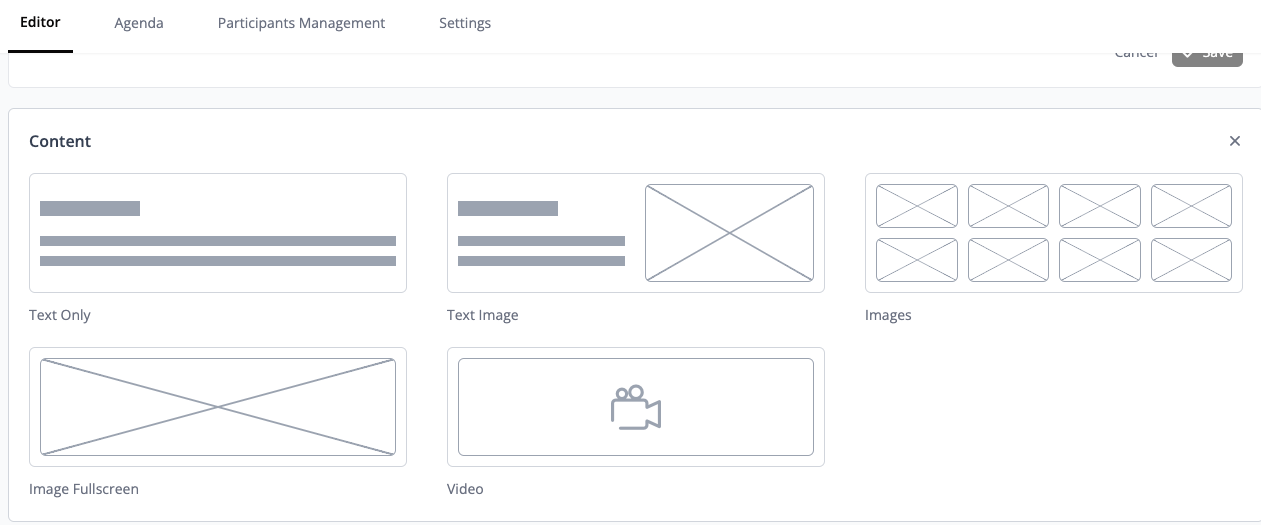
After publishing your Event, go to the editor to add additional information or edit the title, description, and image of your Event. You can also enhance your Event page by clicking on “+ Add another content block” to include text, images, or videos. Additionally, you have the option to upload documents such as floor plans or access guides to provide attendees with detailed information about the Event venue.
General Settings
Event Status: This indicates the current status of your Event. You can change the status to "Publish" if your Event is ready to be announced to the community.
Hidden Event Option: Enabling this option hides the event from the Event calendar.
Limited Participant Amount: You can limit the number of participants for your Event. Access is granted on a "first come, first serve" basis.
Allow User Invitations: Enabling this option allows users to invite other users to the Event.
Hidden Chat: You can choose whether to enable or disable the chat function within your Event.
Event Marketplace: Enabling this option displays the Event in the marketplace module, showcasing offers and requests from participants to enhance interactions.
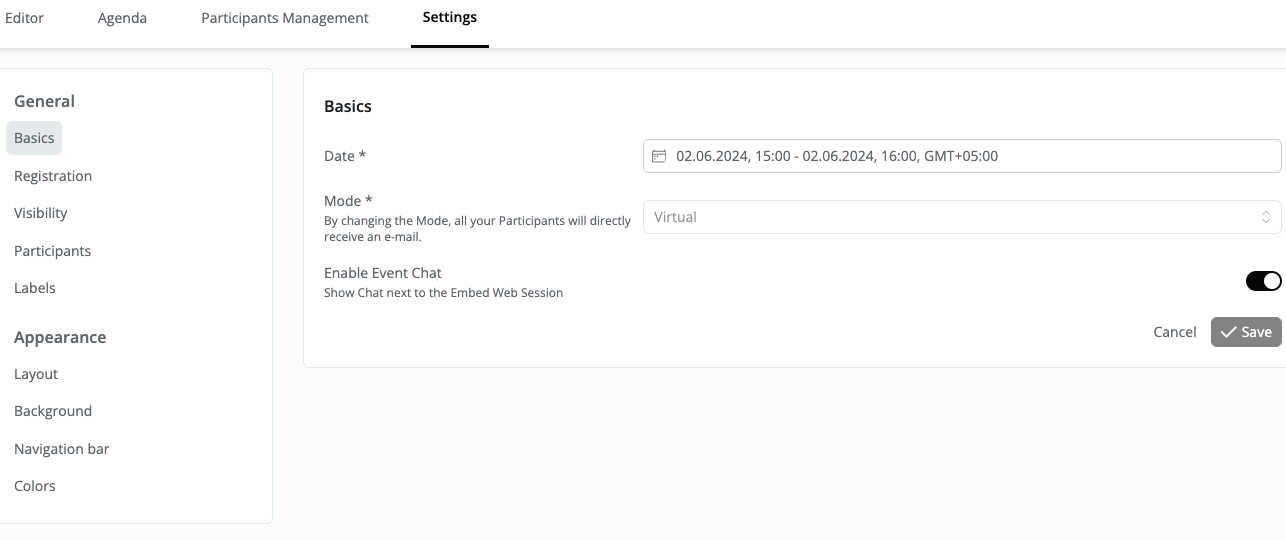
Basics:
Here, you can edit your general Event information. You can use the toggle whether participants can use the chat option during a virtual Event.
Registration:
Add Registration buttons to your Event. Label your Button to align with your CTA and optionally add a secondary Button.
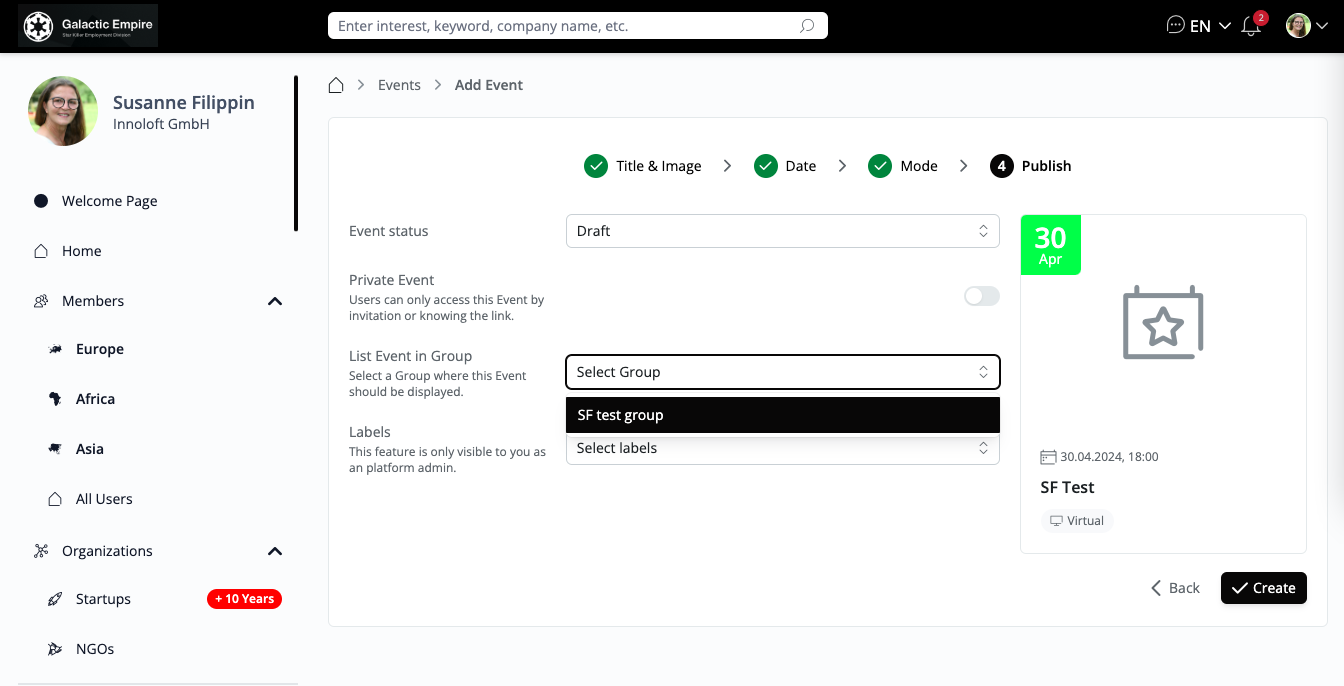
Visibility:
Choose whether this Event is private, accessible only by invitation or with a link, or list it in a selected group.
Participants:
Select if you “Allow all Participants to send Invitations” or if you limit the number of Participants on a "first come, first serve" basis.
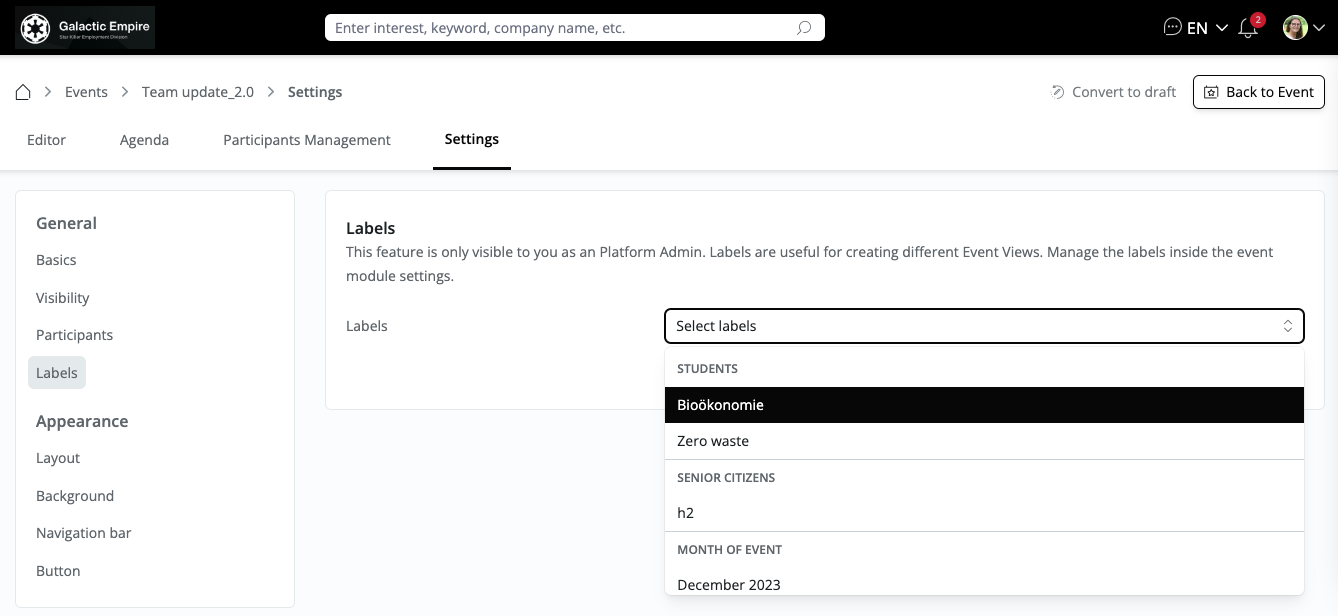
Labels:
Select a Label to list your Event under a specific Label in the Navigation section.
Appearance
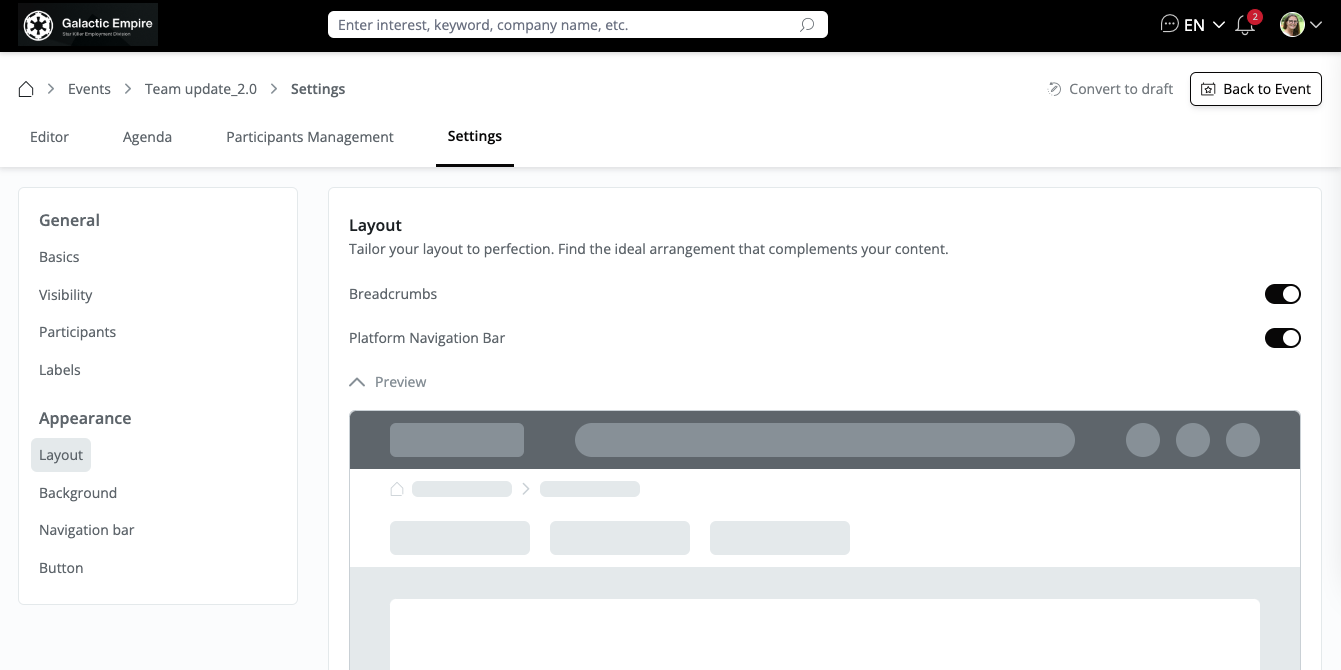
Layout:
Customize your Event by using the toggle to enable or disable breadcrumbs. You can also make your Event resemble a landing page by using the toggle to change the look of the navigation bar. Choose from the two options.

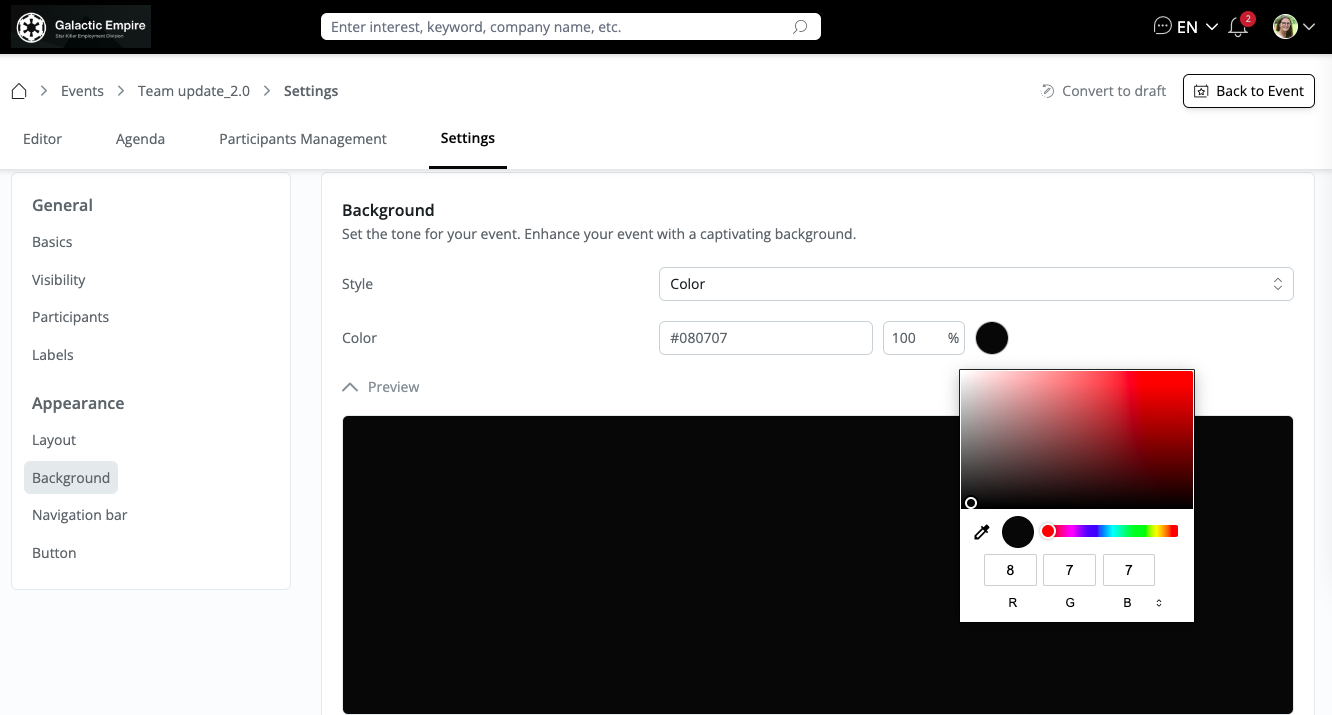
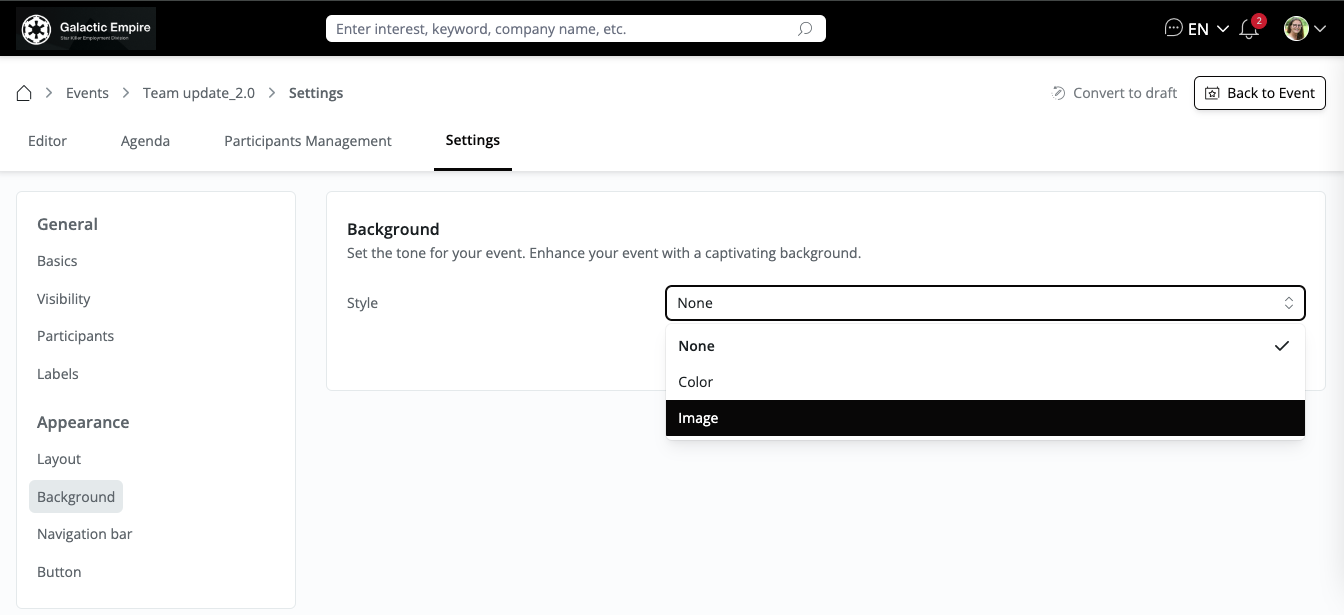
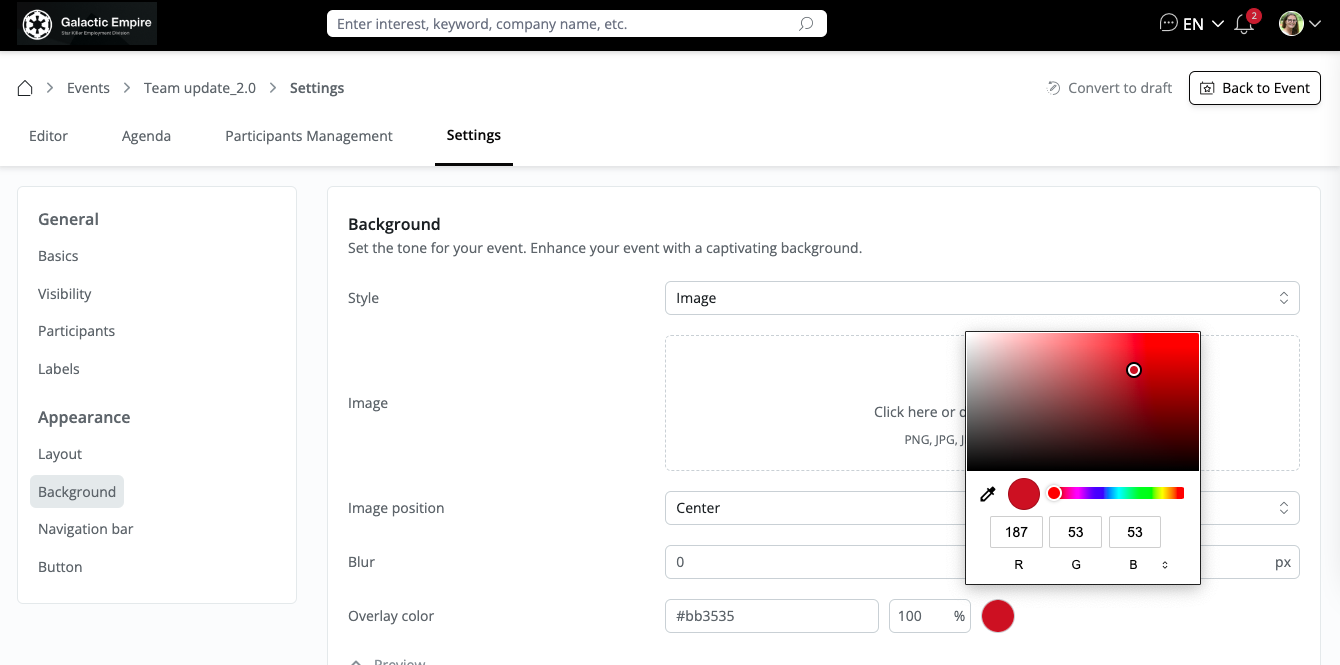
Background:
Customize your Event page by changing the background color to match your branding or by adding a fully customizable image.
Option to change the background colour:
Option to add an image:
Option to fully customize the image:
Navigation bar:
Here, you can find options to fully customize your Navigation bar.
Buttons:
Fully customize your Event page buttons to match the overall page style. Optionally, add a secondary button, for example, to integrate a form. This can be useful for non-registered Users who want to sign up for an event via an event registration platform.
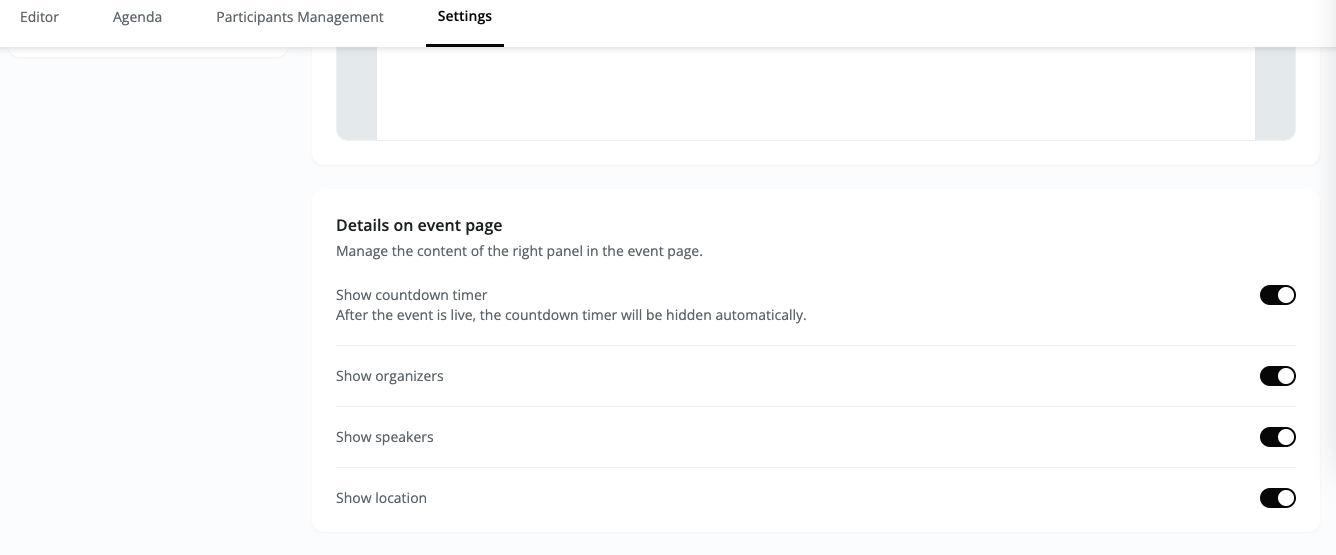
We offer the option to show or hide the Event's countdown timer, speaker, organizer, and location. Go to “Settings”, scroll to the bottom, and enable or disable the options.
Agenda Management
To add an agenda or session to your Event, follow these steps:
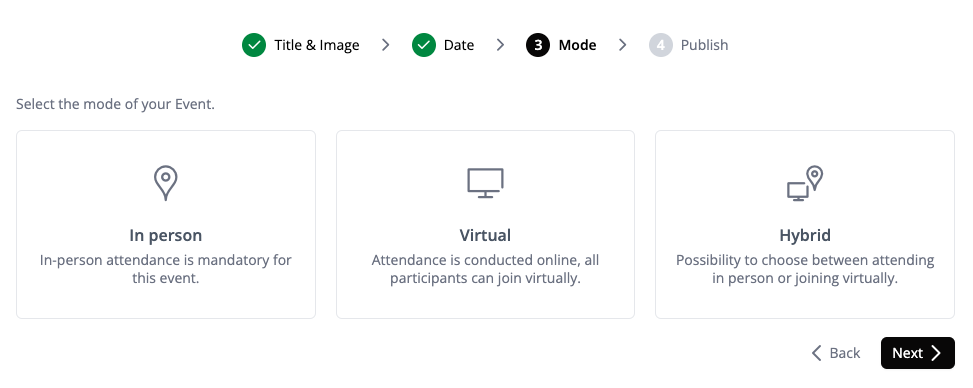
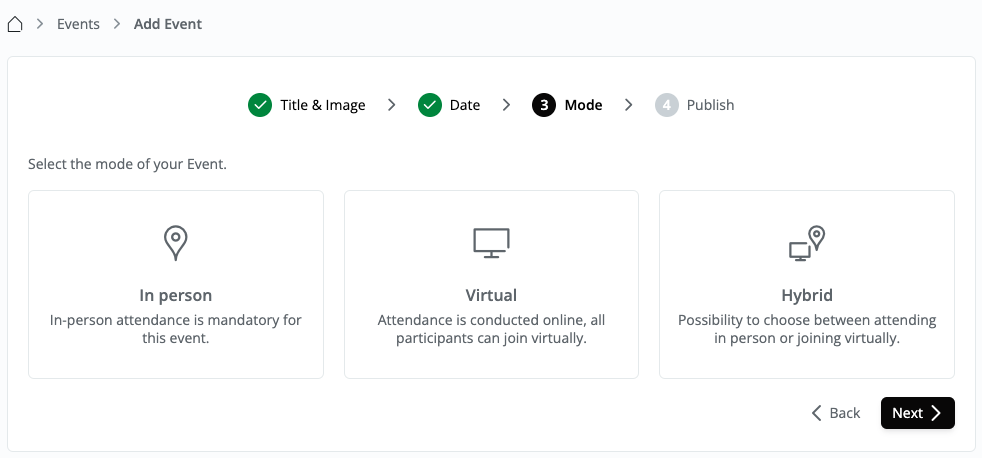
⚠️ Browser Support
The embedded Zoom Client does not support all features on all browsers. For more details, refer to the browser support list. Safari, in particular, may encounter more issues with sound and video than other browsers.
Networking sessions
Networking Sessions Overview:
Choosing Slot Amount: Organizers can specify the number of available slots during the session, impacting the duration of each slot. For example, selecting 6 slots for a 30-minute session results in each slot lasting 5 minutes.
Choosing the number of tables (only for offline Events): For offline Events, organizers determine the number of tables or parallel meetings desired during the networking session. An option for unlimited tables is available for this type of session.
1-on-1 Networking Session:
Speeddating Session:
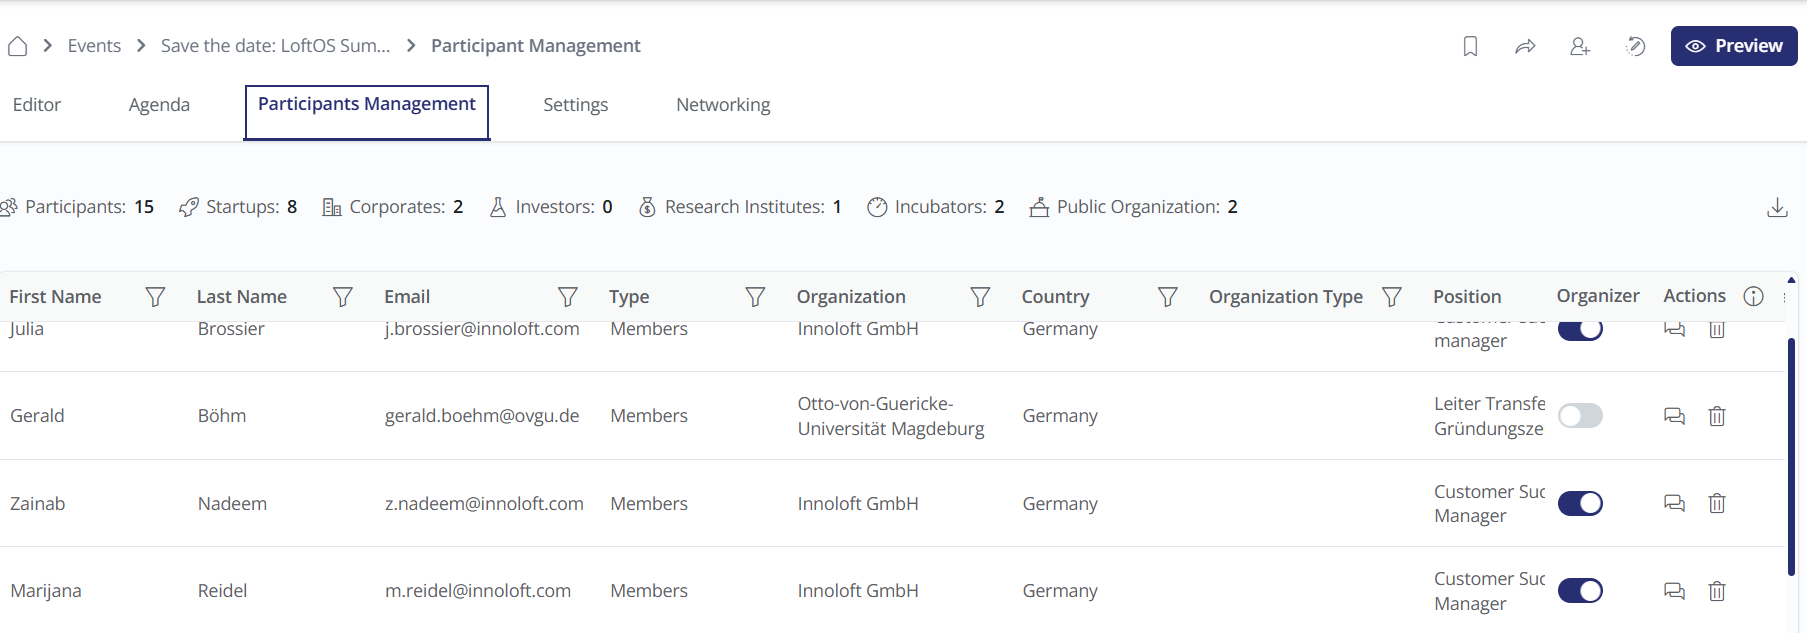
Participant Management
Event Statistics
The Event statistics provide a concise overview of essential Event details, including the date, time, and number of sessions.
Participant Overview and Invitations
Organizers have the flexibility to invite participants via e-mail or select from existing platform members. The "Invite Participants" button initiates the invitation process, where organizers can track invitations, acceptances, and declines. Additionally, organizers can export the participant list via CSV for further analysis.
Bulk E-mail Insertion Tip:
To insert a list of e-mails efficiently:
Adding an Event admin
To make a participant an admin, follow these steps:
Networking Management
This section allows you to oversee all networking sessions established within the platform. Clicking on a session provides a comprehensive view of its participants, featuring details such as their names, associated organizations, and the count of scheduled meetings. Additionally, you have the option to engage in direct chat with participants right from this interface, facilitating seamless communication and networking management.
Delete an Event
Navigate to the Events overview and click "My Events". Select the Event you want to cancel and click "Delete" in the top right corner of the event.
Key Benefits of using Whereby
Whereby is a browser-based video conferencing tool that requires no downloads, making it incredibly simple and accessible for users. It offers customizable meeting rooms with unique URLs, privacy-focused features like room locks, and flexible modes for both interactive meetings and large webinars. With tools like screen sharing, chat, and integrations (e.g., Miro, Trello), it supports collaboration across devices.
Webinar Mode in Whereby
Features of Webinar Mode
Use Cases
How to Enable Webinar Mode
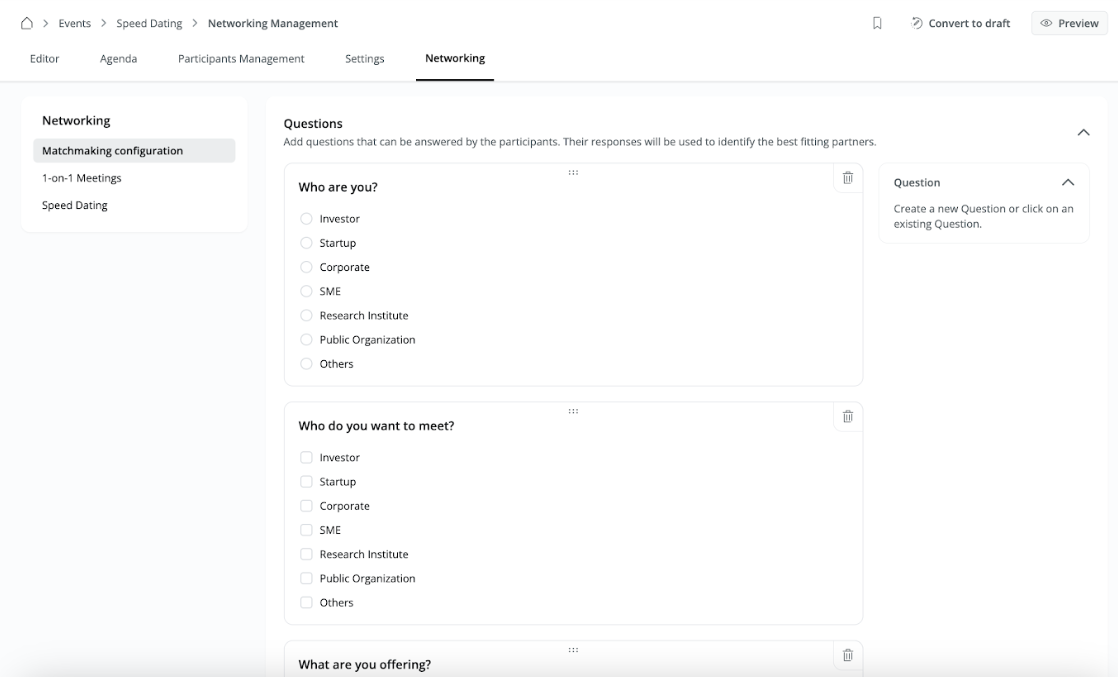
Set up registration questions
Collect important information from participants during the registration process by adding custom questions. This ensures organizers get the details they need upfront.
To configure registration questions:
Enable sorting Event by registration date
👋 Usage (Participant)
Registering for an Event
To register for an Event, simply navigate to the Event's information page, where you'll find a checkbox located on the right side of the screen. Select this checkbox and proceed by clicking the "Register" button.
Finding Details about other Participants
Participating in a Networking Session
1-on-1 Networking Sessions
Speed-dating Sessions
Speed-dating sessions use an algorithm to identify suitable matches for you based on the information you provide.
🤝 Content Management
In the admin area, you can view all Events created on the platform. From here, you can directly delete Events or adjust the content of specific Events as needed.
Platform admins can manage all listed Events and can add databases and labels.
Add your ICS Import to have your events added automatically to the platform. An ICS import allows you to synchronise Events from an external website to your platform database. ICS can be created via:
🥇 Best Practices (Organizer)
Speed-dating
When organizing speed-dating or networking sessions, consider the session duration, typically between 30 minutes and 1.5 hours, avoiding sessions that are too lengthy.
Adjust table availability via agenda management, with each speed date lasting 5 to 10 minutes. For on-site Events, use standing tables with numbers and a designated counter for inquiries, ensuring punctual starts and announcements via a speaker system.
Matches are based on organizer-provided criteria, but organizers are matched only if specified as "searched organization type".
In digital speed dating, the platform creates video conferences via Jitsi.
If a participant's date is absent, organizers can't intervene but can facilitate alternative connections. Note that changing session times isn't feasible; sessions must be recreated if adjustments are needed.
Finalise an Event before publishing it
Are you a group of people managing an Event? To work together on an Event, create the Event and publish it as hidden. The organiser can then invite the Event management group and set them as co-organisers. As soon as you have finalised the Event, set it to “public” in the Event settings and invite Event participants.
Bulk Event Invitations
With just a single click, you can now select all members for your Events.
Navigate to: Events → Edit → Participant Management → Invite Participants. Use the 'Select All' option and filter participants by user type, organization, department, or location to create precisely targeted guest lists.
⏳ Speed Dating Feature Overview & Guide
The Speed Dating functionality allows both Administrators and Participants to manage and view meetings in an organized and user-friendly manner. This guide provides an overview of how the feature works, the differences between Admin and User perspectives, and how to manage the feature effectively.
Overview of the Speed Dating Feature
When you’re logged in as an Admin, you’ll have access to a full view of all Speed Dating meetings and matches happening on the platform. This gives you complete control and oversight over the Event, allowing you to manage the details seamlessly.
For participants (i.e., regular Users), the experience is more personalized. They will only see their meetings and matches, making their interface less cluttered and easier to navigate. This difference in visibility ensures that Admins can monitor the entire Event while Users focus solely on their scheduled interactions.
Speed Dating vs. One-on-One Matching
The platform offers two Matchmaking formats:
Admin View: Managing Speed Dating Events
When you log in as an Admin, you can access the "Overview" button, which opens a complete view of all meetings scheduled during the Event. This overview presents the following details:
User View: Personalized Meeting Schedules
For participants, the interface is simplified to ensure ease of use. Instead of the full overview, Users will see a "My Schedule" button, which presents only their Speed Dating meetings. This ensures that participants are not overwhelmed by unnecessary information and can focus solely on their scheduled interactions.
Participants will only be able to view their matches and meetings, making the user experience more intuitive and personalized.
Speed Dating in Online vs. Offline Events
The Speed Dating feature works in both online and offline event formats, with slight differences in functionality based on the type of Event:
Settings and Session Management
To manage the Speed Dating sessions, Admins can use the Agenda Management feature. Within this, you can add new sessions and set their format to "Speed Dating." Once the session is created, it appears under the Networking Tab, where you’ll find additional options for managing the Event.
This networking tab allows Admins to customize and oversee the Speed Dating event in real-time. You can adjust session details, manage participants, and monitor meetings as they occur.
By understanding the differences between the admin and user perspectives and knowing how to manage and filter meetings, you can efficiently run Speed Dating events and ensure that everything runs smoothly. The added export and filtering features give you flexibility in how you view and share information, while the personalized User views keep participants focused and engaged in their schedules.
Networking must first be configured in the Networking tab before Speed Dating and Networking sessions can be added to the agenda.
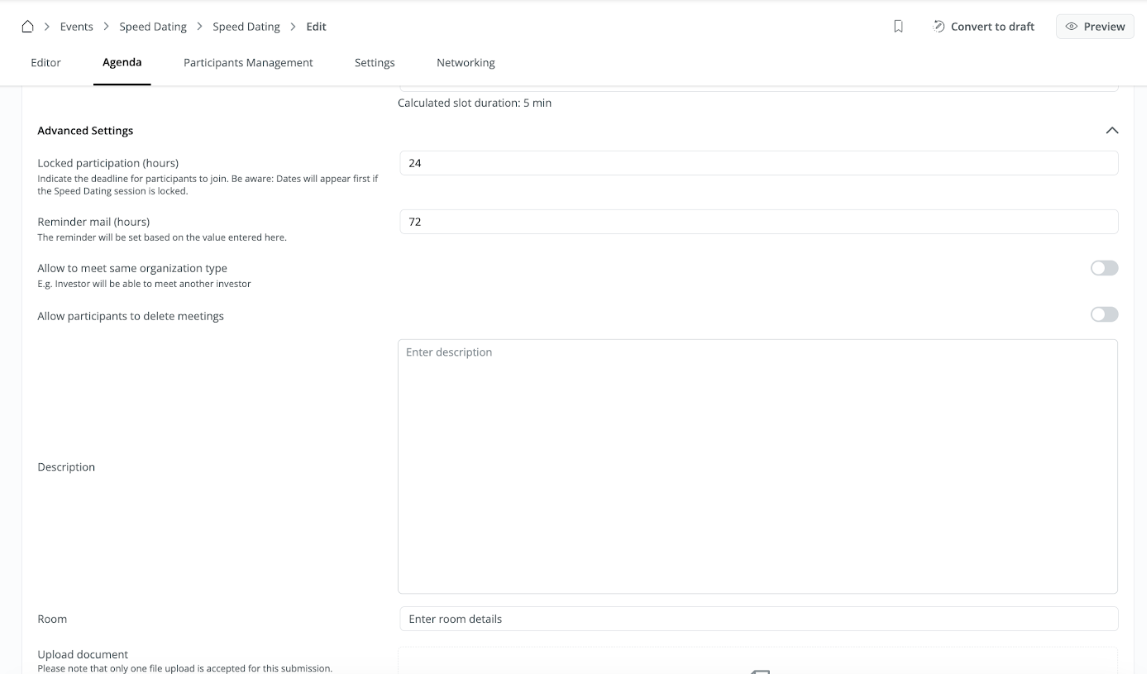
How to configure Locked Participation Hours
Admins can configure locked participation hours, specifying how many hours before the Event Speed Dating sessions will be locked and matches will be generated. Additionally, admins can set reminder email timings.
Go to the Agenda tab, navigate to Advanced Settings, choose Locked Participation Hours, and set the time. Additionally, set the time for the reminder email to be sent.
❓ FAQs (Participant)
General
Do I need to be registered to participate in an Event?
For internal events, participation requires Users to be registered and logged in to the platform. However, for external events, the participation requirements vary and are contingent upon the policies set by the external Event organizers.
Speed-dating & Networking
What information do I have to provide?
Please answer the questions you will find when clicking on “participate” to a speed dating, or after registering to the Event. This will be the basis of matching.
How can I cancel a speed date?
In your timetable, you will see a bin button. Press it to cancel the meeting. Attention: your counterpart needs to delete the meeting on their side as well before your slot frees up again.
❓ FAQs (Organizer)
General
How can I change the event mode of an Event?
If you wish to change the mode of your Event, such as switching from an Internal to a Virtual format, you will need to create a new Event with the desired mode.
How can I assign an Event to a group?
An Event can only be assigned to a group during Event creation.
Can I change the contact person of an Event or add further Event organizers?
How do I change the Event location for an offline Event?
Go to your Event settings and change the address for your Event.
Can I invite external speakers to my Events?
All speakers you want to mention in the Event need to be registered on the platform. Alternatively, you can mention external speakers in a text field within the Event or agenda point description.
What is the ideal aspect ratio for the header graphic?
The ideal aspect ratio for the header graphic is 5:2. For the resolution, we recommend at least 1130x450.
Can users who have not registered to the platform join Events?
Yes, this is possible for Events with Whereby. The stream link can be shared with non-registered users.
What size is optimal for images?
Use a 3:2 ratio, eg, 1500x1000
Can Platform admins decide whether the organizer, speaker, and countdown are shown or not on the events page?
Head over to Admin → Events → Choose your Event → Settings → Layout → Details on Event page.
Can Admins have the option of having a secondary button to link an Event registration form or a CTA for ticket requests?
Head over to Admin → Events → Choose your Event → Settings → Registration
You will find an option where you can toggle this secondary button to be shown to non-event participants if you like.
Is it necessary for a user to be linked with a company before being added as a speaker for an Event or agenda?
Yes, a user must be associated with an organization before they can be added as a speaker for an Event or on the agenda. They can do this by affiliating themselves with their organization during registration or later through their profile settings.
How can I make Events visible for non-registered users and enable registration?
To allow non-registered users to view an event and sign up, use the secondary button feature:
Can a live Event stream be recorded?
You can record a live Event for future viewing by using YouTube; follow these steps:
Note: If automatic archiving wasn’t enabled before the live stream, it won’t be saved, and you won’t be able to retrieve it later.
Sessions
Which video conferencing tools can be used in embedded mode?
Currently Whereby, Zoom, and Jitsi are supported.
Can I use Microsoft Teams for my Events?
Yes, but Microsoft Teams can not be used as an embedded session. If you want to use Microsoft Teams, please create an external web session.
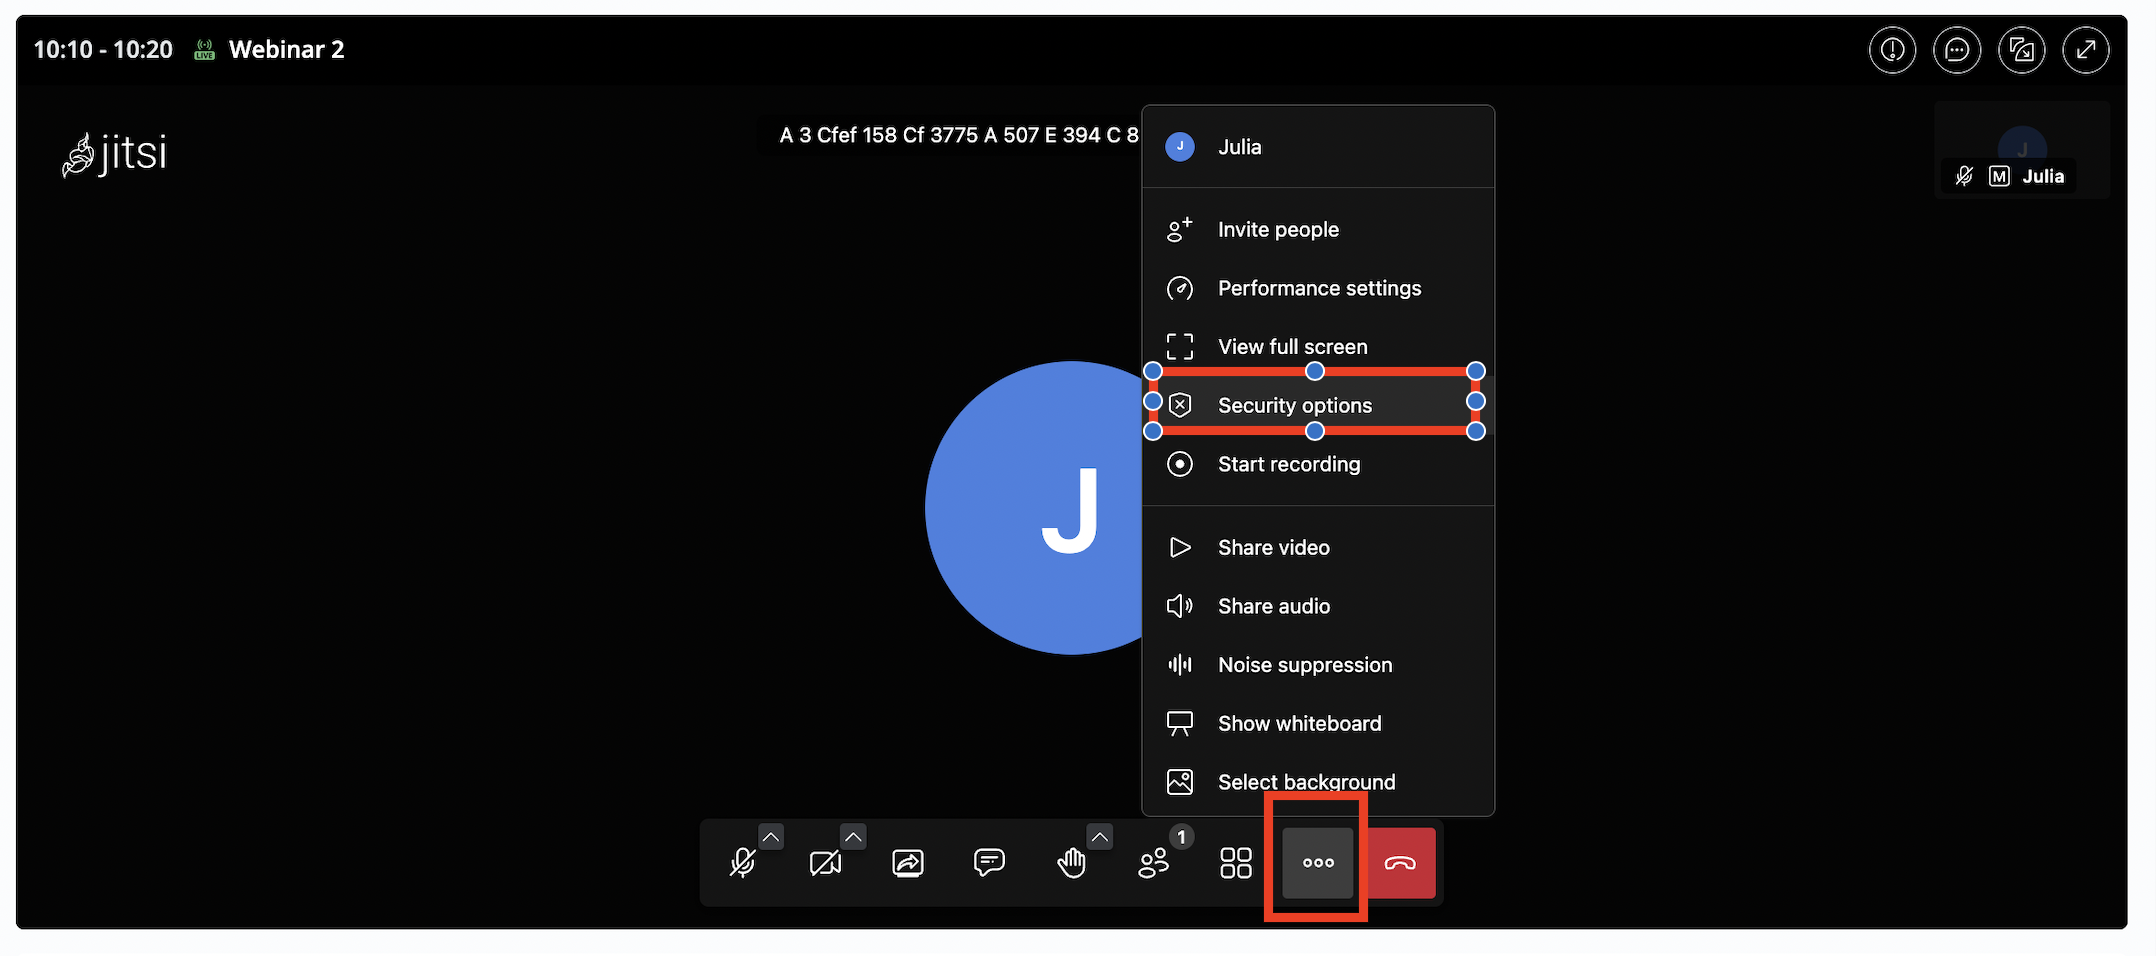
How can I turn on a waiting room in Jitsi?
Click on the three dots on the bottom bar, and then on security options. Here you can enable the lobby.
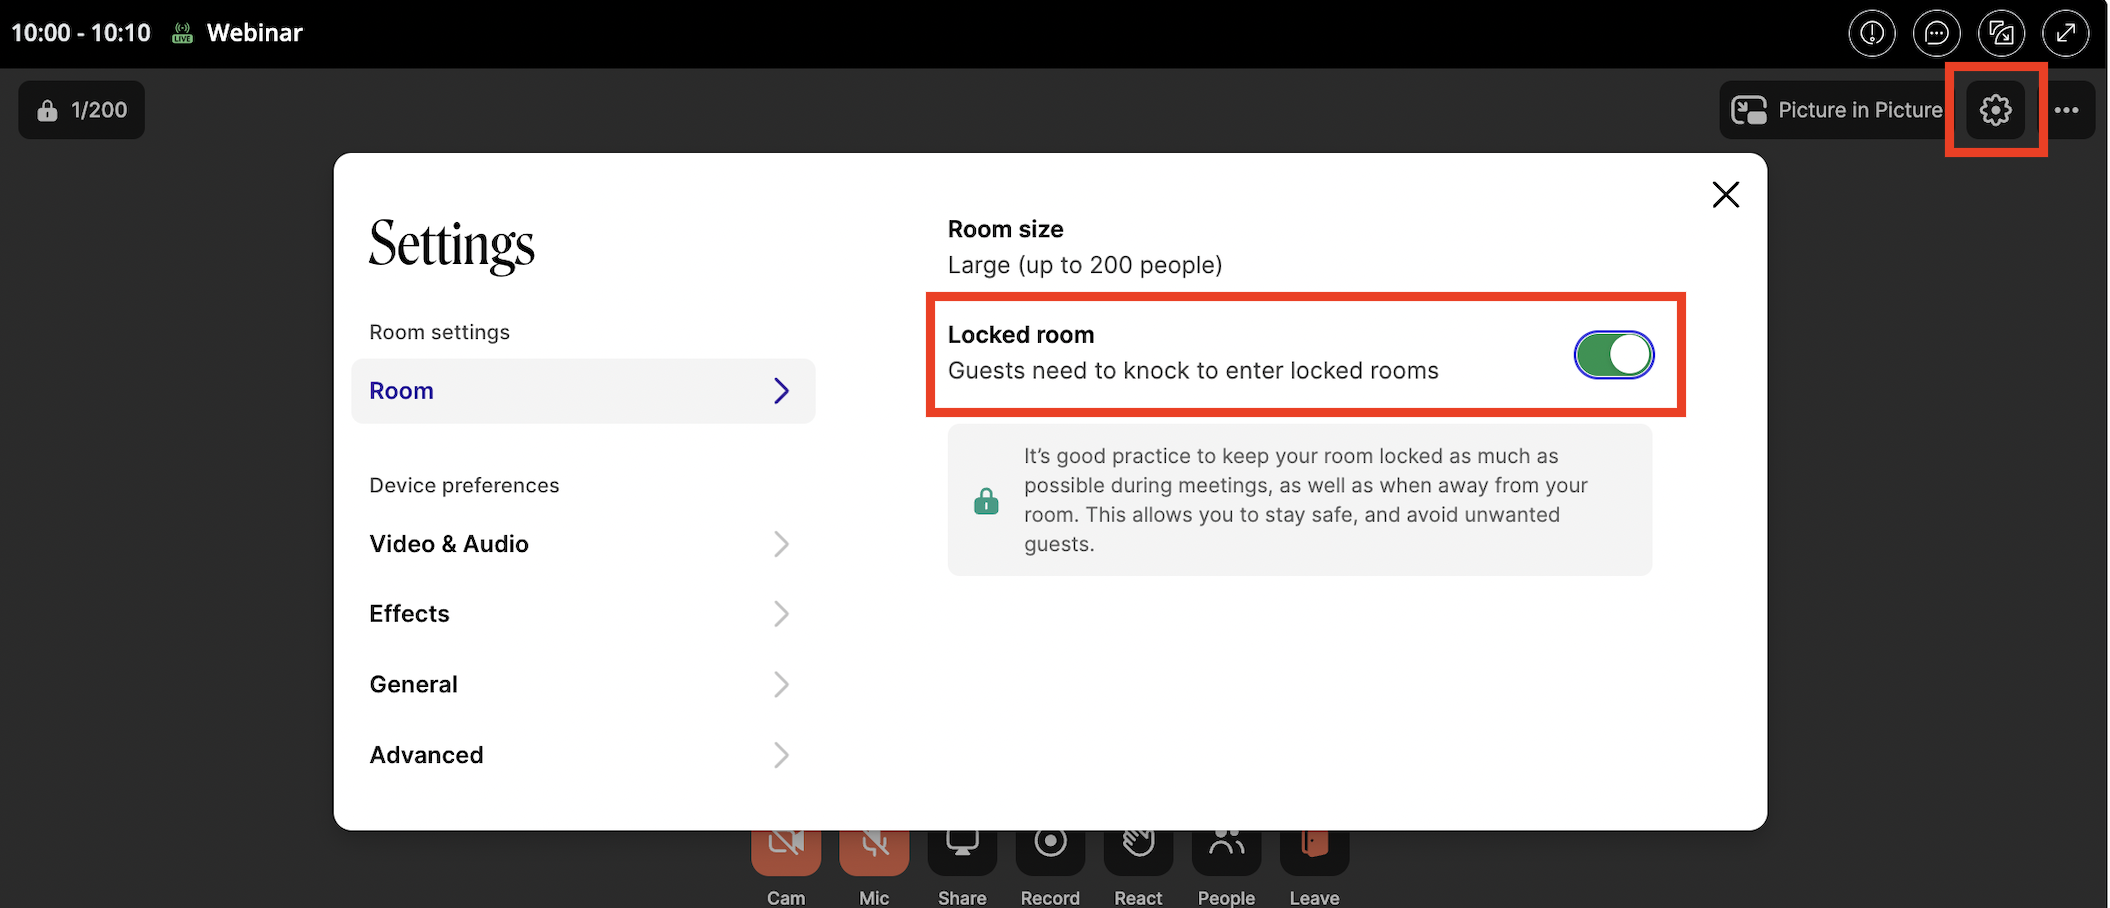
How can I turn on a waiting room in Whereby?
Click on the settings icon on the upper right corner -> rooms and switch on “locked room”.
Speed-dating & Networking
How does the registration for speed-dating work?
Participants need to answer the question catalogue set up by the Event organizer. Then they are automatically matched.
How can I change the time of a speed-dating/networking session?
Currently, changing the time of a speed-dating or networking session is not possible. In such cases, you'll need to delete the session and create a new one with the desired time.
Can I adjust the number of available tables?
Yes, you can adjust the number of available tables by accessing the edit option of the session through the agenda management.
How long should a speed-dating session last?
This depends on the lenght of one slot, how many slots you want to offer and how many participants you have. 30 minutes is a good start.
How long should a single speed date (time slot) last?
A minimum of 10 minutes is recommended.
What should be considered when organising an on-site Event?
How does the assignment of appointments work?
Participants can ask other participants for a 1:1 appointment if the networking is activated by the Event organizer.
Is an additional video conferencing tool needed for digital speed dating?
No, the platform automatically creates a video conference for each meeting based on Jitsi.
Is the organizer also matched?
The organizer is matched if they answer the questions.
What can I do if a person's matching date does not come?
Unfortunately, this is not within the control of the organizers. If needed, organizers can spontaneously bring together other available participants. For this purpose, it's advisable not to assign numbers to 1-2 tables and to designate them as a "free matching" area.
Can I move or adjust the time of a speed-dating session?
No, unfortunately, this is not possible due to technical constraints. In such cases, the speed-dating session needs to be deleted and recreated.
Where do Events go after they cross the Event date?
The system automatically moves Events to the 'Past Events' section after their date and time have passed. To view all past Events, click on the date filter and select “All Past Events”.
Invitation management
How can I add a long list of e-mails without copy-paste them one by one?
What happens when the max. number of participants for the Event has been reached?
Registrations are no longer available at this time. However, if you'd like to set up a waiting list, you can use the secondary button as an alternative. Simply link a form to this button where users can sign up.
How can I send an email to all the participants?
❓ FAQs (Admin)
I only have offline Events, can I still use the module?
Yes, the Event module caters to both online and offline Events. When creating your Event, you can set it up as you normally would and include details for offline sessions. These sessions can be configured to accommodate in-person interactions, such as workshops, seminars, or networking gatherings.
We are already using our own Event service, can we somehow integrate that?
Yes, to integrate event providers like Eventbrite, you can create external Events within your platform. Simply select the "External Event" option during Event creation and then paste the link of your Eventbrite Event. This allows your platform users to access and register for external Events seamlessly through your platform.
What happens when an organizer is deleted?
If there are multiple organizers for an Event and one organizer is removed, they will simply be removed from the Event. However, if the organizer being removed is the only organizer of the Event, the Event will be completely deleted and cannot be restored.