🔎 SEO
💡 Introduction
In this article, we explain how to make your application and it’s content visible to search engines, especially Google, for driving organic traffic.
👩🏻💻 How to Make Your Application Visible to Google
Google Search Console is a free tool that helps you monitor and maintain your site's presence in Google Search results. In the following steps, we explain how to use it to make your application and it’s content visible to Google.
1. Register to Google Search Console
Register for free to the Google Search Console or log in with your existing Google account.
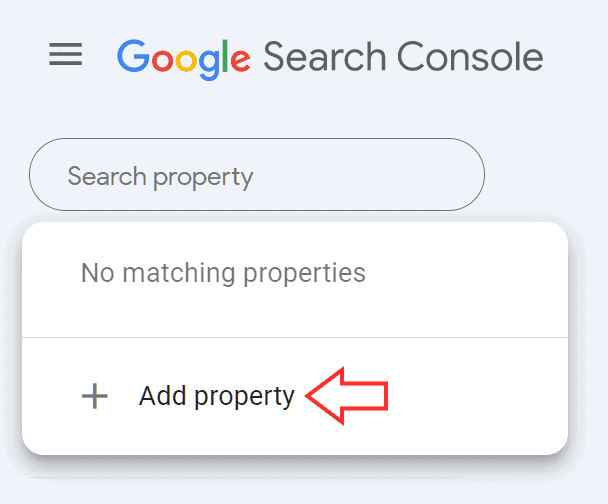
2. Add Your Domain to Google Search Console
To add your domain to Google Search Console and verify ownership, follow these steps:
1. Access Google Search Console
Navigate to Google Search Console and sign in with your Google account.
2. Add your domain
• Click "Add Property" in the property selector dropdown
• Choose "Domain" as the property type (recommended over URL-prefix)
• Enter your domain name without www or http(s):// (example: domain.com)
3. DNS verification
• Google will provide you with a TXT record
• Copy the TXT record value (it will look like "google-site-verification=...")
4. Add DNS record
• Log into your domain registrar's DNS settings
• Add a new TXT record:
5. Complete verification
3. Add Your Sitemaps
A sitemap is an XML file that lists all important pages of your website to help search engines crawl your site more efficiently. Here's how to add your sitemap to Google Search Console:
1. Locate your sitemap
Currently, we provide sitemaps for Pages. We have planned the implementation for Custom Modules and Events. For modules with a limited number of entries, you can add the URLs manually (see the following entry “Alternative to Sitemaps: Adding Web Pages Manually”). You can identify the URL based on the following structure: Pages
2. Submit the sitemap to Google Search Console
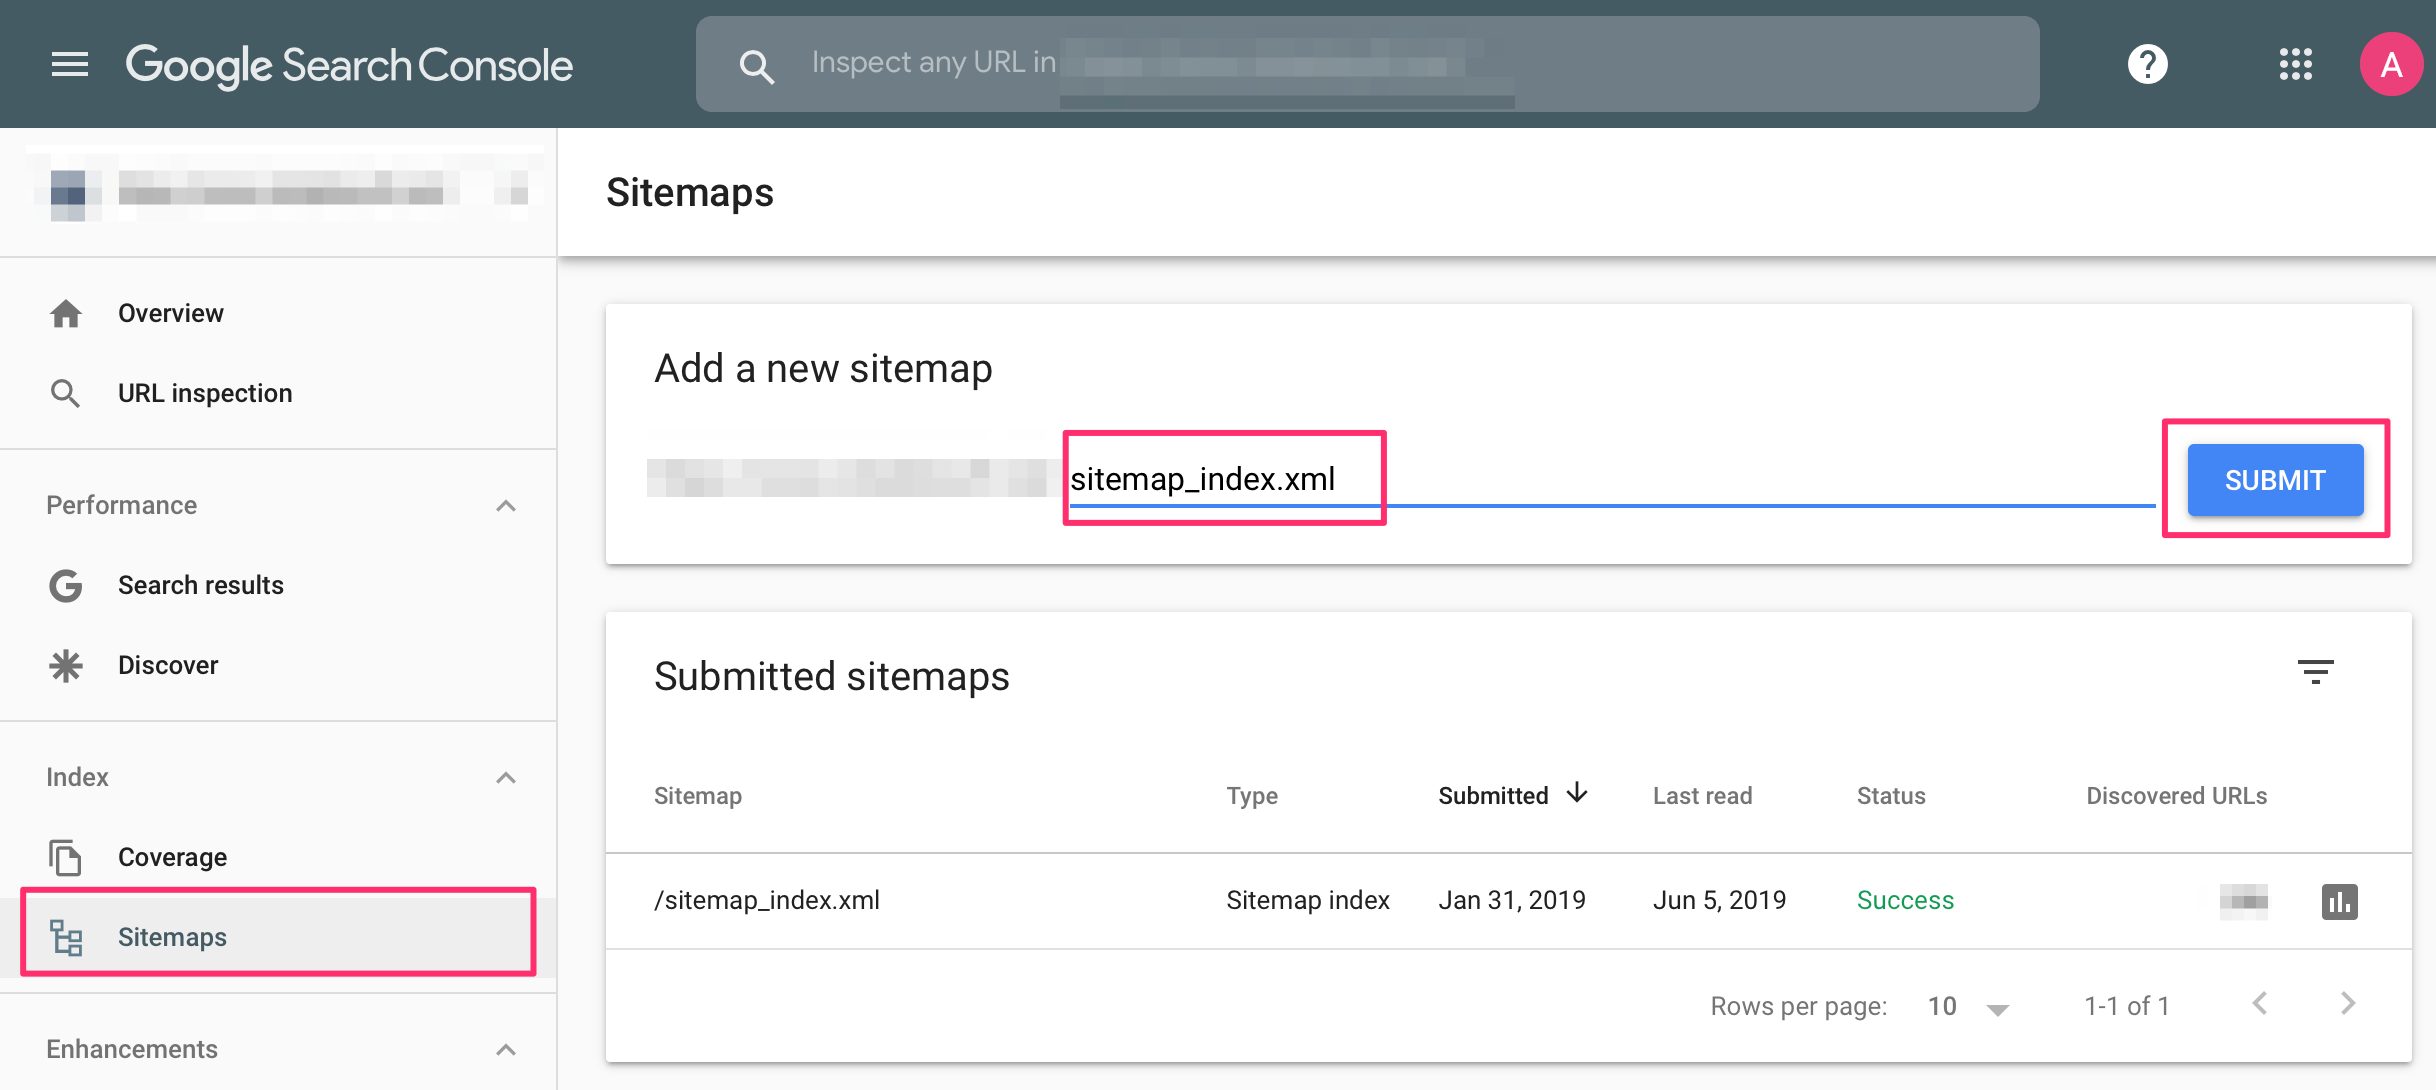
3. Monitor sitemap status
After submission, Google Search Console will process your sitemap and show:
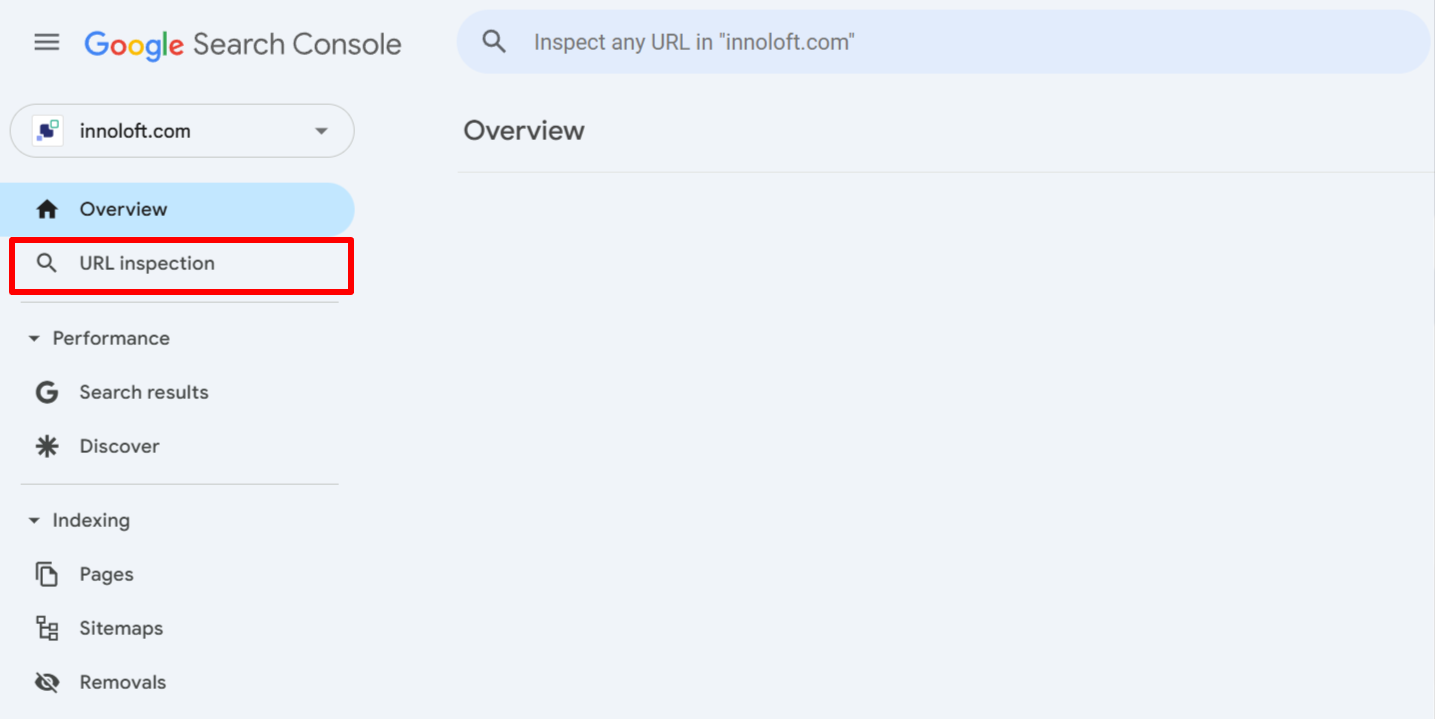
Alternative to Sitemaps: Adding Web Pages Manually
If a sitemap is currently not available or you want to make a single web page visible, please follow these steps:
1. Access URL inspection tool
In Google Search Console, select "URL Inspection" from the left sidebar menu.
2. Enter the URL
Enter the complete URL of the page you want to add in the search bar at the top.
3. Request indexing
4. Check indexing status
You can monitor the status of your submitted URLs in the URL Inspection tool: