🗓️ Calendar
💡 Introduction
Users have the possibility to invite others for appointments directly through the platform. These invitations are dispatched via e-mail notifications. Once received, users can manage their appointments seamlessly within their calendar interface.
👩🏻💻 Usage
View Calendar
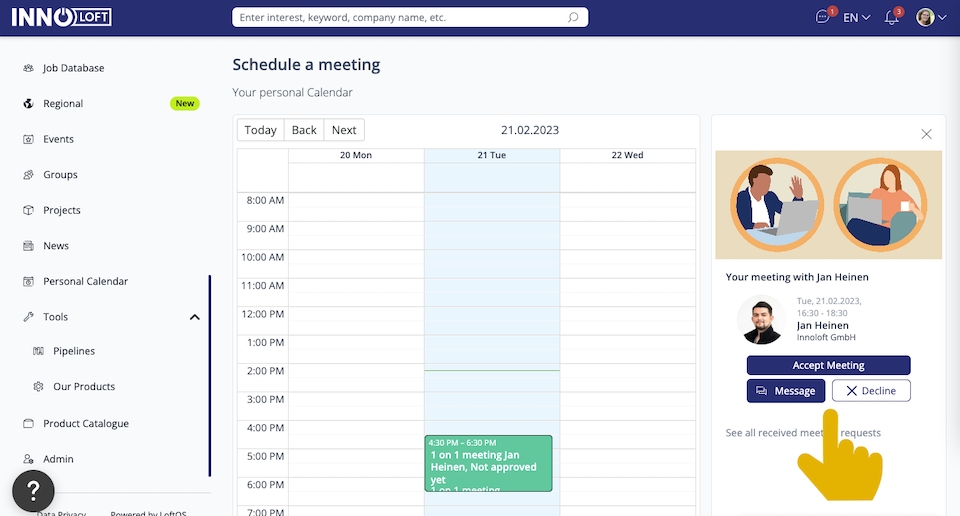
To access your Calendar, navigate to the left-hand side navigation panel and click “My Calendar”. Here, you'll find a comprehensive list of past and upcoming meetings.
In case your platform doesn't feature a dedicated "Calendar" menu option, you can easily access it by adjusting the URL in your browser, for example:
Choose between the Calendar view or List view:
At the top right-hand corner, you'll find “Show Meeting requests”, where you can choose to “Accept” or “Decline” invitations.
When you receive an invitation, click on the session in your Calendar to open a new window. From there, you can directly communicate with the user and customize your meeting settings.
Exporting your Calendar
On your platform's Calendar, you'll notice an "Export" option at the top right-hand corner. Click to download and export your Calendar in an ICS (iCalendar) standard format. It’s widely supported by various calendar applications, including Google Calendar, Apple Calendar, Microsoft Outlook, and others.
ICS files can be used to share and synchronize calendar data. When you download the ICS file, you can import it into your calendar app to add the event to your personal schedule. ICS calendars allow users to send event invitations, schedule meetings, and provide updates to attendees.
